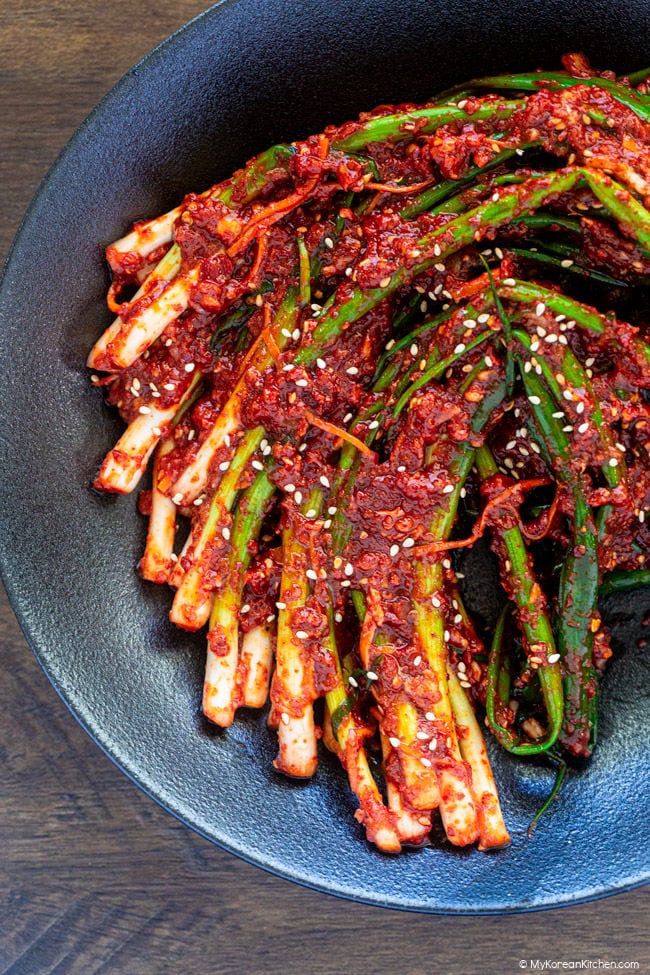
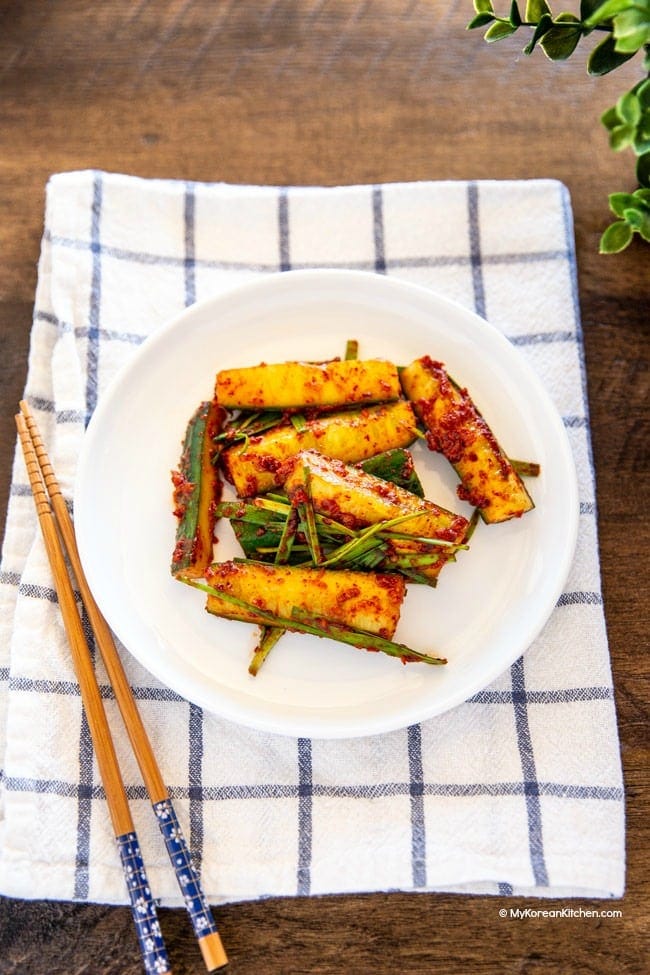
Pa Kimchi (Green Onion Kimchi) – Easy Korean Scallion Kimchi Recipe
Pa kimchi is one of the boldest and most flavorful kimchi varieties, with tender green onions coated in a rich red seasoning that’s spicy, savory, slightly sweet, and deeply umami-rich. Influenced by the boldly seasoned Jeolla-style kimchi my mom and I enjoyed during our years living there, this version is especially delicious with Korean …
Recent
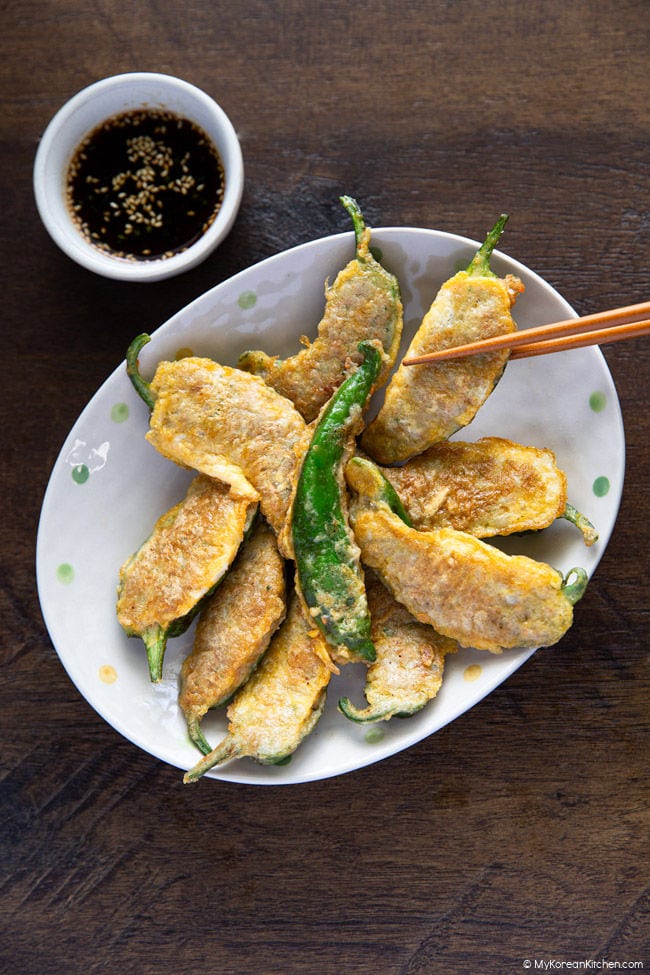
Korean Stuffed Chili Peppers (Gochujeon)
These Korean stuffed chili peppers are lightly pan-fried until golden and tender, with a juicy meat filling tucked inside. They’re delicious on their own, but even better when dipped in …
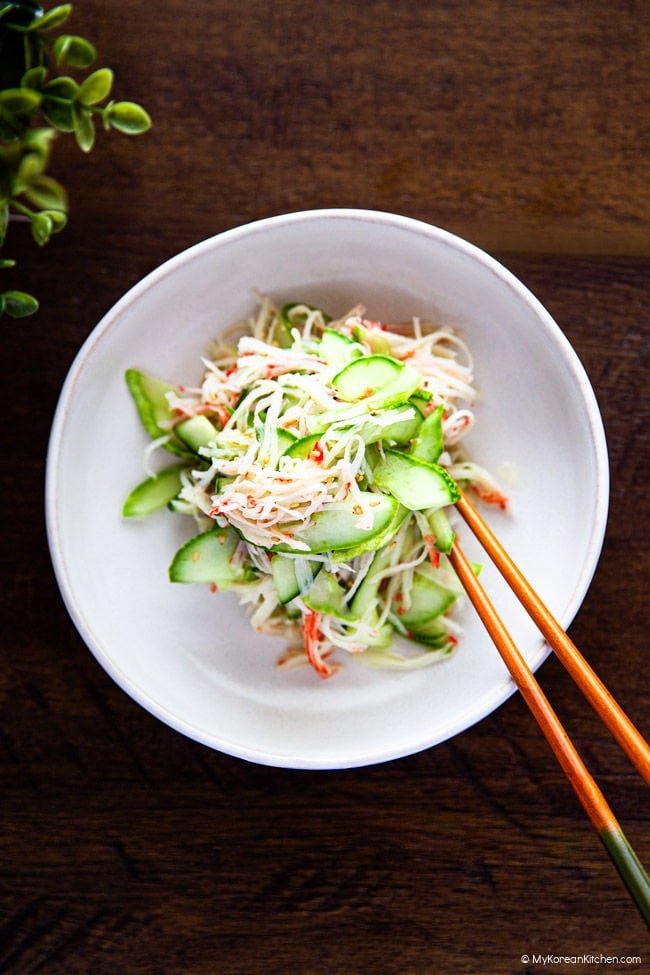
Korean Cucumber Crab Salad (Light and Refreshing)
This Korean cucumber crab salad is light, crisp, and wonderfully refreshing, with tender crab and crunchy cucumbers tossed in a simple, flavorful dressing. It comes together quickly and is perfect …
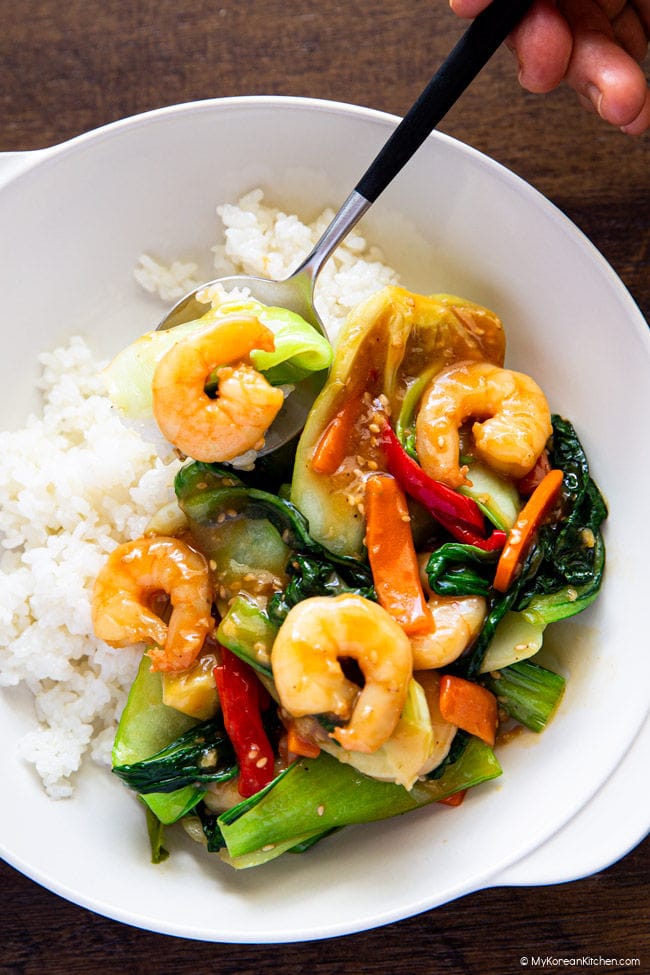
Quick Bok Choy and Shrimp Stir Fry (Easy 15 Minute Recipe)
If you’re after a quick, no-fuss dinner that still feels satisfying, this bok choy and shrimp stir fry is a great one to keep on repeat. It comes together in …
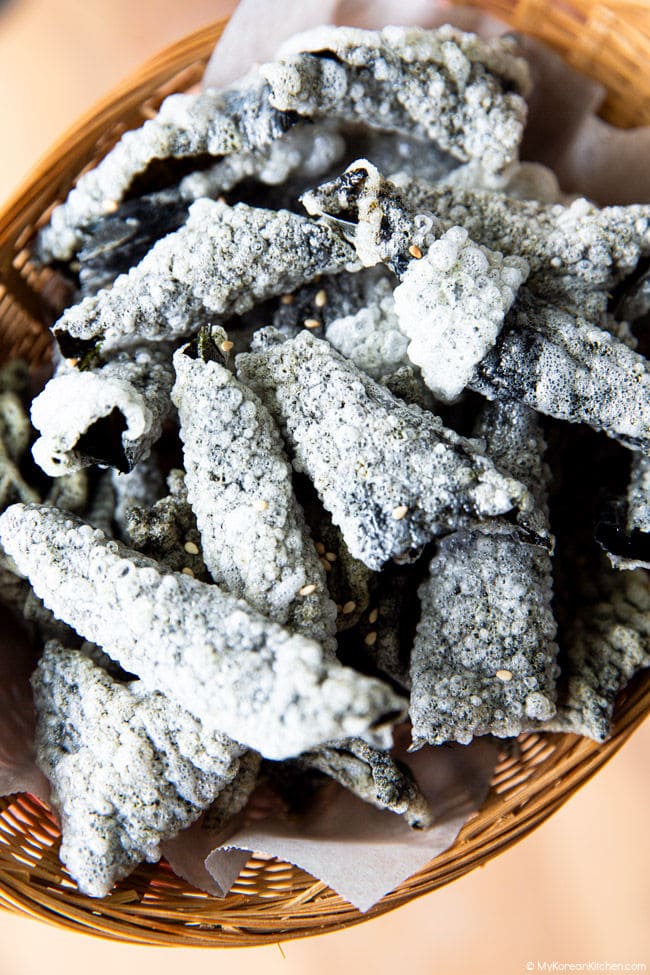
Korean Seaweed Chips (Gim Bugak) – Light, Crispy and Irresistible
If you love crispy snacks with a little something special, you are going to adore these Korean seaweed chips. Light, shatteringly crisp, and delicately savory, they take simple seaweed and …
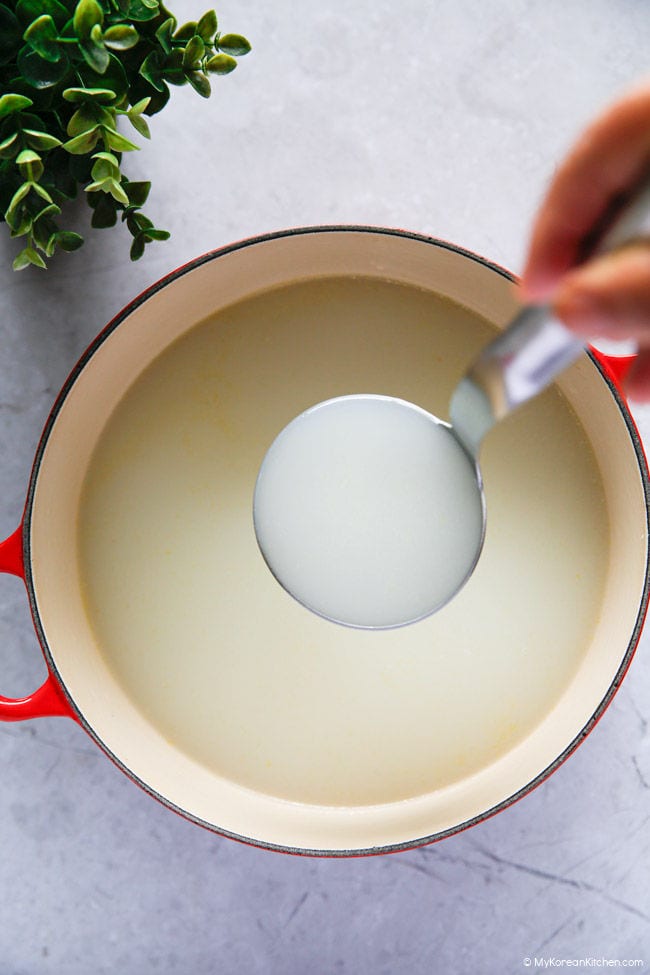
Korean Beef Bone Broth Recipe – Rich, Milky Sagol Yuksu
If you have ever wondered how Korean restaurants create that beautifully rich, milky white broth for their soups, this is it. This is Sagol Yuksu (사골 육수), the classic Korean …
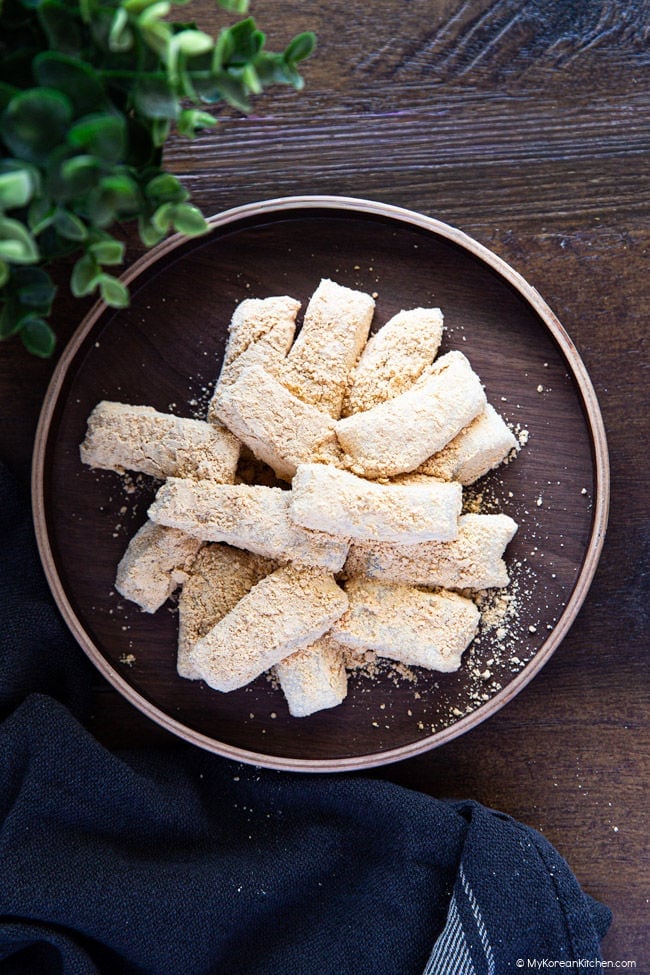
Injeolmi Recipe (Korean Rice Cake with Soybean Powder)
Injeolmi is one of those Korean treats that quietly grows on you, soft and coated in nutty soybean powder that feels more comforting than sweet. It is a rice cake …
")