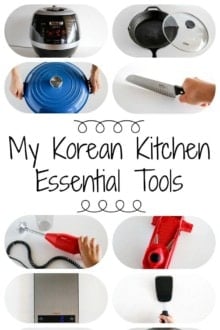
Archive for the 'Product Reviews' Category

Print This Post Print This Post

Sweet Pancakes (Hoddeok) - Pre Mix Version

Sweet Pancake Mix (Hoddeok) on the magazine

Have you seen these pancakes before? They are called Hoddeok, and you can easily spot them on the street, especially in winter in Korea. Hoddeok used to be my favourite street snack when I was a child, yeah I was that spoiled kid who cried for sweet snacks and embarrassed my mom. :)

The other day, my self proclaimed elves (my sisters) found a Hoddeok recipe and they were busy making them. They somehow miscalculated the amount of the ingredients, so it wasn’t quite as good as it could be, but it was still good for their first try.

So I thought I should compare our Hoddeok with something more professional before I present it to you, and since I haven’t found any Hoddeok carts on the street (I said this is quite a small city on other posts), I decided to compare with one from the factory.

This is the premix packet for Hoddeok and what is inside.

Sweet Pancake Mix (Hoddeok) package Sweet Pancake Mix (Hoddeok) package inside

  • Product name - Q1 stuffed pancake mix
  • Made by - Samyang
  • Purchase price - 2500 won (US $2.60) from Homeplus
  • Weight - 550g (supposedly able to make 10 pancakes)
  • Contents - Premix 396g (left), filling jam mix 150g (right), Dry yeast 4g (centre)

There are instructions on the side of the box in Korean and here are the steps from the box with additional opinions of mine. The extra ingredients you will need are: water 260ml and some vegetable oil.

Step 1. Sieve the premix (the yellowish packet), then add the dry yeast (silver packet) and water, knead it with a wooden spatula.

Sweet Pancake Mix (Hoddeok) prep1

Step 2. Cover the bowl with wrap, and ferment it for 2 hours at room temperature (20-25 ℃) The volume of the dough needs to increase by 2 times.

Sweet Pancake Mix (Hoddeok) step2

Step 3. When the dough is ready, put some oil on your hands (anti stick purpose) and separate an adequate amount of the dough(to allow ten to be made), then put it on your hand.

Sweet Pancake Mix (Hoddeok) step3

Step 4. Widen the dough with your hands and put a spoonful of jam mix (the green packet). Seal the dough. Repeat it for the rest of the dough. (You need to spread the dough more than in the picture. Otherwise it is hard to seal properly.)

Sweet Pancake Mix (Hoddeok) prep2

Step 5. Pre heat the frying pan for 20 seconds and add some oil.

Step 6. Put 2-3 sealed dough balls onto the pan and turn them over when the bottom part is cooked. (Cook them on medium to low heat)

Sweet Pancake Mix (Hoddeok) cooking

Step 7. Press the dough with a spatula and when the both sides are golden brown you can serve them on the plate.

Sweet Pancake Mix (Hoddeok)served

Sweet Pancake Mix (Hoddeok) in half

Recommendation from the packet : It is best if you consume all the fermented dough (dough without the jam mix) when you make it. However if you can’t finish it all, keep it in the fridge (if you are going to consume it within 24 hours), otherwise keep it in the freezer, and defrost it well before you use it.

Review of the product (5 is the highest)

  • Price compared to fully homemade version : 2/5 (I think it is expensive to buy this premix packet since I saw how easy it is to make the dough ourselves with easily available ingredients.
  • Convenience : 5/5 (Since it is made for convenience, it is a well made product)
  • Taste and Flavour : 3.5/5 (It was delicious though was too sweet for me. It has a vanila flavour and slight sense of cinnamon.)
  • Side affect - I got three pimples possibly more on my right cheek after having 3 Hoddeok yesterday. I think it is nothing to do with the product, I just had too much of it maybe (As you can guess, it is very sugary and oily). Also, importantly, people who have a peanut allergy shouldn’t have it. It contains powdered peanuts, though it didn’t say how much it has.

By the way, you will see a fully homemade version recipe very soon.

Related Posts

Korean Sweet Pancakes (Hoddeok) - Fully Home Made Version

Spring Rolls in Laver (Gimmari in Korean)

Enoki mushrooms Pancakes (Paeng-ee Beosut Jeon in Korean)

Frozen Cheese Cakes

Technorati , , , , ,
Print This Post Print This Post

Instant Cold Noodles in Broth (Mul Naengmyun)

Review - Instant Cold Noodles in Water (Mul Naengmyun)2

When I bought a cold instant noodles pack, Michael said I was crazy. His point was, who would want to have freezing cold noodles in the middle of winter? I picked it up as a back up just in case I couldn’t find buckwheat noodles for New years eve, but since I had found buckwheat noodles I didn’t need to use this packet. However as the expiry date was getting closer, I had to use it up somehow. There, that’s my excuse for cooking these in Winter.

My defense theory (for cooking these in winter) was “the smell of garlic takes away the smell of onions.” Along the same theory, there is also a Korean saying “Rule the heat with the heat and rule the cold with the cold.” Michael insisted that it is a crazy idea. So I decided to eat these noodles when Michael wasn’t around. I had my sister over for a couple of weeks now, so I decided to have the noodles with them. It didn’t make me colder than I expected (I was having noodles on a really well heated floor, so called ondol)

Though, maybe Michael was right. I would have appreciated them more if it was a hot summer day.

This is a picture of the instant packet I used. (It does look really nice, doesn’t it? Although my meal doesn’t look nearly as good as this, but as least mine is very encouraging for you to give it a try ;))

Review - Instant Cold Noodles in Water (Mul Naengmyun)1

Made by CJ

Price : 3,720 won (US $ 3.90) at Homeplus

Inside of the packet (for 2 people) - It includes two packs of noodles, two packs of broth, and two packs of mustard sauce
Review - Instant Cold Noodles in Water (Mul Naengmyun)packet1 Review - Instant Cold Noodles in Water (Mul Naengmyun)packet2

Cooking for 2 people

Review - Instant Cold Noodles in Water (Mul Naengmyun)cooking
  1. Slightly freeze the broth in its packet. (It takes about 3-4 hours)
  2. Boil the noodles in boiling water (7 cups) for 1 minute.
  3. Drain the water and rinse the noodles in cold water a couple of times.
  4. Put the noodles in a bowl, add the broth. You can add boiled egg, cucumber, pickled radish, pear, steamed pork etc, as a topping if you want. I only had egg and cucumber available, so I just added those two.
  5. Enjoy! (You can add the mustard sauce if you want)

The noodles’ taste depends 90% on the broth, and the broth was nearly as good as some restaurants in Korea (Apparently not many restaurants make the broth themselves, they buy it from the food suppliers). In my opinion, as long as you can make some effort for the toppings (more than I did), it will taste as good as you can get them from a restaurant.

Total Points for winter : 3.1 (5 is the highest)

  • Taste - 4/5 (if I had more toppings, I would give 4.5/5)
  • Affordable price - 4.3/5 (compared to eating it at a restaurant where one dish is usually US $5.30)
  • Appropriateness for winter - 1/5 (Just writing about this post, makes me shiver. :))

Related Posts

Buckwheat Noodles (Memil Guksu in Korean)

Spicy Noodles with Green Bean Sprouts (Sukju Ramyun in Korean)

Instant Udong Noodles

Instant Korean Black Bean Paste Noodles (Jajangmyun in Korean)

Technorati , ,
Print This Post Print This Post

BBQ Grill Plate

My mom owned Korean restaurants for nearly 15 years, on and off.

She had plenty of chances to buy grill plates, and when she bought a grill pan for her restaurant, she considered these things.

  • Affordability - Not too expensive
  • Weight - Not too heavy plate. (easy to lift and wash)
  • Usability - easy to clean (its coating shouldn’t scratch off), well built oil draining system, fits on the portable burner, safety from the oil splashing.

This is a picture of the grill plate I used for my samgyeopsal party the other day.

BBQ Grill Plate1

(Front - if you see closely, there is a blocking bolt in the core. You need to unscrew it with your hands to drain the oil. The separate parts are for baking garlic and chilies etc though, they don’t cook well there, so it is pretty much for keeping them warm.)

BBQ Grill Plate2

(Back - Those four legs are to sit on the portable burner.)

BBQ Grill Plate3

(Side - Oil comes out through this chanel, so you need to put a bowl to catch the oil near the exit)

I did my best to get the best quality grill for its price at Homeplus. If I give it a point, 5 is the highest, I will give it, 4.3 out of 5.

Point details

  • Affordability: 4/5
  • Weight: 5/5
  • Total usability: 4/5
    1. Easy to clean - 3/5 (I think it will scratch off eventually)
    2. Well built oil draining system - 4/5 (It was slightly blocked inside until we cleaned it out)
    3. Fits to the portable burner - 5/5
    4. Safety from the oil splashing - 4/5

      Made by Kitchen art/ 14,900 won (US $15.70)

      I think if you don’t open the core bolt, you can cook other kinds of meat like Bulgogi (Marinated beef). I haven’t tried it yet though, if I do, I will let you know.

      Related Posts

      Pork Belly (Samgyeopsal in Korean) Party

      This is the “Rice Cooker”

      Technorati ,