
Super Easy Korean Mochi Recipe – Chapssaltteok (찹쌀떡)!
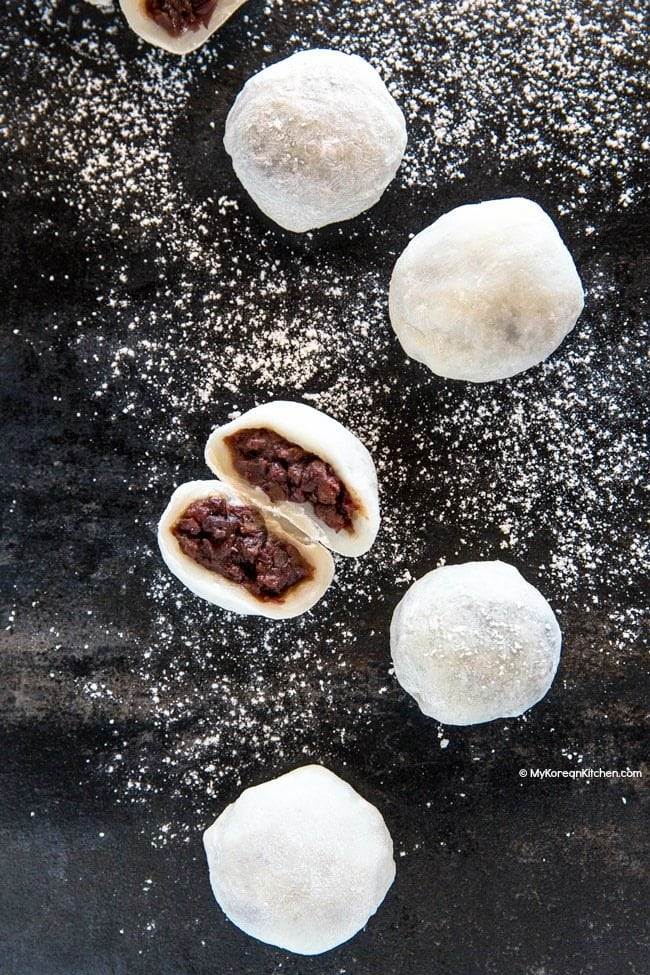
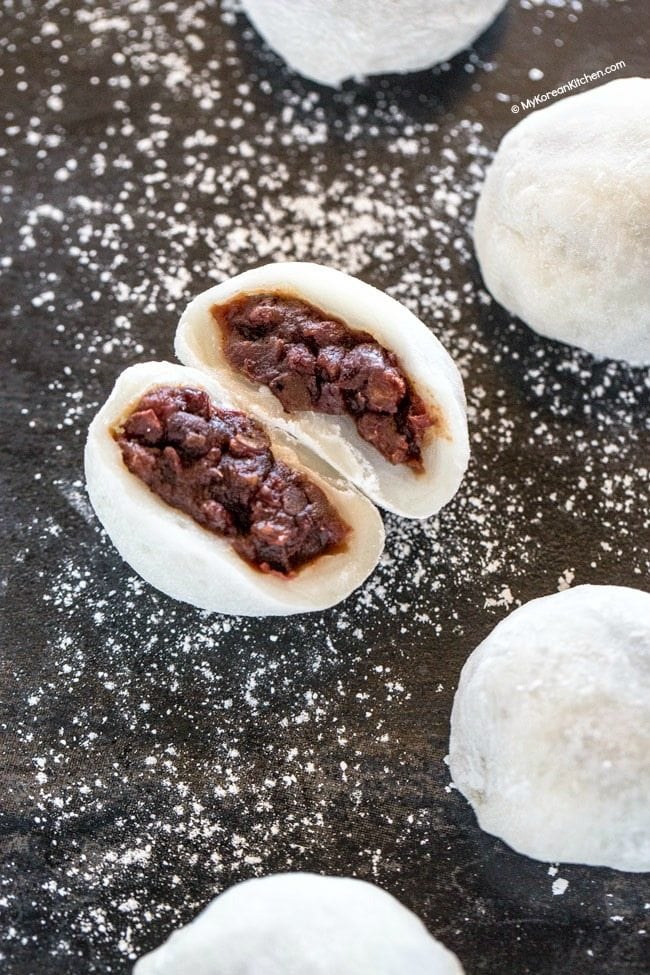
Chapssaltteok, also known as Korean mochi, is Korea’s delightful take on the Japanese daifuku rice cake. Soft, chewy, and filled with sweet red bean paste, this popular treat combines satisfying textures with a subtly sweet flavor.
While Chapssaltteok can be enjoyed all year round, it’s especially cherished in the colder months. It also holds a special cultural significance, often gifted during university entrance exam season as a symbol of good luck. The belief is that the sticky texture reflects the hope that knowledge “sticks” to the test-taker’s mind!
Made from glutinous rice, the dough achieves its unique springy texture, perfectly complementing the smooth and sweet filling inside. If you love red bean mochi, you’ll definitely want to try this Korean version. It’s a delightful bite of tradition and flavor wrapped into one!
Chapssaltteok Made Easy: A Simple Twist on a Classic Treat
As far as I know, chapssaltteok has its roots in Japan. If you’re wondering about the difference between chapssaltteok and daifuku mochi, I’d say it’s probably in the technique of preparing the ingredients. (Honestly, the Japanese version seems a bit more intricately prepared. Just my two cents. LOL.) But, when it comes to taste, I think they’re almost identical, if not the same.
Traditionally, mochi or glutinous rice cake is steamed over the stovetop until the rice flour turns translucent. Then, it’s pounded with a mortar and pestle to get that signature chewy, bouncy texture.
But, as a busy mom with zero time to spare, I turned to my trusty microwave to speed things up! Oh, and I also used store-bought red bean paste instead of making it from scratch. No shame in taking a few shortcuts, right?
Honestly, it couldn’t be easier to make. The whole process takes under 30 minutes! (By the way, I promise to share my homemade sweet red bean paste recipe soon. It’s hiding somewhere in my notes, but it needs a little fine-tuning first. Stay tuned for that!)
I really hope you give this a try and enjoy every bite!
P.S. If you’re a mochi fan, you might also want to check out my mochi donuts recipe. Just saying.
P.P.S. Heads up! This might be the first post where I’m skipping my usual step-by-step photos. Instead, I’ve put together a video tutorial for you at the end of the post. Don’t miss it if you’re a visual learner!
Simple Tips to Elevate Your Recipe
- For perfectly chewy and silky mochi or chapssaltteok, it’s crucial to give the dough a good massage (refer to step 2 in the recipe card below). This step is key, so don’t skip it or rush through it!
- Also, remember to wash your hands often as you go. Clean hands make it much easier to handle the dough, especially when dividing it or adding the filling. Sticky hands can quickly turn a fun process into a messy one, so keep them glue-free for a smoother experience!
How to Store and Enjoy Your Leftover Mochi
- For short-term storage, place any unused portions in the fridge for one to two days. If you’re planning to keep them longer, freezing is the way to go. Wrap each piece of mochi individually in cling wrap, then place them together in a ziplock bag before freezing. They’ll stay fresh for up to a month this way!
- When serving frozen mochi, simply defrost them at room temperature for about an hour. If your mochi feels dry or hardened after being in the fridge, pop it into the microwave for 10 to 15 seconds. It will turn soft and tender again, as if freshly made.
More Korean Snack Recipes to Enjoy and Love
- Hotteok (Korean Sweet Pancake)
- Bungeoppang (Red Bean Fish Pastry)
- Hodugwaja (Korean Walnut Cake)
- Jollypong Shake (Korean Cereal Milkshake)
How I Make It: Step-by-Step Recipe Video
Chapssaltteok (Red Bean Mochi)
Ingredients
- 3/4 cup sweet rice flour / mochiko / glutinous rice flour (100g / 3.5 ounces)
- 1/4 cup castor sugar (60g / 2.1 ounces)
- A pinch fine sea salt
- 1/2 cup water (120g / 4.2 ounces)
- 3/4 cup sweet red bean paste (180g / 6.3 ounces), shaped into 6 balls
- 3 Tbsp corn starch or potato starch (25g / 0.9 ounces)
Instructions
- - Combine the sweet rice flour, sugar and salt in a microwave safe mixing bowl. Whisk it well. Add the water and mix them well.- Cover the bowl with cling wrap leaving a little gap for steam to escape. Put the bowl into a microwave and heat it up for about 1 min (based on 1250W).- Take the bowl out and stir the mixture around with a wooden spoon or spatula.- Return the bowl, covered again, into the microwave and heat it up for a further 1 mins. (The cooking time can vary depending on your microwave. If the desired consistency is not yet achieved, cook it for a little bit longer.)- Remove the bowl from the microwave.
- With a wooden spoon/spatula, mix and massage around the rice cake mixture until it cools down enough to touch (about 5 mins).
- Lightly scatter the corn starch on the board. (This is for anti-sticking purpose.) Carefully remove the mochi mixture from the bowl and place it on the board. Knead it to one long dough while scattering the corn starch over it. Then, using a scraper, divide the dough into 6 pieces.
- Gently flatten and open up the dough on your palm (large enough to fit a ball of red bean paste) then place the red bean paste ball in the middle. Seal the rice cake by gathering the corners of the dough. Roll the mochi around on the corn starch and place it in a disposable baking cup facing the gathered point down. Repeat this step with the remaining ingredients.
- Serve at room temperature.
Notes
Nutrition Info (per serving)
The nutrition information shown is an estimate provided by an online nutrition calculator. It should not be considered a substitute for a professional nutritionist’s advice.
")
")
 - Classic Chuseok Recipe")