
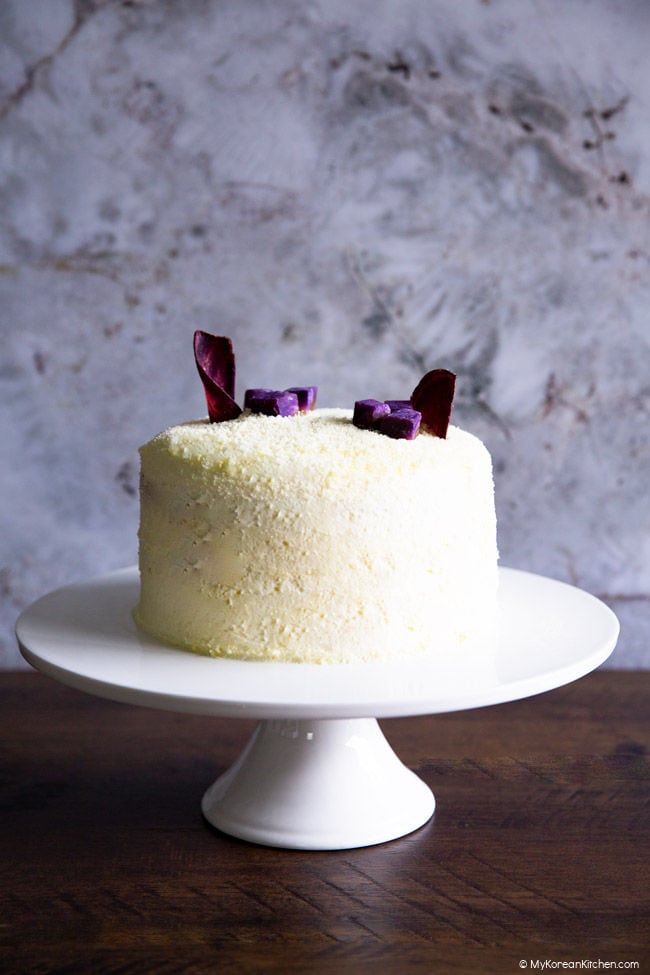
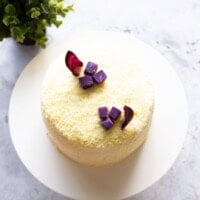
Korean sweet potato cake (Goguma Cake, 고구마 케익) is all about celebrating the natural sweetness and velvety texture of sweet potatoes in the most delightful and indulgent way.
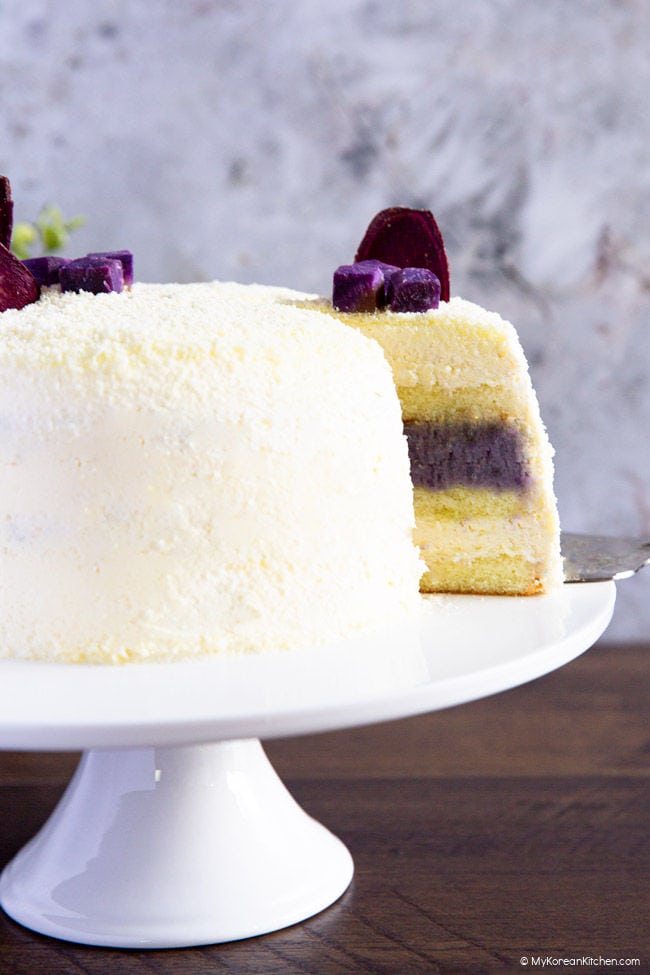
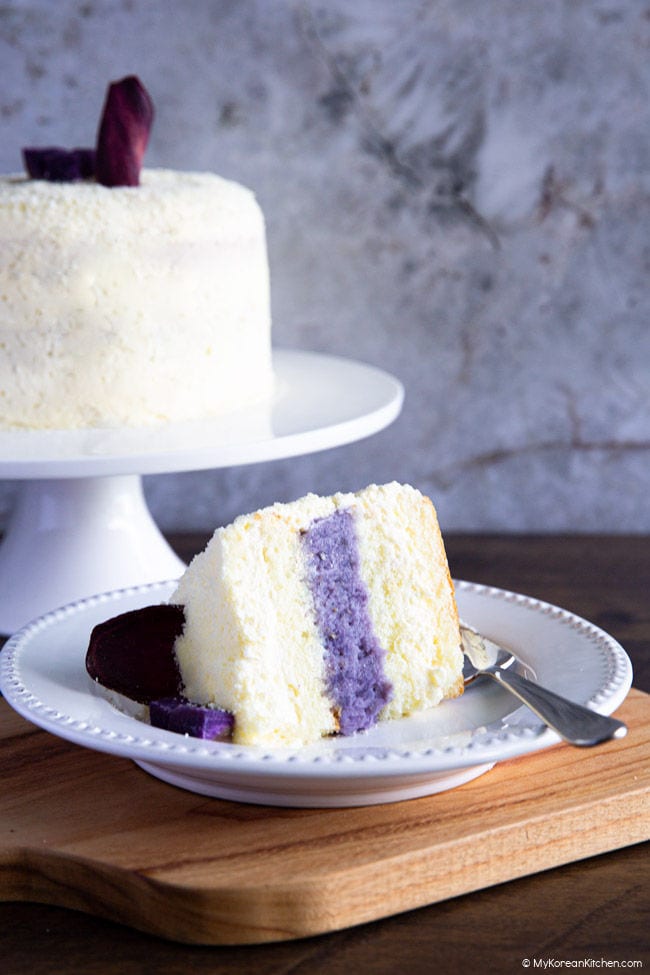
The soft, fluffy vanilla sponge melts in your mouth, while the silky sweet potato filling brings a comforting, earthy sweetness. Topped with a cloud of delicate whipped cream, it’s a perfect harmony of flavors and textures. And the vibrant purple tones make it almost too beautiful to eat. Whether dressed up for celebrations or enjoyed as a simple treat, this cake will leave a lasting impression!

Save This Recipe
Effortless Tips for Perfect Korean Sweet Potato Cake
Why Purple Sweet Potatoes Are a Game-Changer for This Cake
In this recipe, I used purple sweet potatoes, also known as Hawaiian or Okinawan sweet potatoes. Their natural nuttiness and sweetness really shine through, and the beautiful pastel purple flesh they bring to the cake makes it a treat for both the eyes and the taste buds.
That said, if you can’t find purple varieties, feel free to use whatever is available in your area (e.g., Beauregard sweet potatoes). However, I highly recommend using purple sweet potatoes for the best experience!
Sponge Cake Made Easy: Store-Bought, Genoise, or Mix
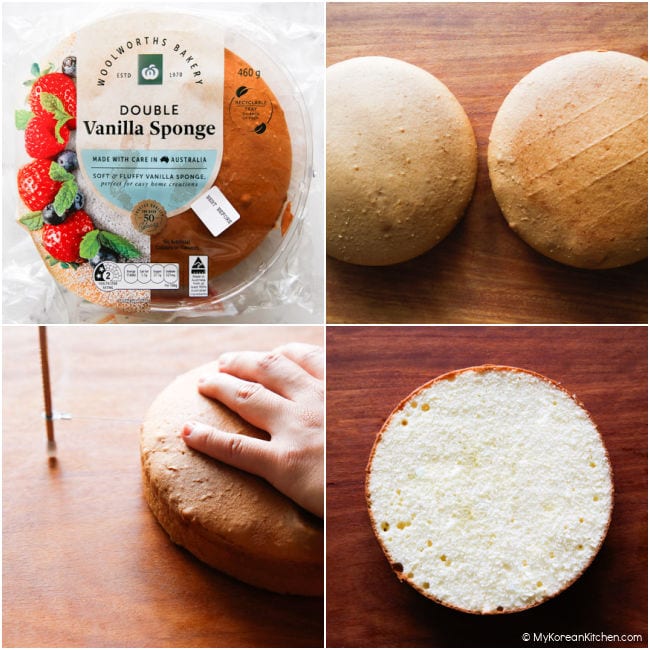
To save time, I used unfilled sponge cakes for this recipe, which I picked up from Woolworths—one of the major grocery stores in Australia. The pack comes with two unfilled sponge cakes for about AUD $6. You’ll just need a cake leveler to divide them into four even cake bases. Many Koreans use an unfilled Genoise base that has already been level-cut.
If you’d rather bake, you can always make the sponge base from scratch or use a pre-mix vanilla cake. Personally, I like the White Wings brand—it tastes better than some of the other options out there.
For baking, I recommend using tiered cake pans of the same size to keep things simple. I used the Mondo Ombre/Layer Cake Pan Set (5 pieces), which has an 18cm (7-inch) diameter and a 3cm (1-inch) height, and it worked perfectly. For reference, dividing one pre-mix cake mix evenly among three of these pans works really well.
Making Stabilized Whipped Cream
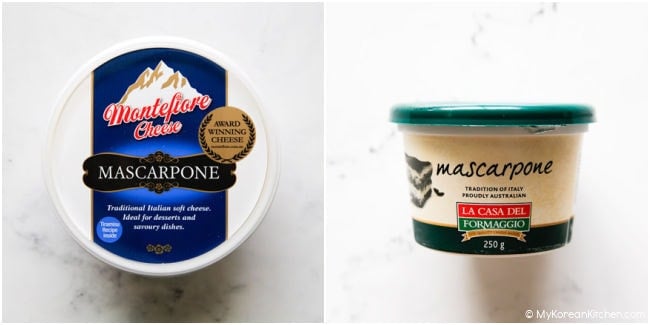
Typically, whipped cream for Korean sweet potato cake is made using heavy cream or thickened cream and icing sugar. I’m not sure how others manage to ice the cake perfectly with just these two ingredients, but after many failed attempts, I realized that stabilizing the whipped cream is essential for successful decorating. I decided to use mascarpone (a creamy Italian cheese), as it holds up much better than whipped cream on its own.
For the best results:
- Ensure both your mascarpone and thickened cream are cold—straight from the fridge. Cold ingredients whip up faster and create a stiffer, more stable cream.
- Chill your mixing bowl and whisk beforehand to maintain the cold temperature.
- Use a stand mixer or hand mixer on medium speed for smoother results and to save time. Stop whipping as soon as stiff peaks form to avoid over mixing.
- I’ve had success using La Casa Del Formaggio Mascarpone (250g) from Woolworths and Montefiore Mascarpone (250g) from Coles. In the U.S., a popular option is BelGioioso Mascarpone, which is available in 8-ounce packages.
Stabilized whipped cream is best used fresh, even though it’s stabilized. However, if needed, you can store it in an airtight container in the fridge for up to 24 hours. If it softens slightly, give it a gentle whisk before serving to restore its fluffy texture.
How to Store Your Cake
For optimal flavor, store the cake in a tall cake carrier or airtight container to maintain its shape, and allow it to chill in the fridge for a few hours before serving. For the freshest experience, try to finish it within three days.
Serving Suggestions
I love serving each slice, often paired with chamomile tea for an added touch of relaxation. Whether enjoyed as a light snack during afternoon tea or as an indulgent dessert, it’s always perfectly satisfying.
Ingredients
Main
- 450g / 16 ounces sweet potatoes (Hawaiian or Okinawan), peeled and sliced into 2.5 cm (1-inch) pieces
- 1 tall vanilla sponge cake (around 4.5cm or higher), 2 shorter vanilla sponge cakes (each about 3cm tall), or an equivalent amount of Genoise sponge
Sweet Potato Filling
- 1/3 cup milk, full cream
- 2 Tbsp white sugar (granulated)
- 1 Tbsp sweetened condensed milk
- 30g / 1 ounce unsalted butter
- 1/4 cup stabilized whipped cream (see below for how to make it)
Vanilla Cake Syrup
- 1/4 cup water
- 2 Tbsp white sugar (granulated)
- 1/2 tsp vanilla bean paste
Stabilized Whipped Cream
- 2 cup thickened cream
- 1 cup mascarpone (e.g., La Casa Del Formaggio Mascarpone 250g from Woolworths, Montefiore Mascarpone 250g from Coles, or BelGioioso Mascarpone 8 ounces in the US)
- 1/2 cup icing sugar (powdered sugar)
*1 Tbsp = 15 ml, 1 cup = 250ml
How To Make Korean Sweet Potato Cake
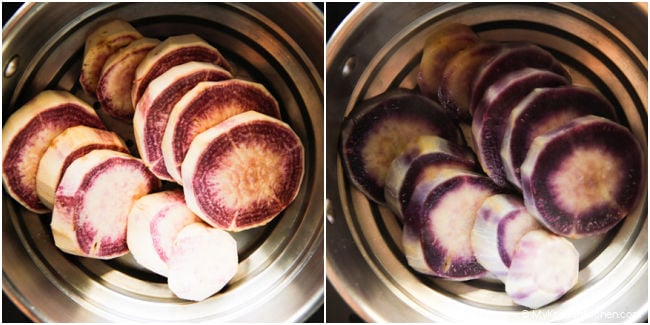
1. Steam the sweet potatoes over medium heat for 25-30 minutes, or until they are fully cooked. To check the doneness, gently poke them with a chopstick—they should be soft and easily pierced.
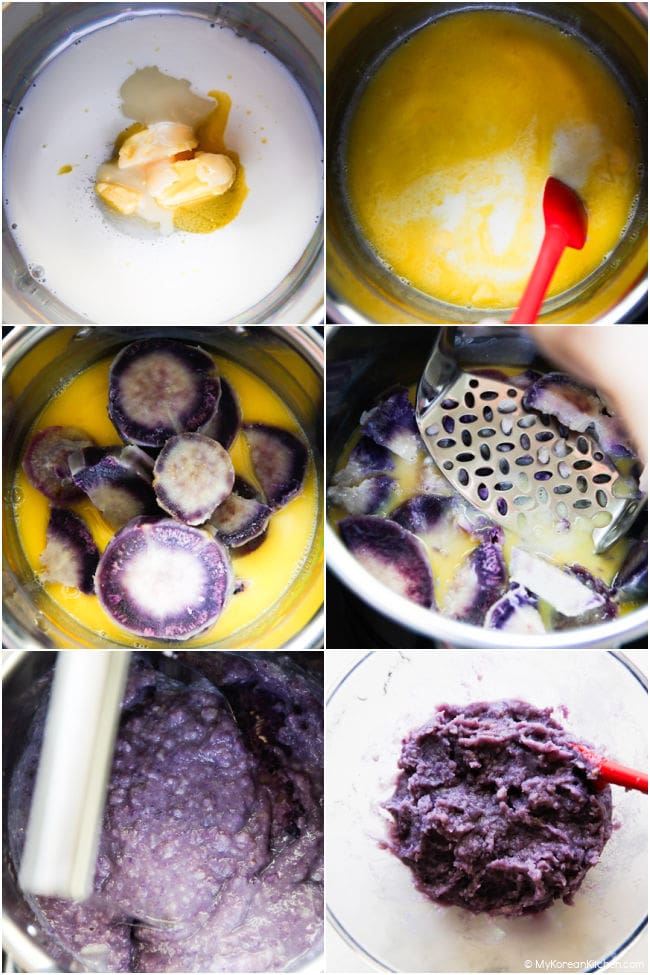
2. In a medium-sized pot, combine the milk, sugar, sweetened condensed milk, and unsalted butter. Cook over low heat, stirring frequently, until the sugar is completely dissolved. Add the steamed sweet potatoes to the pot and mash thoroughly using a potato masher until smooth. Transfer the mashed mixture to a bowl and let it cool completely.
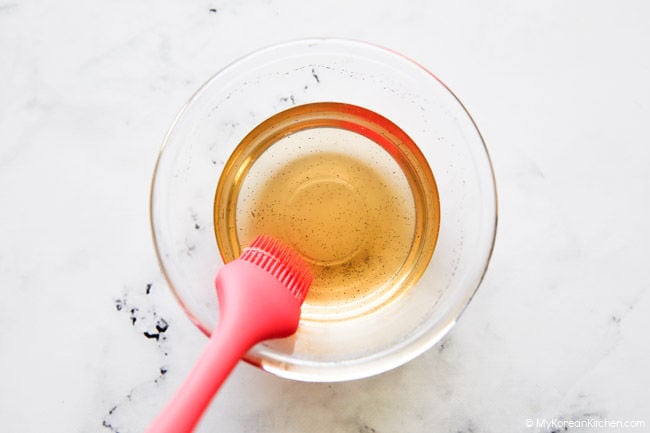
3. Prepare the vanilla cake syrup. Mix water, sugar, and vanilla bean paste in a small bowl. Microwave the mixture for 30 seconds and stir until the sugar dissolves completely. Set aside.
4. Prepare cake base layers. To create three 1.5cm cake base layers, start by assessing your cake:
- For a single tall cake (around 4.5cm or higher): Slice it horizontally into three equal layers, each approximately 1.5cm thick.
- For two shorter cakes (each about 3cm tall): Slice both cakes horizontally in half. This will give you four layers in total. Choose the three most even layers to assemble your cake base.
Set the extra layer aside— it’s optional but can be grated for decoration later.
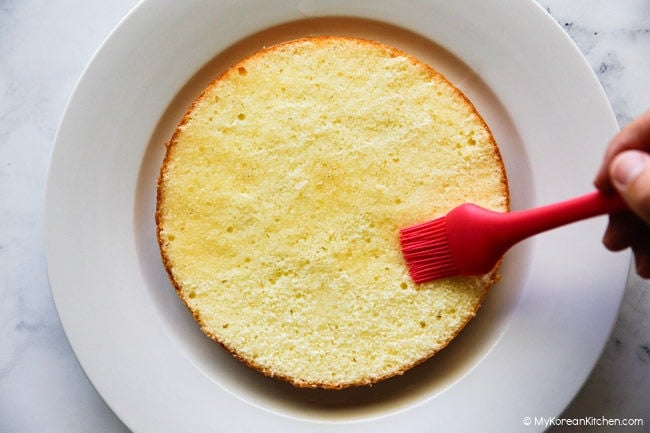
5. Generously brush each cake layer with vanilla syrup to enhance the flavor and keep the sponge moist. You can do this during step 9 if it suits your workflow, but I prefer doing it now to avoid forgetting later.
6. This step is completely optional, but if you’d like to use cake crumbs for decoration, grab any leftover cake layers or sponge scraps and trim away the brown edges for a consistent, even-colored crumb. Once trimmed, grate the sponge and then pass it through a sieve to create fine, fluffy pieces. These delicate crumbs make a beautiful decorative topping, adding a soft and polished touch to your cake.

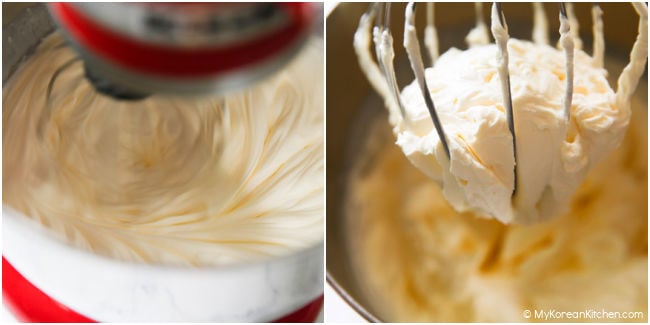
7. Start by combining thickened cream, icing sugar, and mascarpone in a chilled mixing bowl. Whip the mixture until stiff peaks form. For best results, keep the whipped cream extra cold by placing the mixing bowl inside a larger bowl filled with ice while proceeding with the next steps.
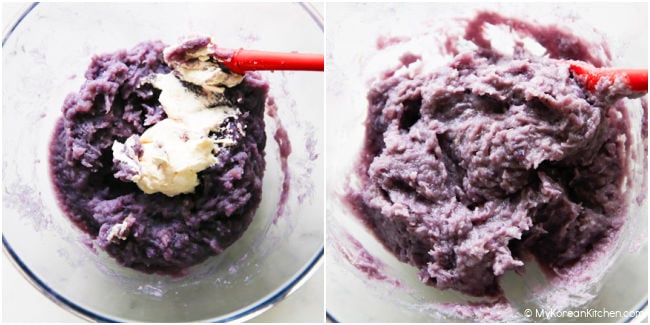
8. Gently fold 1/4 cup of whipped cream into the sweet potato mixture (from step 2) until smooth and creamy. Continue mixing until fully combined and velvety.
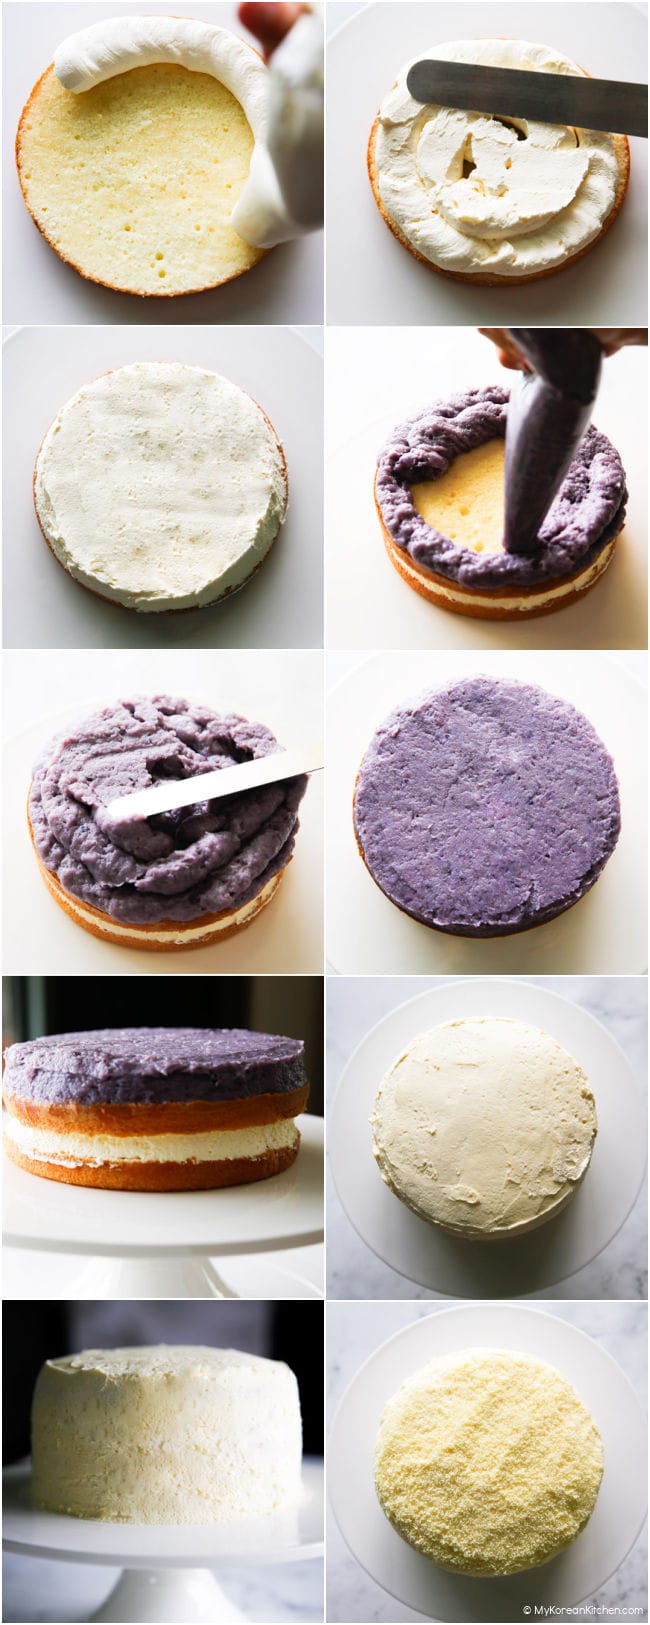
 9. To assemble the cake, transfer the whipped cream and sweet potato mixtures into separate piping bags. Place the first sponge cake layer on a cake turntable. Pipe and spread an even layer of whipped cream over the top. Add the second sponge cake layer, then pipe and spread a generous layer of sweet potato filling. Finally, place the third sponge cake layer on top and cover the entire cake with a thick, even coat of whipped cream. Smooth the whipped cream around the sides for a polished finish.
Tip: Humidity can affect the stability of whipped cream, especially when piping. If the cream appears runny or struggles to stick to the sides, chill both the cake and whipped cream briefly before continuing. I also recommend turning on the air conditioning to keep the environment cool and reduce the impact of humidity. This will help stabilize the cream and ensure a smoother finish.
10. Decorate the cake as creatively as you like! For instance, sprinkle the sponge cake crumbs prepared in step 6 over the top. Add a playful touch with sweet potato chips and pieces of leftover boiled sweet potato. Once decorated, refrigerate the cake for at least an hour to let the cream set beautifully. When ready, slice and enjoy!
Other Recipes You Might Like
If you love velvety, nutty flavors, you’ll absolutely adore these Korean recipes as well.
- Korean Sweet Potato Latte (Goguma Latte)
- Korean Walnut Pastry (Hodugwaja)
- Korean Fish Pastry(Bungeoppang)
Love Korean food? Explore our site for more authentic Korean recipes including how to create a perfect Korean BBQ at home or other easy Korean recipes. Also, never miss a new recipe by subscribing to our newsletter, and join us in celebrating Korean cuisine!
Korean Sweet Potato Cake
Ingredients
MAIN
- 450 g sweet potatoes (Hawaiian or Okinawan), peeled and sliced into 2.5 cm (1-inch) pieces
- 1 tall vanilla sponge cake (around 4.5cm or higher), 2 shorter vanilla sponge cakes (each about 3cm tall), or an equivalent amount of Genoise sponge
SWEET POTATO FILLING
- 1/3 cup milk , full cream
- 2 Tbsp white sugar
- 1 Tbsp sweetened condensed milk
- 30 g unsalted butter (1 ounce)
- 1/4 cup stabilized whipped cream (see below for how to make it)
VANILLA CAKE SYRUP
- 1/4 cup water
- 2 Tbsp white sugar (granulated)
- 1/2 tsp vanilla bean paste
Stabilized Whipped Cream
- 2 cup thickened cream
- 1 cup mascarpone (e.g., La Casa Del Formaggio Mascarpone 250g from Woolworths, Montefiore Mascarpone 250g from Coles, or BelGioioso Mascarpone 8 ounces in the US)
- 1/2 cup icing sugar (powdered sugar)
Instructions
- Steam the sweet potatoes over medium heat for 25-30 minutes, or until they are fully cooked. To check the doneness, gently poke them with a chopstick—they should be soft and easily pierced.
- In a medium-sized pot, combine the milk, sugar, sweetened condensed milk, and unsalted butter. Cook over low heat, stirring frequently, until the sugar is completely dissolved. Add the steamed sweet potatoes to the pot and mash thoroughly using a potato masher until smooth. Transfer the mashed mixture to a bowl and let it cool completely.
- Prepare the vanilla cake syrup. Mix water, sugar, and vanilla bean paste in a small bowl. Microwave the mixture for 30 seconds and stir until the sugar dissolves completely. Set aside.
- Prepare cake base layers. To create three 1.5cm cake base layers, start by assessing your cake:- For a single tall cake (around 4.5cm or higher): Slice it horizontally into three equal layers, each approximately 1.5cm thick. - For two shorter cakes (each about 3cm tall): Slice both cakes horizontally in half. This will give you four layers in total. Choose the three most even layers to assemble your cake base.Set the extra layer aside— it’s optional but can be grated for decoration later.
- Generously brush each cake layer with vanilla syrup to enhance the flavor and keep the sponge moist. You can do this during step 9 if it suits your workflow, but I prefer doing it now to avoid forgetting later.
- This step is completely optional, but if you’d like to use cake crumbs for decoration, grab any leftover cake layers or sponge scraps and trim away the brown edges for a consistent, even-colored crumb. Once trimmed, grate the sponge and then pass it through a sieve to create fine, fluffy pieces. These delicate crumbs make a beautiful decorative topping, adding a soft and polished touch to your cake.
- Start by combining thickened cream, icing sugar, and mascarpone in a chilled mixing bowl. Whip the mixture until stiff peaks form. For best results, keep the whipped cream extra cold by placing the mixing bowl inside a larger bowl filled with ice while proceeding with the next steps.
- Gently fold 1/4 cup of whipped cream into the sweet potato mixture (from step 2) until smooth and creamy. Continue mixing until fully combined and velvety.
- To assemble the cake, transfer the whipped cream and sweet potato mixtures into separate piping bags. Place the first sponge cake layer on a cake turntable. Pipe and spread an even layer of whipped cream over the top. Add the second sponge cake layer, then pipe and spread a generous layer of sweet potato filling. Finally, place the third sponge cake layer on top and cover the entire cake with a thick, even coat of whipped cream. Smooth the whipped cream around the sides for a polished finish.Tip: Humidity can affect the stability of whipped cream, especially when piping. If the cream appears runny or struggles to stick to the sides, chill both the cake and whipped cream briefly before continuing. I also recommend turning on the air conditioning to keep the environment cool and reduce the impact of humidity. This will help stabilize the cream and ensure a smoother finish.
- Decorate the cake as creatively as you like! For instance, sprinkle the sponge cake crumbs prepared in step 6 over the top. Add a playful touch with sweet potato chips and pieces of leftover boiled sweet potato. Once decorated, refrigerate the cake for at least an hour to let the cream set beautifully. When ready, slice and enjoy!
Notes
- 1 Tbsp = 15 ml, 1 cup = 250ml
The nutrition information shown is an estimate provided by an online nutrition calculator. It should not be considered a substitute for a professional nutritionist’s advice.

")
