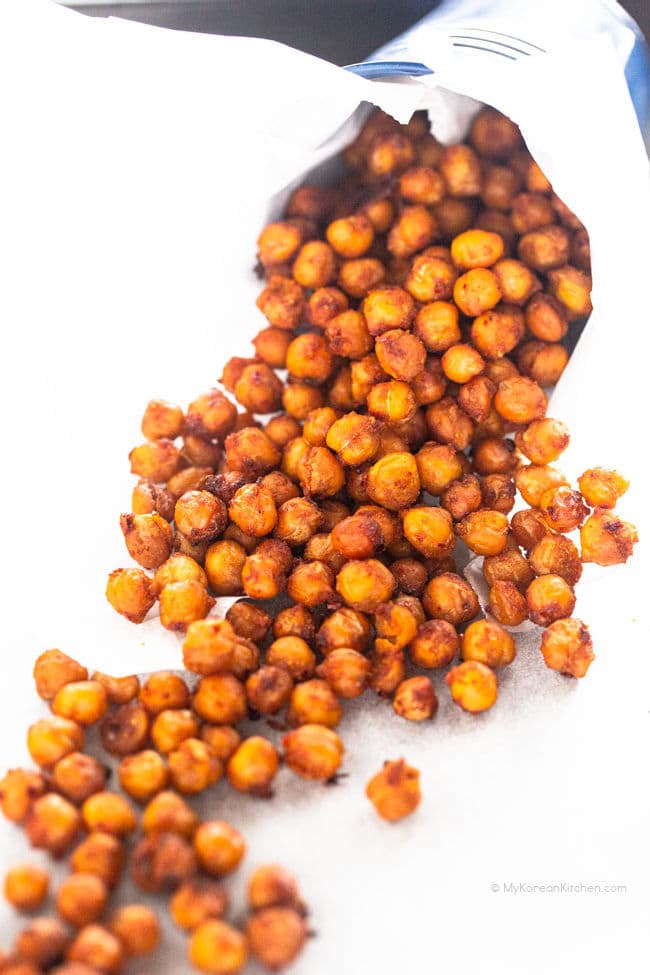
Try these delicious and crispy air fryer chickpeas! These Korean BBQ flavored roasted chickpeas are crunchy, delicious and so moreish. They will make perfect healthier snacks.
As a bonus, I also included instructions for the oven roasting method for those who don’t have an air fryer at home. Let’s get cooking!

What are Air Fryer Chickpeas
I’m relatively a newbie to air fryer cooking, but I have to say, I love using my air fryer! (Mine is similar to this one but with additional smart sensing functionality.) It makes cooking, particularly roasting and baking so much easier, faster, tastier and crunchier.
Air fryer chickpeas are roasted / baked chickpeas in an air fryer. These air fryer roasted chickpeas are really nice, nutty and also very crispy. What’s more, air frying gives you much faster and easier cooking options than roasting / baking in the oven too.
To make crispy chickpeas in an air fryer, all you need to do is:
- Dehydrate the chickpeas for a short while in an air fryer.
- Coat the chickpeas with some oil.
- Roast the chickpeas for 15 mins or until golden and crisp.
- Season with your choice of seasonings or rubs.
- Roast further in an air fryer while the air fryer is cooling down (Air fryer’s power is off).
Korean BBQ Flavor
Chickpeas aren’t a regular ingredient you would see in Korean cooking, but I knew Korean BBQ flavor would go well with the savory roasted chickpeas.
To make Korean BBQ seasoning, you will need soy sauce, brown sugar, salt, ginger powder, garlic powder, and onion powder. To add a bit of heat (but not a lot), I also added Korean chili flakes as well. If you want these chickpeas to be even more spicy, you could use cayenne pepper instead of Korean chili flakes, but at a reduced level (around 1/4 tsp to 1/2 tsp).
The result is delicious and savory Korean BBQ flavored crispy chickpeas! It will become your new favorite snack!
Tips
- To properly crisp the chickpeas, you really need good spacing between the chickpeas so that they crisp properly. Otherwise, you will end up with soft chewy chickpeas. I know you will be tempted, but I don’t recommend doubling the recipe.
- Don’t be tempted to mix all ingredients from the beginning. Seasonings can easily burn and you will end up with burnt bitter tasting chickpeas. (I’ve done that many times during my testing!)
- 175 C / 347 F is a good temperature to bake chickpeas whether it’s in an air fryer or oven. I’ve tried other temperature combinations as well but too high temperature can burn the chickpeas easily and make them way too hard to bite. Too low temperature will leave the chickpeas with a bit of a mushy texture and you could be baking for hours until you reach a crispy texture.
Ingredients for Air Fryer Chickpeas (Korean BBQ Flavor)
- 1 (400g / 15 ounces) canned chickpeas, rinsed & well-drained
- 2 tsp olive oil
- 2 tsp brown sugar
- 1 tsp soy sauce, regular
- 1 tsp Korean chili flakes (gochugaru) or cayenne pepper powder (1/4 tsp to 1/2 tsp)
- 1/4 tsp fine sea salt
- 1/4 tsp ginger powder
- 1/4 tsp garlic powder
- 1/4 tsp onion powder
* If you want to learn about Korean ingredients, check my essential Korean ingredients list.
How to Make Crispy Roasted Chickpeas (Korean BBQ Flavor)
Air Fryer Method (Faster!)
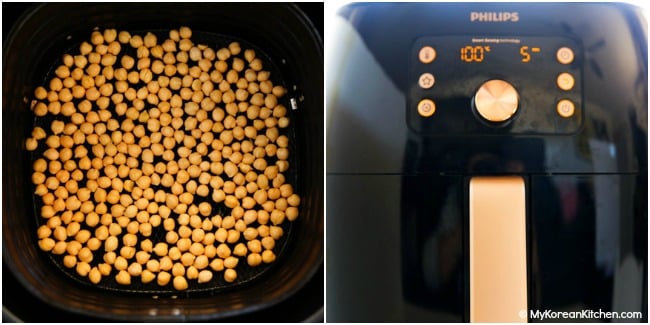
1. Transfer well-drained chickpeas onto an air fryer basket ensuring they are not overlapping each other. Roast them at 100C / 212 F for 5 mins. This will allow the chickpeas to dry well so that you don’t have to wipe them manually with a paper towel or kitchen cloth.
2. Transfer the chickpeas into a mixing bowl, add the olive oil and coat gently. Transfer the chickpeas back to the air fryer basket and spread them well. Place the basket into the air fryer.
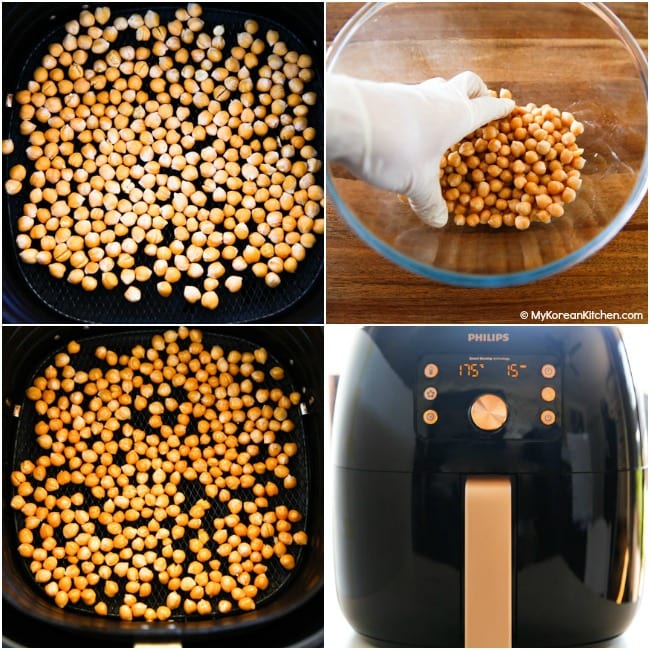
3. Turn up the air fryer temperature to 175 C / 347 F and bake the chickpeas for a total of 15 mins. Half way though this time, shake the basket around for even cooking.
4. In the mean time, combine and whisk the remaining ingredients – brown sugar, soy sauce, Korean chili flakes, salt, ginger powder, garlic powder, and onion powder in a small bowl.
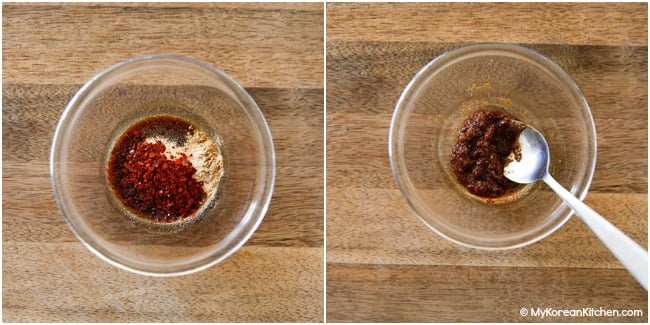
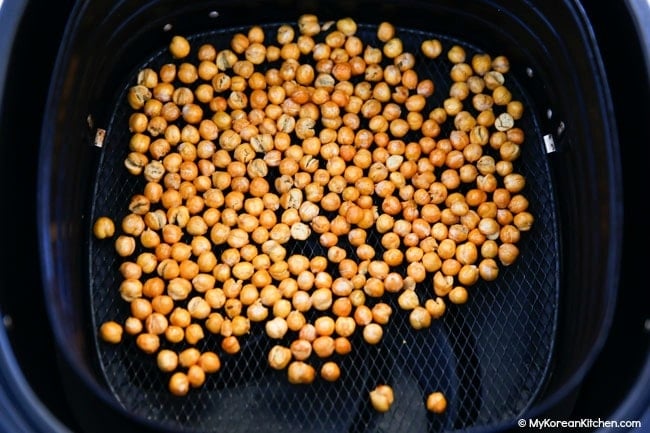
5. When the chickpeas are ready, turn the air fryer off. Transfer the chickpeas into a mixing bowl and combine with the BBQ sauce (from step 4). Rub the sauce well ensuring the chickpeas are evenly coat. – I didn’t find it too hot to touch the chickpeas with my gloved hands, but be watchful as you touch the roasted chickpeas.

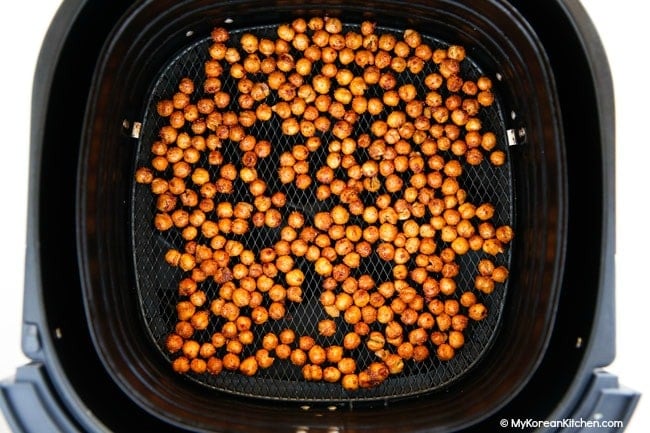
6. Transfer the seasoned chickpeas back into the air fryer basket and spread them well so they don’t overlap. Put the basket back to the air fryer. Bake the chickpeas in the cooling down air fryer for 20 – 30 mins. (Air fryer is off.) This will help chickpeas get even crispier.
7. Remove from the air fryer and cool down for about 5 mins. Serve immediately or transfer to an air tight container for later. You can munch them on their own or serve in your salad as a garnish.
Oven Roasting Method
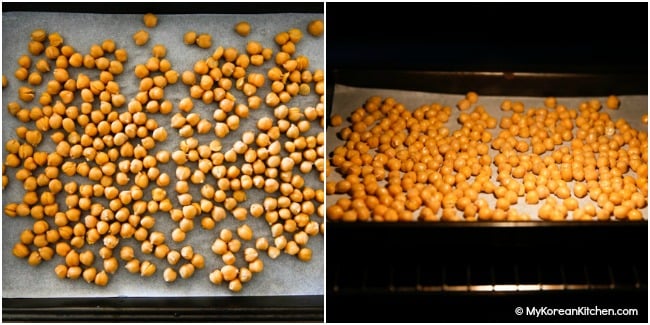
1. Preheat oven at 100 C / 212 F for 10 mins. Line up the baking paper on a large rimed baking sheet. Transfer well-drained chickpeas onto a baking sheet ensuring they are not overlapping each other. Bake for 10 mins. This will allow the chickpeas to dry well so that you don’t have to wipe them manually with paper towel or kitchen cloth. Remove the baking sheet from oven.
2. Transfer the chickpeas into a mixing bowl, add the olive oil and coat gently. Transfer the chickpeas back to the baking sheet and spread them well.

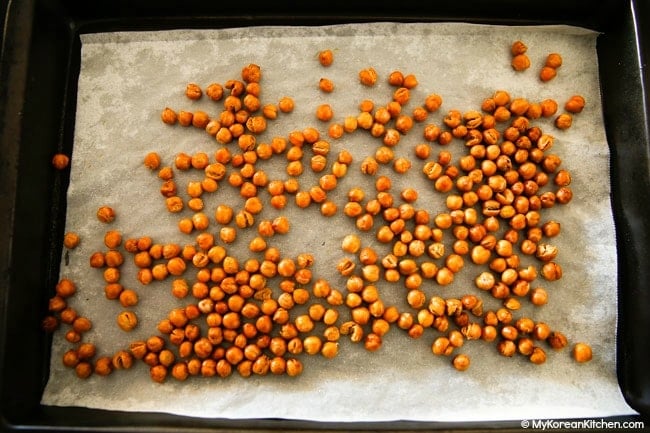
3. Turn the oven temperature up to 175 C / 347 F and place the baking sheet in the oven. Bake the chickpeas for a total of 45 mins and half way though baking turn the chickpeas around for even cooking.
4. In the mean time, combine and whisk the remaining ingredients – brown sugar, soy sauce, Korean chili flakes, salt, ginger powder, garlic powder, and onion powder in a small bowl.
5. When the chickpeas are ready, remove the baking sheet from the oven and turn the oven off. Transfer the chickpeas into a mixing bowl and combine with the BBQ sauce (from step 4). Rub the sauce well ensuring the chickpeas are evenly coat. – I didn’t find it too hot to touch the chickpeas with my gloved hands, but be watchful as you touch the roasted chickpeas.
6. Transfer the seasoned chickpeas back to the baking sheet and spread them well so they don’t overlap. Put the baking sheet back to the oven.
7. Bake the chickpeas in the cooling down oven for 30 mins. (Oven is off.) This will help the chickpeas get crispier. Remove from the oven and cool down for about 5 mins. Serve immediately or transfer to an air tight container for later. You can munch them on their own or serve in your salad.

How To Store
Store the roasted chickpeas in an air tight glass container or a glass jar. Leave the lid off for the first few hours to allow any residual steam to escape. Once time lapses, cover with the lid tightly. Store at room temperature. It should be good for up to 3 days maintaining the crispy texture.
Love Korean food? Browse lots more Korean recipes from my easy Korean recipe collections. Also, subscribe to my newsletter and follow along on Facebook, Pinterest and Instagram for all of the latest updates.

Air Fryer Korean BBQ Chickpeas
Ingredients
- 1 canned chickpeas (400g / 15 ounces), rinsed & well-drained
- 2 tsp olive oil
- 2 tsp brown sugar
- 1 tsp soy sauce
- 1 tsp Korean chili flakes (gochugaru) or cayenne pepper powder (1/4 tsp to 1/2 tsp)
- 1/4 tsp fine sea salt
- 1/4 tsp ginger powder
- 1/4 tsp garlic powder
- 1/4 tsp onion powder
Instructions
AIR FRYER METHOD (FASTER!)
- Transfer well-drained chickpeas onto an air fryer basket ensuring they are not overlapping each other. Roast them at 100C / 212 F for 5 mins. This will allow the chickpeas to dry well so that you don’t have to wipe them manually with a paper towel or kitchen cloth.
- Transfer the chickpeas into a mixing bowl, add the olive oil and coat gently. Transfer the chickpeas back to the air fryer basket and spread them well. Place the basket into the air fryer.
- Turn up the air fryer temperature to 175 C / 347 F and bake the chickpeas for a total of 15 mins. Half way though this time, shake the basket around for even cooking.
- In the mean time, combine and whisk the remaining ingredients – brown sugar, soy sauce, Korean chili flakes, salt, ginger powder, garlic powder, and onion powder in a small bowl.
- When the chickpeas are ready, turn the air fryer off. Transfer the chickpeas into a mixing bowl and combine with the BBQ sauce (from step 4). Rub the sauce well ensuring the chickpeas are evenly coat. – I didn’t find it too hot to touch the chickpeas with my gloved hands, but be watchful as you touch the roasted chickpeas.
- Transfer the seasoned chickpeas back into the air fryer basket and spread them well so they don’t overlap. Put the basket back to the air fryer. Bake the chickpeas in the cooling down air fryer for 20 – 30 mins. (Air fryer is off.) This will help chickpeas get even crispier.
- Remove from the air fryer and cool down for about 5 mins. Serve immediately or transfer to an air tight container for later. You can munch them on their own or serve in your salad as a garnish.
OVEN ROASTING METHOD
- Preheat oven at 100 C / 212 F for 10 mins. Line up the baking paper on a large rimed baking sheet. Transfer well-drained chickpeas onto a baking sheet ensuring they are not overlapping each other. Bake for 10 mins. This will allow the chickpeas to dry well so that you don’t have to wipe them manually with paper towel or kitchen cloth. Remove the baking sheet from oven.
- Transfer the chickpeas into a mixing bowl, add the olive oil and coat gently. Transfer the chickpeas back to the baking sheet and spread them well.
- Turn the oven temperature up to 175 C / 347 F and place the baking sheet in the oven. Bake the chickpeas for a total of 45 mins and half way though baking turn the chickpeas around for even cooking.
- In the mean time, combine and whisk the remaining ingredients – brown sugar, soy sauce, Korean chili flakes, salt, ginger powder, garlic powder, and onion powder in a small bowl.
- When the chickpeas are ready, remove the baking sheet from the oven and turn the oven off. Transfer the chickpeas into a mixing bowl and combine with the BBQ sauce (from step 4). Rub the sauce well ensuring the chickpeas are evenly coat. – I didn’t find it too hot to touch the chickpeas with my gloved hands, but be watchful as you touch the roasted chickpeas.
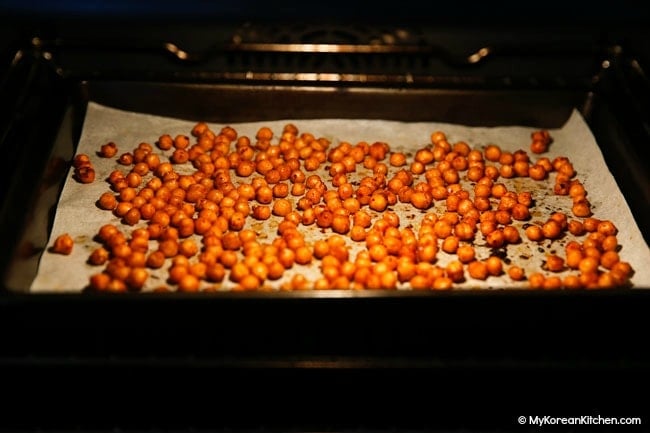
- Transfer the seasoned chickpeas back to the baking sheet and spread them well so they don’t overlap. Put the baking sheet back to the oven.
- Bake the chickpeas in the cooling down oven for 30 mins. (Oven is off.) This will help the chickpeas get crispier. Remove from the oven and cool down for about 5 mins. Serve immediately or transfer to an air tight container for later. You can munch them on their own or serve in your salad.
Notes
- If you want to learn about Korean ingredients, check my essential Korean ingredients list.
- To properly crisp the chickpeas, you really need good spacing between the chickpeas so that they crisp properly. Otherwise, you will end up with soft chewy chickpeas. I know you will be tempted, but I don’t recommend doubling the recipe.
- Don’t be tempted to mix all ingredients from the beginning. Seasonings can easily burn and you will end up with burnt bitter tasting chickpeas. (I’ve done that many times during my testing!)
- 175 C / 347 F is a good temperature to bake chickpeas whether it’s in an air fryer or oven. I’ve tried other temperature combinations as well but too high temperature can burn the chickpeas easily and make them way too hard to bite. Too low temperature will leave the chickpeas with a bit of a mushy texture and you could be baking for hours until you reach a crispy texture.
Nutrition Info (per serving)
The nutrition information shown is an estimate provided by an online nutrition calculator. It should not be considered a substitute for a professional nutritionist’s advice.


")