Making songpyeon is one of the most cherished traditions of Chuseok, the Korean harvest festival. These beautiful half moon rice cakes are soft, chewy, and filled with sweet fillings like sesame seeds, red bean paste, or chestnuts.
Growing up, I remember sitting around the kitchen floor with my family, shaping each piece carefully and sneaking little tastes of the fillings along the way. This recipe brings that cozy tradition into your own kitchen, so you can enjoy the flavor of Korea’s harvest season wherever you are.
What is Songpyeon
Songpyeon (송편) is a type of Korean rice cake traditionally made for Chuseok, Korea’s harvest festival. Families gather to make them together, shaping soft rice dough into small half moons filled with sweet fillings. The shape carries a special meaning. It’s said to symbolize growth and abundance, like a waxing moon that becomes fuller with time.
Why This Recipe
Making songpyeon at home can feel intimidating, but my recipe keeps it simple and reliable, even if you don’t have access to a Korean rice mill or fresh pine needles.
I’ll show you how to make soft, chewy rice cakes using homemade wet milled rice flour and natural colorings like matcha and purple sweet potato. The texture turns out beautifully tender, and the process is easier than you might think! It’s perfect for celebrating Chuseok wherever you are.
Ingredients
Dough
- 3 cups rice flour (made from short grain rice), see ‘Tips’ for details
- 2 1/2 Tbsp glutinous rice flour
- 1/8 tsp fine salt
- 1 1/2 Tbsp granulated sugar
- About 6 Tbsp boiled water, added gradually until the dough comes together (you may need slightly more or less)
- (optional) 1/2 tsp purple sweet potato powder or matcha powder
Honey Sesame Filling
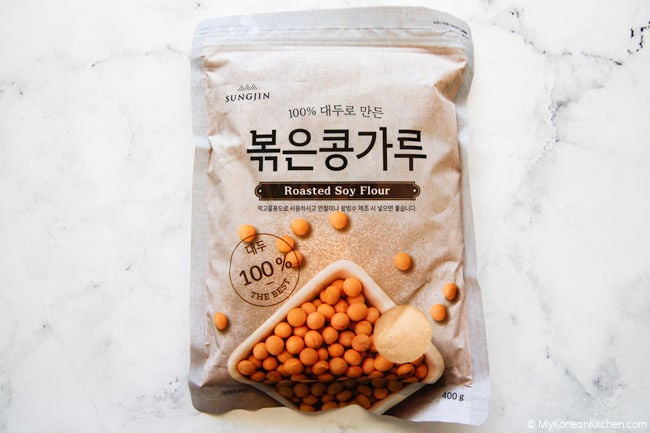
- 2 tsp roasted soybean powder (konggaru)
- 1/8 tsp fine salt
- 3 Tbsp dark brown sugar
- 1 1/2 tsp Korean rice syrup (or honey)
- 3 Tbsp sesame seeds, grounded
Sweet Red Bean Paste Filling
- About 160 g (5.6 oz) sweet red bean paste (use my homemade version or store bought)
Finishing
- A few drops of sesame oil, for brushing
* 1 cup = 250ml
** Each of the filling ingredients are enough for 24–27 songpyeon, so if you make both fillings, you’ll have enough for about 54 pieces. Double the dough ingredients if you’d like to use both fillings.
How to Make Songpyeon
1. Make the dough
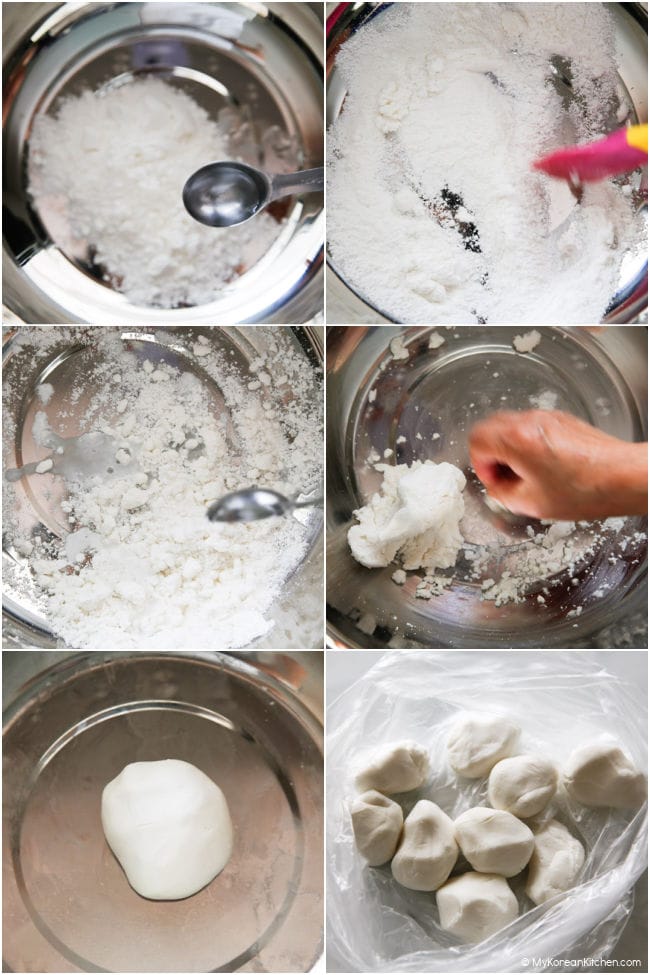
In a medium bowl, combine the rice flour, glutinous rice flour, salt, sugar, and any optional powder you’re using to color the dough. Add about 1 tablespoon of boiling water at a time, sprinkling it over the driest areas of the flour. Stir and mix, then add another splash over the dry spots. Keep repeating until the mixture starts to come together into a dough.
Knead the dough with clean hands until it feels very smooth and pliable. The more you knead, the bouncier and chewier the texture will be once steamed. Cover with a damp towel (or loosely drape a plastic bag) and let it rest for 10 minutes while you prepare the filling.
2. Make the filling
Option 1: Honey Sesame Filling
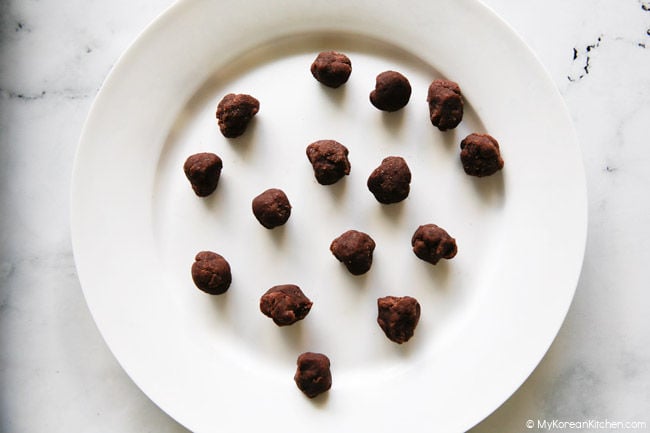
In a small bowl, combine the roasted soybean powder, salt, dark brown sugar, rice syrup, and sesame seeds. Mix until everything is evenly coated and the mixture has a moist, sandy consistency. It won’t form a firm paste, but it should be easy to scoop with a spoon. Set aside.

Option 2: Sweet Red Bean Filling
If you’re using sweet red bean paste, scoop about 1 teaspoon (about 6g / 0.21 oz) portions and roll them into small balls. Set aside on a tray while you prepare the dough. (You can find my full recipe for homemade sweet red bean paste here.)
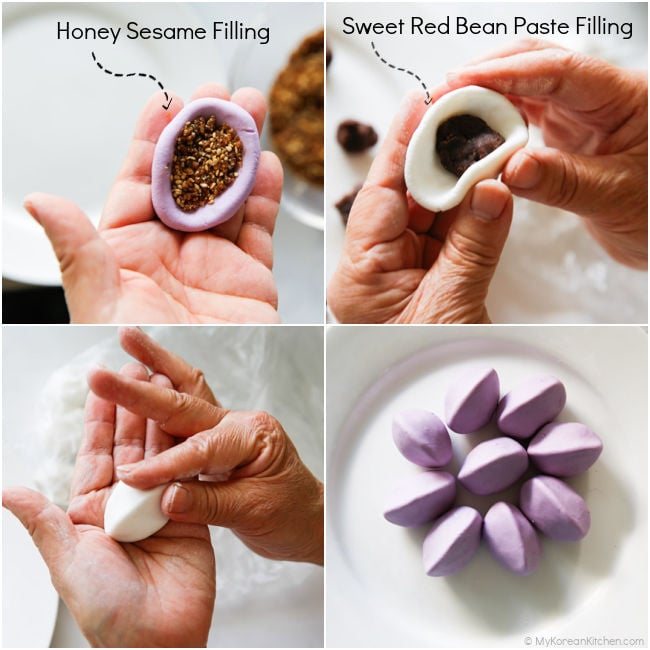
3. Shape the songpyeon
Pinch off a small piece of dough, about 20 g (walnut size). For even-sized rice cakes, portion out all the dough first and keep the pieces covered with a damp towel or loose plastic drape so they don’t dry out.
Roll each piece into a smooth ball, then flatten it into a small disc about 5 cm / 2 inches wide. Place about 3/4 to 1 teaspoon of filling in the middle. Gently fold the edges up around the filling and bring them together, then reshape into a smooth oval or ball between your fingers. Pinch the edges to seal firmly, and keeping the edges slightly thinner than the center.
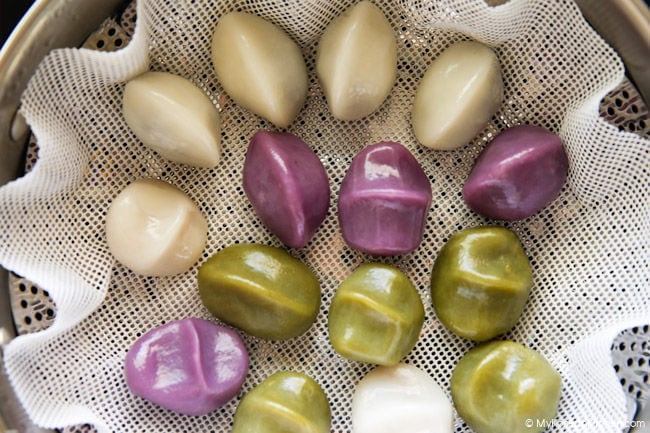
4. Steam
Line a steamer with a damp cotton cloth or perforated silicon mat. If you have fresh pine needles, you can use them a few under the songpyeon for fragrance, but this is optional. Arrange the songpyeon so they don’t touch each other. Once the water in the steamer is boiling, place the tray inside and steam over medium heat for about 15 minutes, until the surface looks slightly glossy.
5. Set and finish
When the songpyeon are done steaming, carefully remove them from the steamer. If you used a liner or cloth, lift the edges to take them out easily without tearing.
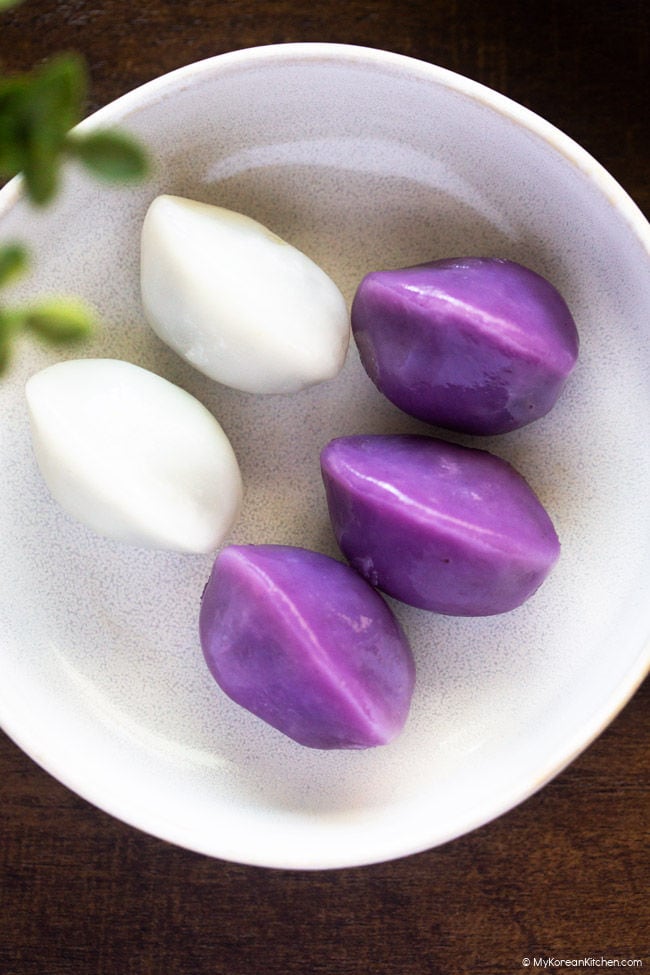
Let them cool until they’re comfortable to handle, then lightly brush or rub with a little sesame oil to keep them glossy and prevent sticking. Songpyeon taste best once they’ve rested at room temperature for about an hour after steaming.
How to Store
Songpyeon are best enjoyed the same day they’re made, when the texture is soft and chewy. If you have leftovers, store them in an airtight container.
Fridge: They’ll keep for up to 2 days, but the texture will firm up as the rice starch tightens when chilled. To bring them back to their soft, bouncy state, re-steam for 3–5 minutes before serving.
Freezer: For longer storage, you can freeze songpyeon for up to 1 month. Place them in a single layer on a tray to freeze first, then transfer to an airtight container or freezer bag. When ready to eat, steam from frozen for about 8-10 minutes, or until soft and chewy again.
Avoid microwaving if possible. It heats unevenly and can make the rice cakes tough or rubbery.
Helpful Tips for Making Songpyeon
Here are a few things that might help as you make your songpyeon. These are small details, but they make a big difference, from getting the right dough texture and color to keeping the rice cakes from sticking or cracking.
- Choosing the Right Rice Flour
Songpyeon dough relies on the texture of freshly milled short-grain rice flour. The kind traditionally made by wet-milling soaked rice, not the dry store-bought type you often see at your local supermarket. If you use regular rice flour, the dough can turn crumbly or crack during shaping and steaming.
When I make songpyeon, I always prepare my own wet milled short grain rice flour. You can follow my step-by-step guide on how to make wet milled rice flour. It’s the same method I use for garaetteok (rice cakes).
If you’re in Korea, local rice mills (called bangatgan, 방앗간) or traditional markets sell freshly wet-milled rice flour for songpyeon. That’s the ideal kind to use.
- Naturally Coloring Your Dough
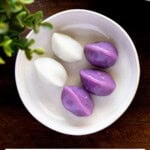
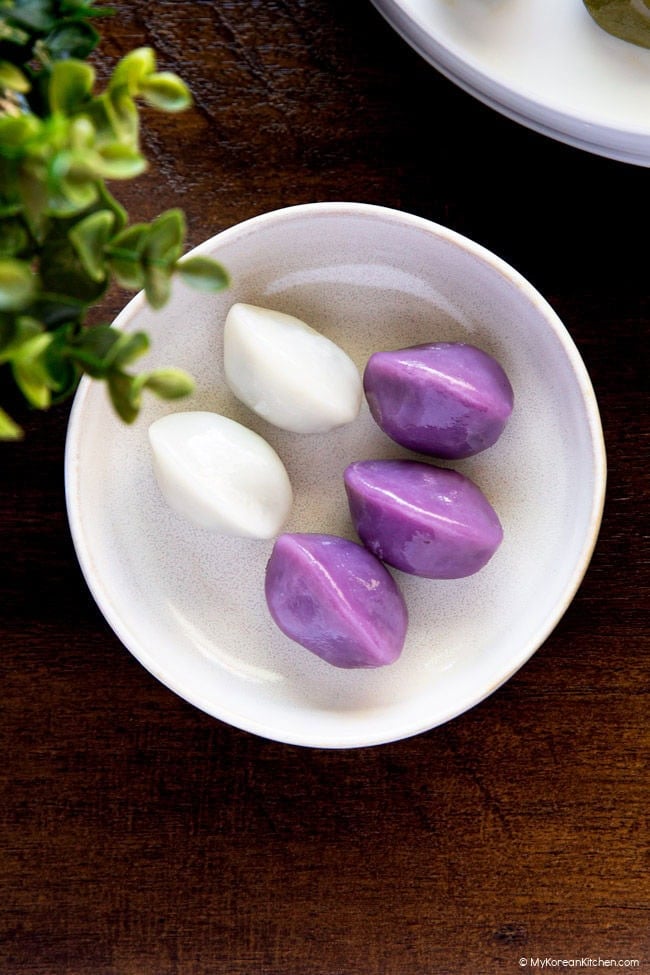
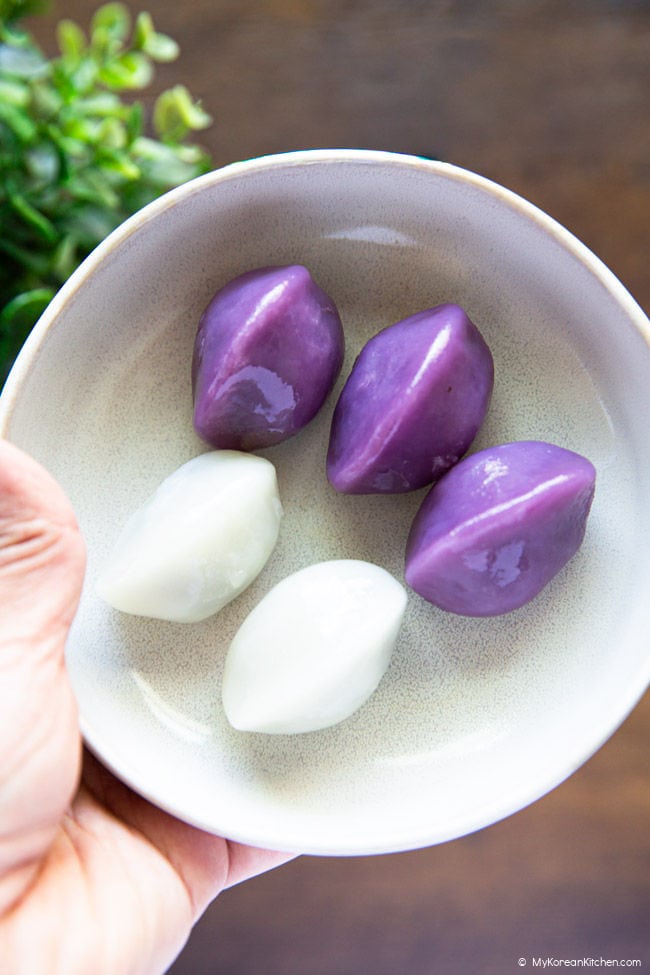
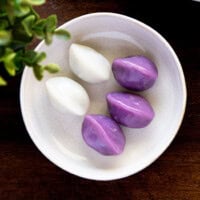
You can naturally tint your songpyeon dough with colorful ingredients. It’s a fun way to celebrate the season. Try matcha (green tea powder) for soft green, purple sweet potato powder for a pretty lilac hue, or turmeric powder for a gentle golden tone. Traditional colors also come from mugwort (ssuk powder) for earthy green, beet powder for pink, or pumpkin powder for a warm yellow orange tone.
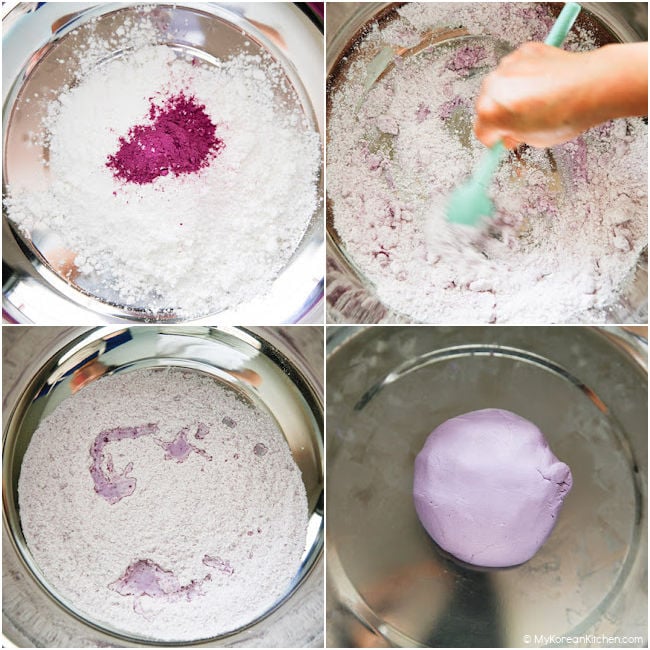
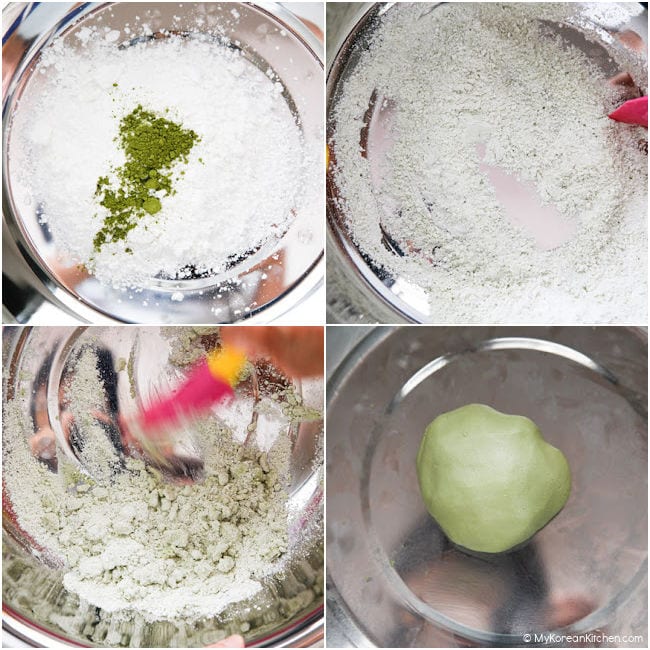
You don’t need to add much of these colored powders. Just 1/2 teaspoon is enough for 3 cups of rice flour!
Powders can slightly change how much water the dough needs (just a touch more), so add the water gradually and adjust as you go. Aim for a smooth, pliable dough with soft, natural color rather than bright or artificial tones.
- Getting the dough just right
Different rice flours absorb water a little differently depending on how fresh and finely milled they are. That’s why it’s important to add the boiling water gradually, about 1 tablespoon at a time, instead of pouring it all in at once. You’ll notice the dough slowly coming together as it hydrates. It should feel warm, soft, and pliable, not crumbly or sticky. If it looks dry and cracks when you press it, add just a few more drops of hot water and knead again until smooth.
- What fillings work best?
I’ve always loved honey sesame filling. It’s been my favorite since childhood. In this recipe, I used Korean rice syrup (jocheong, 조청) instead of honey because I find it works even better. Honey can sometimes overpower the delicate, nutty flavor of the sesame seeds, while rice syrup keeps the sweetness gentle and balanced.
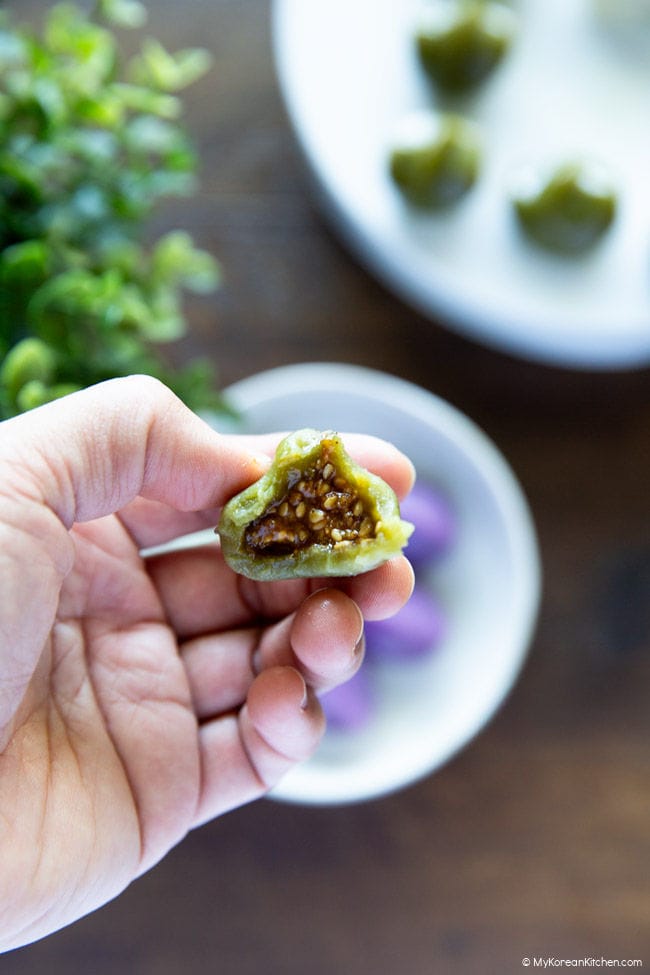
If anything, it enhances the nuttiness even more. I also mix in roasted soybean powder, which adds a lovely depth and rounds out the flavor along with the sesame seeds.
If you’re not into the honey sesame flavor, try sweet red bean paste or chestnuts instead. These are all popular fillings for songpyeon.
- How to Prevent Sticking
A damp cotton cloth or a perforated silicone liner works best to keep the rice cakes from sticking to the steamer. Both create a gentle barrier that lets the steam circulate evenly without adding oil, so the songpyeon cook through beautifully and stay smooth on the surface. If you’re using cloth, make sure it’s just damp, not dripping. This prevents excess moisture from making the rice cakes soggy.
- Why is my dough cracking?
There are a few possible reasons, but in my experience, the steaming temperature is often the main cause. If the steam is too strong, the songpyeon can expand too quickly and crack. I’ve found that steaming over medium heat for about 15 minutes gives much more stable results. The gentler steam lets the rice cakes cook evenly and hold their shape beautifully.
It can also help to check two smaller things:
– Don’t overfill each piece. Too much filling can stretch the dough and make sealing harder.
– Keep the dough covered with a damp towel or plastic wrap while you shape, so it doesn’t dry out and form tiny cracks before steaming.
More Korean Rice Cake Recipes You’ll Love
- Chapssaltteok (Red Bean Mochi): Soft, chewy, and filled with sweet red bean paste. It’s a simple treat that’s always a favorite.
- Tteokbokki (Spicy Korean Rice Cakes): Chewy rice cakes simmered in a spicy, slightly sweet gochujang sauce. One of Korea’s most loved street foods.
- Garaetteok (Korean Cylinder Rice Cakes): Plain white rice cakes with a soft, chewy texture. It’s perfect for making tteokbokki or tteokguk.
- Tteokguk (Korean Rice Cake Soup): A warm, comforting soup made with sliced rice cakes. It’s traditionally enjoyed to celebrate the Lunar New Year.
Songpyeon (Korean Half Moon Rice Cakes) – Classic Chuseok Recipe
Ingredients
Dough
- 3 cups rice flour (made from short grain rice), see Tips for details
- 2 1/2 Tbsp glutinous rice flour
- 1/8 tsp fine salt
- 1 1/2 Tbsp granulated sugar
- 6 Tbsp hot (boiled) water or more
- 1/2 tsp purple sweet potato powder or matcha powder (optional)
Honey Sesame Filling
- 2 tsp roasted soybean powder (konggaru)
- 1/8 tsp fine salt
- 3 Tbsp dark brown sugar
- 1 1/2 tsp Korean rice syrup (or honey)
- 3 Tbsp sesame seeds , grounded
Sweet Red Bean Paste Filling
- 160 g sweet red bean paste (5.6 oz), (use my homemade version or store bought)
Finishing
- A few drops sesame oil , for brushing
Instructions
- Make the dough - In a medium bowl, combine the rice flour, glutinous rice flour, salt, sugar, and any optional powder you’re using to color the dough. Add about 1 tablespoon of boiling water at a time, sprinkling it over the driest areas of the flour. Stir and mix, then add another splash over the dry spots. Keep repeating until the mixture starts to come together into a dough. Knead the dough with clean hands until it feels very smooth and pliable. The more you knead, the bouncier and chewier the texture will be once steamed. Cover with a damp towel (or loosely drape a plastic bag) and let it rest for 10 minutes while you prepare the filling.
- Make the filling - Option 1: Honey Sesame Filling. In a small bowl, combine the roasted soybean powder, salt, dark brown sugar, rice syrup, and sesame seeds. Mix until everything is evenly coated and the mixture has a moist, sandy consistency. It won’t form a firm paste, but it should be easy to scoop with a spoon. Set aside. Option 2: Sweet Red Bean Filling. If you’re using sweet red bean paste, scoop about 1 teaspoon (about 6g / 0.21 oz) portions and roll them into small balls. Set aside on a tray while you prepare the dough. (You can find my full recipe for homemade sweet red bean paste here.)
- Shape the songpyeon - Pinch off a small piece of dough, about 20 g (walnut size). For even-sized rice cakes, portion out all the dough first and keep the pieces covered with a damp towel or loose plastic drape so they don’t dry out.Roll each piece into a smooth ball, then flatten it into a small disc about 5 cm / 2 inches wide. Place about 3/4 to 1 teaspoon of filling in the middle. Gently fold the edges up around the filling and bring them together, then reshape into a smooth oval or ball between your fingers. Pinch the edges to seal firmly, and keeping the edges slightly thinner than the center.
- Steam - Line a steamer with a damp cotton cloth or perforated silicon mat. If you have fresh pine needles, you can use them a few under the songpyeon for fragrance, but this is optional. Arrange the songpyeon so they don’t touch each other. Once the water in the steamer is boiling, place the tray inside and steam over medium heat for about 15 minutes, until the surface looks slightly glossy.
- Set and finish - When the songpyeon are done steaming, carefully remove them from the steamer. If you used a liner or cloth, lift the edges to take them out easily without tearing. Let them cool until they’re comfortable to handle, then lightly brush or rub with a little sesame oil to keep them glossy and prevent sticking. Songpyeon taste best once they’ve rested at room temperature for about an hour after steaming.
Notes
- 1 cup = 250 ml
- Each of the filling ingredients are enough for 24–27 songpyeon, so if you make both fillings, you’ll have enough for about 54 pieces. Double the dough ingredients if you’d like to use both fillings.
Nutrition Info (per serving)
The nutrition information shown is an estimate provided by an online nutrition calculator. It should not be considered a substitute for a professional nutritionist’s advice.
")

")