
Learn how to make Korean chili oil. This hot chili oil adds a nice layer of spiciness, rich umami, pleasant fragrance, and vibrant red color to your favorite Korean dish. What’s more, it’s so easy to make!
What is Korean Chili Oil
Korean chili oil is a type of condiment made with Korean chili flakes (red pepper flakes), cooking oil and other common aromatic vegetables such as green onions, garlic and ginger.
It is often used to intensify spiciness, add depth of flavor and fragrance, and add vivid red color to dishes like sundugu jjigae and yukgaejang.
You can certainly make these dishes without Korean chili oil, but often adding just a little bit of it can give a huge positive difference.
Popular Chili Oil Ingredients and Variations
The most simple form of Korean chili oil can be made with just two simple ingredients:- Cooking oil and Korean chili flakes. But the oil will taste nicer and richer in flavor if you add some aromatic vegetables.
Below I listed the most commonly used ingredients when making Korean chili oil and also optional ingredients you could use if you want to intensify the flavor or change things a bit.
Commonly Used Ingredients
- Korean Chili Flakes (Gochugaru) – Certainly not all Korean chili flakes are the same quality or even come with the same level of spiciness.
If you have an option, go for chili flakes that are made with Korean grown chilies and that are sun dried. These are classed as the highest quality chili flakes in Korea.
Typically many Korean chili flakes available at grocers outside of Korea are mild heat level chili flakes. However, there are also spicy chili flakes (e.g. cheongyang pepper flakes) as well, so watch out for the label. If you want to use these spicy chili flakes, use smaller amount along with your regular Korean chili flakes, particularly if you don’t normally handle the heat well.
I haven’t tried making chili oil with other types of chili flakes (e.g. Sichuan chili flakes) or any other non-Korean standard chili flakes yet, so please don’t ask me if that would work.
- Neutral Oil – Neutral oil works best to bring out all the fragrance and flavor of chili flakes and aromatic vegetables. Choose an oil that has a high smoke point such as rice bran oil, canola oil, and grape-seed oil.
- Garlic – Some people use whole garlic cloves as it is more convenient, but thinly sliced garlic will add more garlicky fragrance.
- Ginger – This also adds a nice gingery fragrance into the oil. Be sure to thinly slice it to intensify the fragrance.
- Green Onion – Thinly slice the green onion to get the most of its fragrance.
Optional Ingredients
- Dried Chilies – For extra spiciness, some people add dried red chilies. If you want to add a subtle but sharp kick to your oil, you can add some.
- Sesame Oil – Some people add sesame oil when they make chili oil. But I find that the fragrance of sesame oil can overpower the overall taste of chili oil even with just a small amount. You are welcome to add some if you want, but just beware that it will shorten the shelf life of chili oil.
How to Use Korean Chili Oil
As I mentioned earlier, Korean chili oil is most commonly used in spicy soup dishes and also Koreanized Chinese dishes in Korea. See below for some examples.
- Sundubu Jjigae (순두부찌개, Spicy soft tofu stew)
- Yukgaejang (육개장, Spicy Korean beef stew) – Recipe coming up
- Jjampong (짬뽕, Spicy seafood noodle soup)
- Korean ramyun (라면, ramen) – Hot chili oil can add some value even to an instant ramen dish. It adds richness and depth of flavor.
- Mix with soy dipping sauce to spice up the sauce a little bit – Soy dipping sauce is often served with Korean pancakes and Korean dumplings.
The main purpose of chili oil is to make a dish spicier while minimizing the use of chili flakes. Because if you add too much Korean chili flakes in a dish, it can give a gritty texture. It also adds vigorously red color to a dish, making it more invigorating and appetizing.
To use, simply replace the regular oil with Korean chili oil when the recipe calls for it. It will bring out a new level of deliciousness and excitement.
How to Store Chili Oil
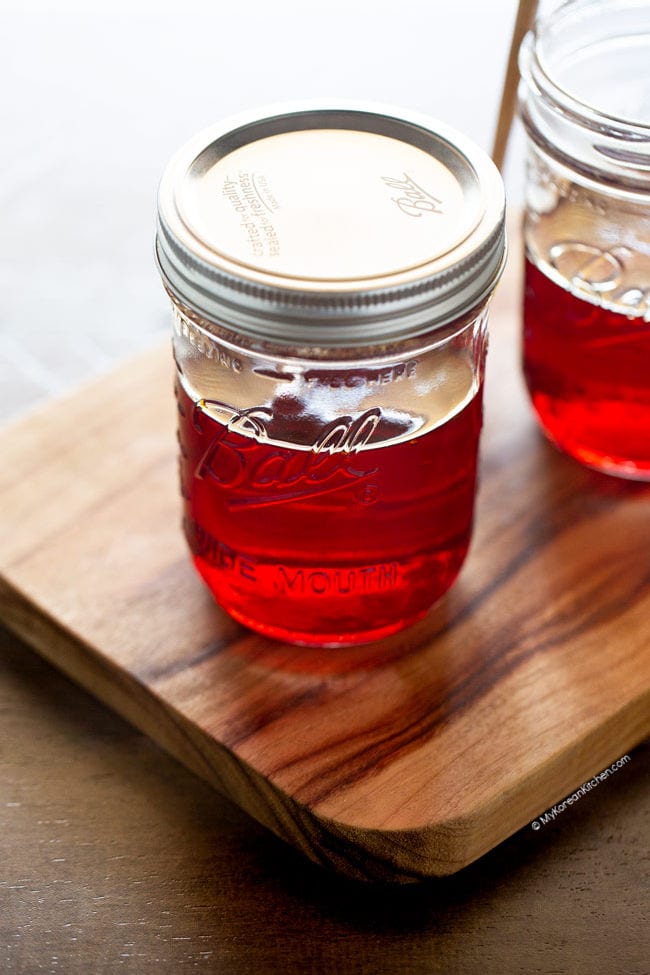
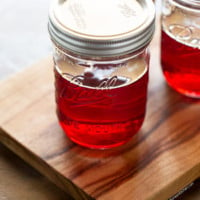
Store the oil in an air tight glass jar and refrigerate to extend the shelf life.
From my own experience, you can keep the chili oil for about 2-3 months in the fridge, although some people say it can last even more, anywhere between 6 to 12 months, depending on the storage condition and the way you use the oil.
Just watch out for oil going rancid after 2-3 months of refrigeration. You will notice the unique unpleasant smell if it develops. Discard the oil if that happens.
Ingredients for Korean Chili Oil (Yields about 1 Cup)
- 1/2 cup gochugaru (Korean chili flakes)
- 40g /1.4 ounces garlic cloves, peeled, washed and thinly sliced
- 40g / 1.4 ounces ginger, peeled, washed, and thinly sliced
- 70g / 2.4 ounces green onion, mostly white part, thinly sliced vertically
- 1.5 cups neutral cooking oil (I used rice bran oil, but canola or grape-seed oil can work too.)
How to Make Korean Chili Oil
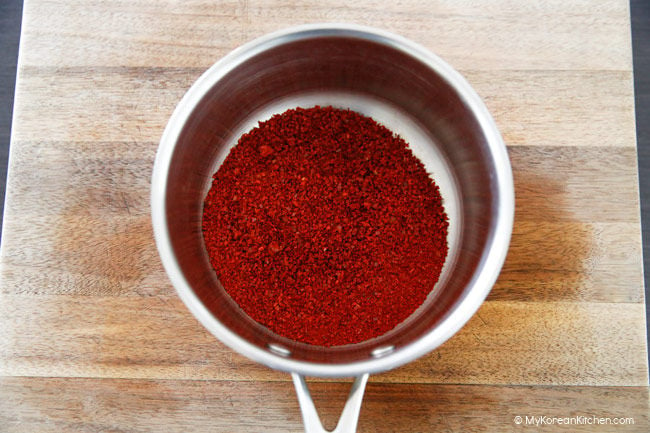
1. Add the Korean chili flakes in a medium sized heat proof bowl or a small stainless steel pot. (A pot with a long handle is a great option as you can filter the oil easier later on.)
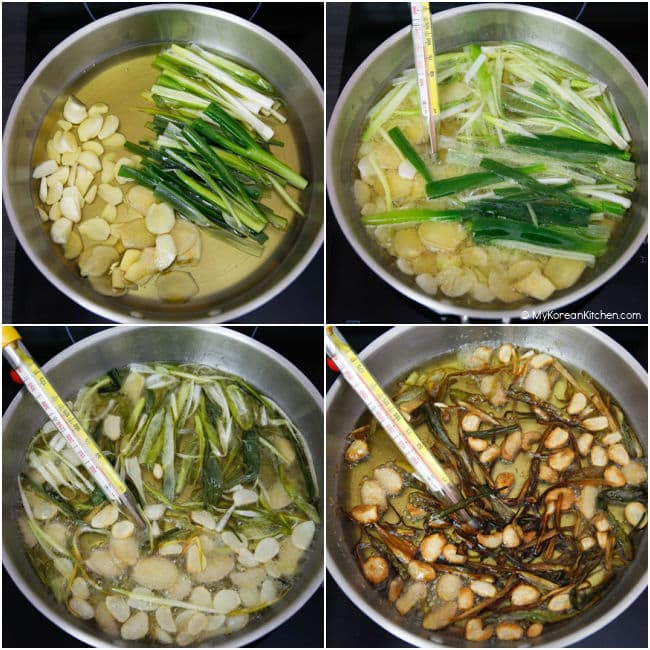
2. Add in the garlic, ginger, green onion into a wide base saucepan or sauté pan. Pour the cooking oil and bring it to boil over medium high heat until the aromatics start turning light brown or until the oil temperature reaches about 170 C / 340 F when you use an instant thermometer. Depending on your stove type, it will be between 5 to 10 mins to reach this point.
Another sign you could use is by splashing a small amount (about 2 tsp) of boiled oil over the Korean chili flakes. If the temperature is high enough, the chili flakes will make some sizzling bubbles. Turn the heat off.
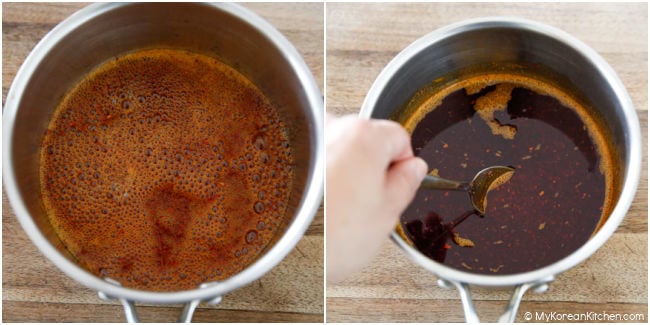
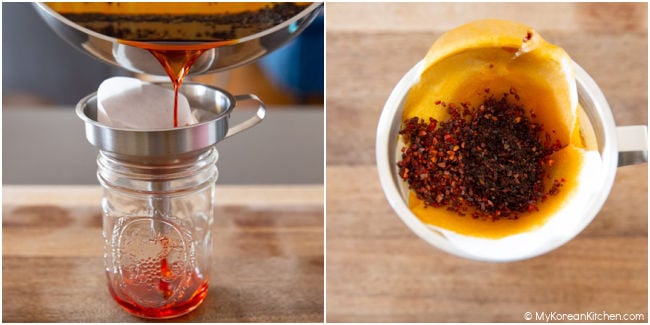
3. Scoop out the aromatic vegetables using a slotted spoon or tongs and discard. Or strain them while pouring the oil over the chili flakes (from step 1) in a few batches. It will make small sizzling bubbles initially then die down as it cools.
Stir around the chili flakes and oil to mix them well. Steep the chili flakes for 15 mins and allow it to bring out the flavor and color.
4. Filter the oil using a funnel and filter paper and transfer the chili oil into a sterilized glass jar. (Most Koreans do not keep the residual chili flakes after steeping but if you want to you can keep them. Just skip the filtering process.)
To store, refrigerate the jar. Try to use the oil within 2 months.
To use, give the oil a stir before using and always use a clean spoon to scoop it out.

Love Korean food? Browse lots more Korean recipes from my easy Korean recipe collections. And subscribe to my newsletter and follow along on Facebook, Pinterest and Instagram for all of the latest updates.
Korean Chili Oil Recipe
Ingredients
- 1/2 cup Korean chili flakes
- 40 g garlic cloves (1.4 ounces), peeled, washed and thinly sliced
- 40 g ginger (1.4 ounces), peeled, washed, and thinly sliced
- 70 g green onion (2.4 ounces), peeled, washed, and thinly sliced
- 1.5 cups cooking oil (I used rice bran oil, but canola or grape-seed oil can work too.)
Instructions
- Add the Korean chili flakes in a medium sized heat proof bowl or a small stainless steel pot. (A pot with a long handle is a great option as you can filter the oil easier later on.)
- Add in the garlic, ginger, green onion into a wide base saucepan or sauté pan. Pour the cooking oil and bring it to boil over medium high heat until the aromatics start turning light brown or until the oil temperature reaches about 170 C / 340 F when you use an instant thermometer. Depending on your stove type, it will be between 5 to 10 mins to reach this point. Another sign you could use is by splashing a small amount (about 2 tsp) of boiled oil over the Korean chili flakes. If the temperature is high enough, the chili flakes will make some sizzling bubbles. Turn the heat off.
- Scoop out the aromatic vegetables using a slotted spoon or tongs and discard. Or strain them while pouring the oil over the chili flakes (from step 1) in a few batches. It will make small sizzling bubbles initially then die down as it cools. Stir around the chili flakes and oil to mix them well. Steep the chili flakes for 15 mins and allow it to bring out the flavor and color.
- Filter the oil using a funnel and filter paper and transfer the chili oil into a sterilized glass jar. (Most Koreans do not keep the residual chili flakes after steeping but if you want to you can keep them. Just skip the filtering process.) To store, refrigerate the jar. Try to use the oil within 2 months. To use, give the oil a stir before using and always use a clean spoon to scoop it out.
Notes
- If you want hotter Korean chili oil, you may mix in some dried red chilies and/or combine spicy Korean chili flakes along with regular Korean chili flakes. I provided more information about these in the main post above.
- If you are not sure whether you can finish the oil soon enough, I recommend you halve the recipe initially.
Nutrition Info (per serving)
The nutrition information shown is an estimate provided by an online nutrition calculator. It should not be considered a substitute for a professional nutritionist’s advice.

")
 - Easy Korean Scallion Kimchi Recipe")