This is my comprehensive guide to making garaetteok, the classic Korean cylinder-shaped rice cake, completely from scratch at home. I’ll walk you through every step, from making your own rice flour to shaping chewy, freshly made garaetteok, and share practical ways to use them in everyday Korean dishes.
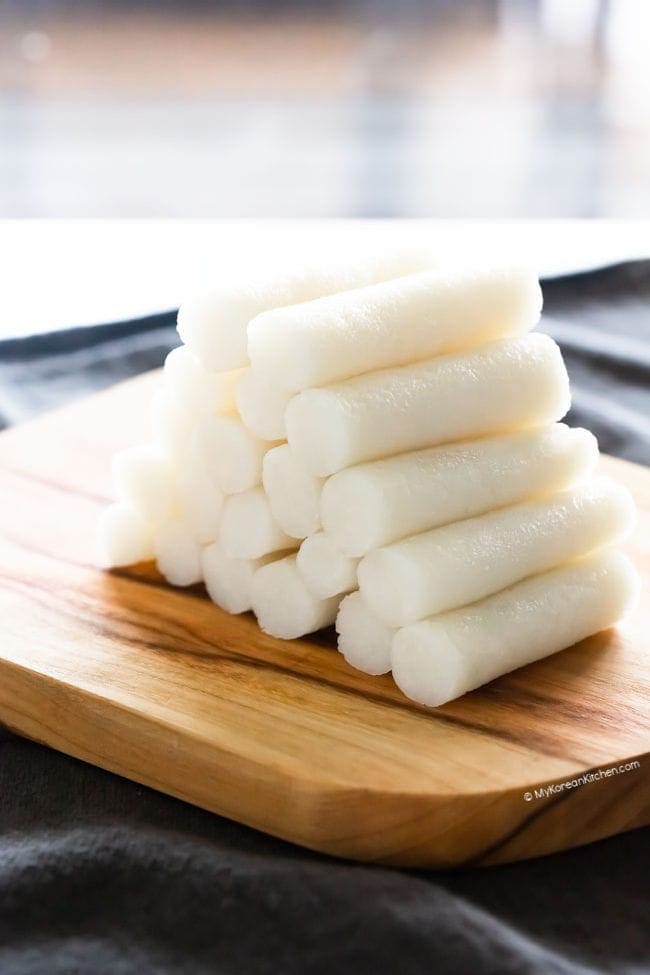
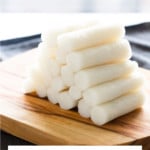
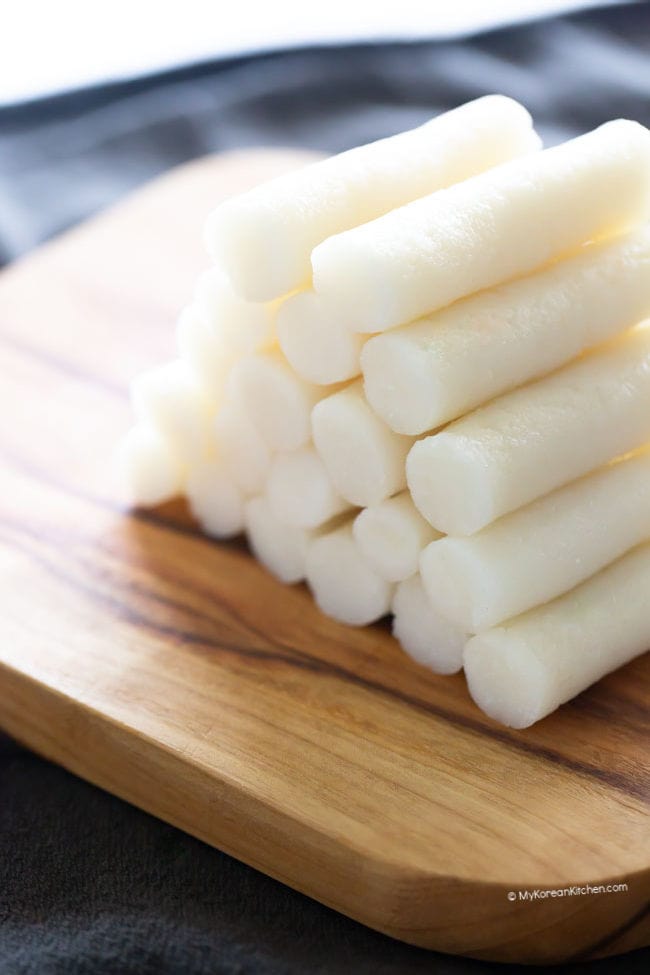
Garaetteok is a classic Korean rice cake most commonly used in dishes like tteokbokki (spicy rice cakes) and tteokguk (rice cake soup).
I usually don’t make rice cakes from scratch because they’re easy to buy at my local Korean grocer. But over the years, I’ve received many requests for a homemade garaetteok recipe from readers who don’t have access to a Korean store, which makes it hard to enjoy dishes like tteokbokki or tteokguk at home.
So with a happy heart, I’m excited to finally share my garaetteok recipe with you. I truly hope you find it helpful.
Table of Contents
- What is Garaetteok?
- Making Your Own Rice Flour
- Tips for Success
- Key Ingredients You’ll Need
- Microwave Cooking Method
- Steamer Cooking Method
- Preparing for Tteokbokki
- Preparing for Tteokguk
- Storage and Freshness Tips
- Creative Ways to Use It
- Step-by-Step Video Tutorial
What is Garaetteok
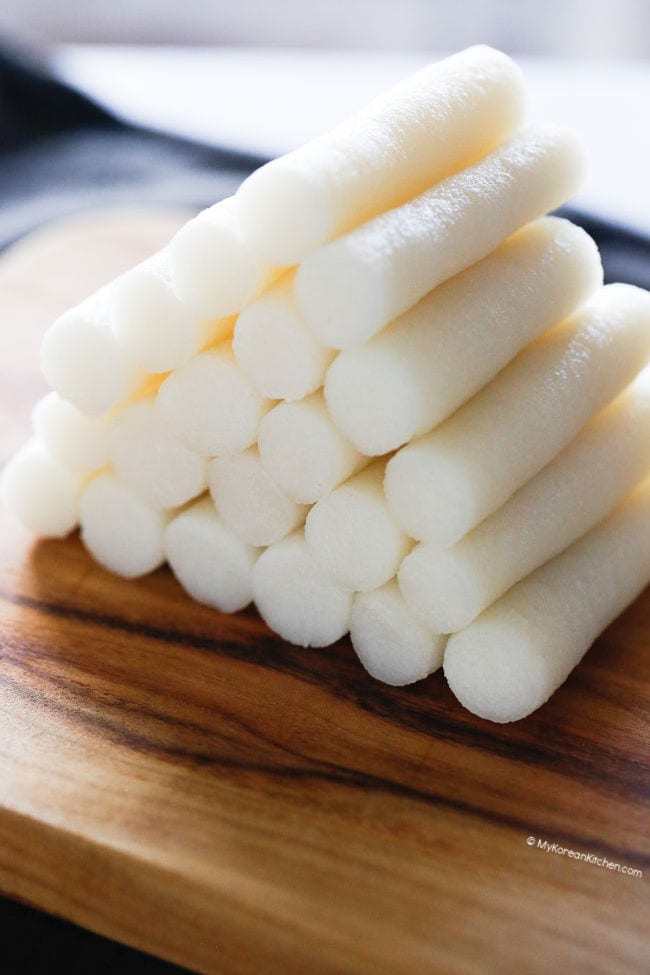
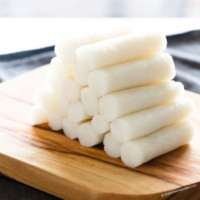
Garaetteok, also known as garae-tteok or garaeddeok (가래떡), is a classic Korean rice cake shaped into long cylinders. It’s made with non-glutinous rice flour (mepssal-garu, 멥쌀가루) and has a pleasantly chewy, slightly bouncy texture.
Garaetteok is white in color and fairly mild in taste, which makes it perfect for soaking up flavors. You’ll often find it used in stir-fried dishes like tteokbokki or simmered in comforting soups such as tteokguk.
When making garaetteok from scratch, short-grain or medium-grain rice works best. Long-grain rice varieties, like jasmine or basmati, don’t produce the right texture and aren’t suitable for this recipe.
To make the rice flour, the rice is soaked overnight, then wet-milled into a fine powder. You’ll find detailed, step-by-step instructions below.
Making Your Own Rice Flour
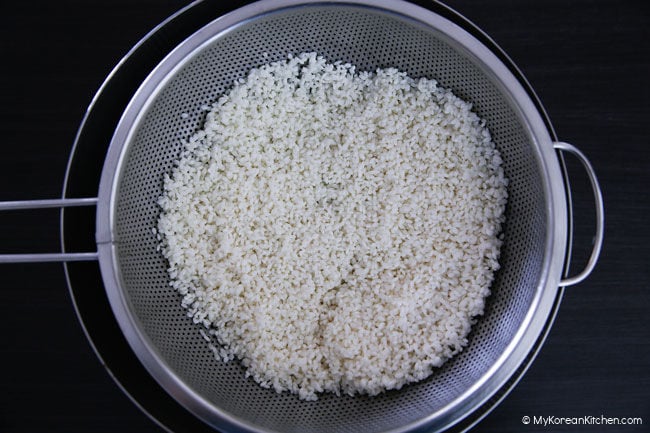
1. Rinse 2.5 cups of rice (short-grain or medium-grain rice, such as sushi rice, 535 g / 1.17 lb) under cold water until the water runs clear. Transfer the rice to a medium bowl and add enough water to fully submerge it. Cover and soak for about 12 hours or overnight.
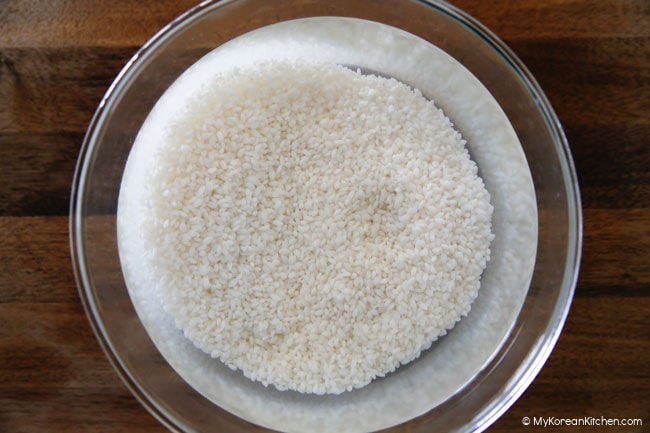
2. Drain the rice well and let it sit in a fine-mesh strainer at room temperature for about 1 hour to remove excess surface moisture. For reference, the soaked rice will weigh roughly 697 g (1.53 lb) once fully hydrated.
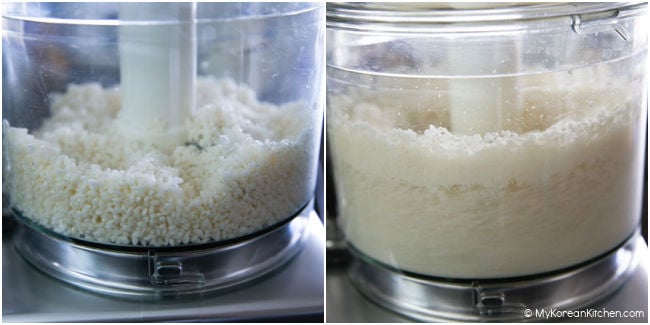
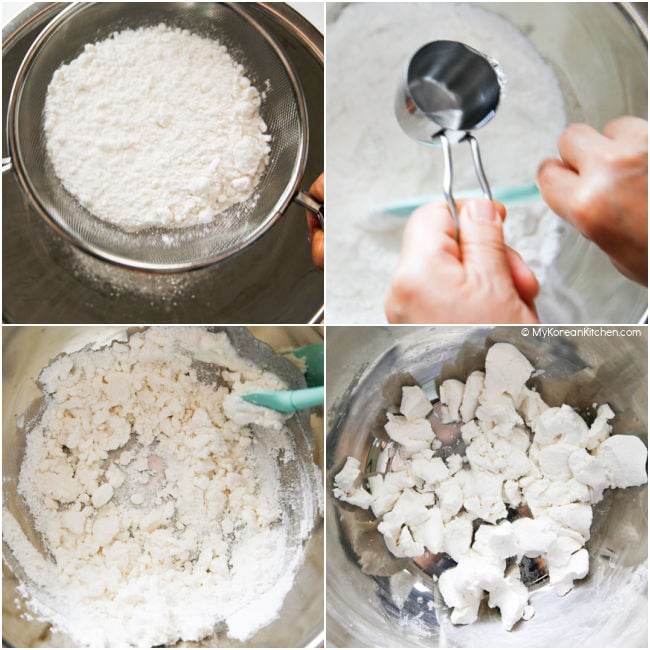
3. Grind the rice in a powerful food processor until it becomes a fine, flour-like powder. If needed, work in batches so the rice grinds more evenly. Stop periodically to scrape down the sides and redistribute the rice so it grinds evenly.
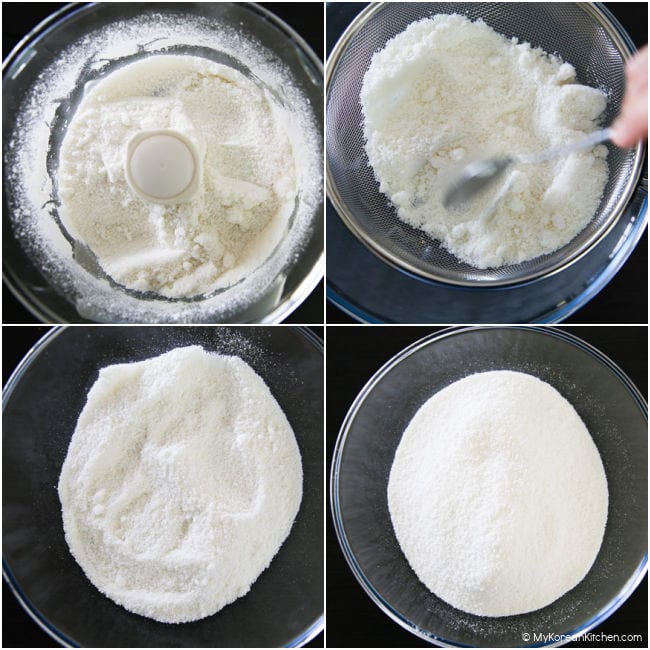
4. Sift the rice flour into a clean bowl in two or three batches, as it sifts more easily in smaller quantities. Remove any clumps or unground rice grains. Once all the flour has been sifted, sift it one more time to ensure it is very fine.
If you find a noticeable amount of unground rice, return it to the food processor and grind it again, then sift once more. In our testing, we ran the rice through the grinder more than once to achieve an extra-fine texture. This step is important for smooth garaetteok, as insufficiently fine flour can result in gritty rice cakes.
You should end up with about 4.5 cups of fine rice flour.
Tips for Success
Rice Flour Tips
- If available, you can buy short-grain rice flour from a Korean grocer. It is usually found in the freezer section or near the flour, rice, or grain aisle.
- If making rice flour from scratch, soak the rice for at least 12 hours. Longer soaking results in finer flour after grinding.
- During hot or humid weather, soak the rice in the fridge and keep it covered.
- Use short-grain or medium-grain rice such as sushi rice. These rice varieties have the right starch balance to create the chewy, slightly bouncy texture that garaetteok is known for.
- When I tested long-grain rice flour, the dough came together easily, but the rice cakes developed a slight grey tinge and lacked the proper tteok-like texture. They were not elastic or pleasantly bouncy.
- In my testing, medium-grain rice produced slightly softer and chewier rice cakes than short-grain rice, though both work well.
- Homemade rice flour is usually not as fine as professionally milled flour because home grinders cannot fully replicate wet commercial milling. As a result, some coarser particles remain, which can slightly affect the smoothness of the rice cake. Sifting and re-grinding the flour help create a more uniform texture.
- Store leftover rice flour in a ziplock bag or airtight container in the freezer for up to 3 months. Thaw it in the fridge or at room temperature, then sift before using to break up any clumps.
Rice Cake Tips
- Adding starch helps give the rice cakes a softer, chewier texture, so I recommend including it.
- The amount of boiling water needed depends on how dry or moist your rice flour is. You may need slightly more or less water than stated in the recipe.
- If additional boiling water is needed, add it gradually using a small measuring spoon. This helps you adjust in small increments and prevents the mixture from becoming too wet.
- Steamed rice cakes can be made using either a microwave or a steamer. Keep in mind that the dough can be easily overcooked in a microwave, especially if there is not enough water.
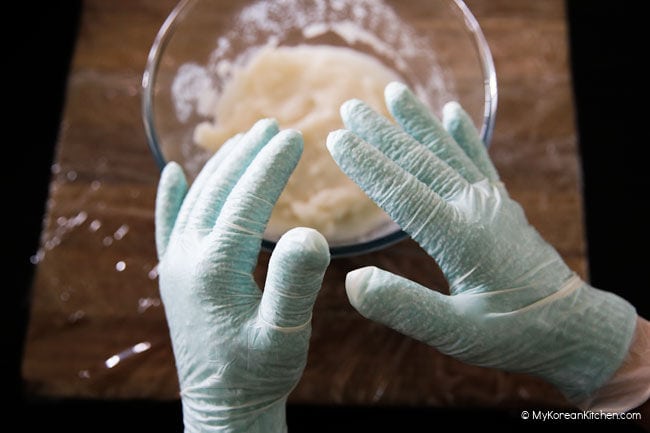
- When handling the hot dough, wear thick cotton gloves first, then food-safe gloves on top. This protects your hands from heat and prevents sticking while kneading and pounding.
- Once the dough cools slightly and is ready to shape, you can remove the gloves. At this stage, the dough should no longer stick and is easier to form into smooth cylinders.
Key Ingredients You’ll Need
- 2 cups of wet-milled rice flour (300 grams), from short or medium grain (e.g. sushi rice)
- 1 Tbsp cornstarch
- 1 tsp fine salt
- 3/4 cups boiling water (for microwave version, 175 grams), divided into three sets of 1/4 cups
- 1/4 cups boiling water (for steamer version, 60 grams)
- 1/2 tsp sesame oil
* 1 Tbsp = 15 ml, 1 Cup = 250 ml
** The amounts of water used above are based on homemade, wet-milled rice flour. Wet-milled rice flour contains more moisture than dry-milled rice flour, so it requires less water for this recipe. If you are unable to find wet-milled rice flour at your local grocer, I recommend making your own using the instructions above. It’s very easy to do at home!
*** Above ingredients will results in about 450 grams (1 pound) rice cake.
Microwave Cooking Method
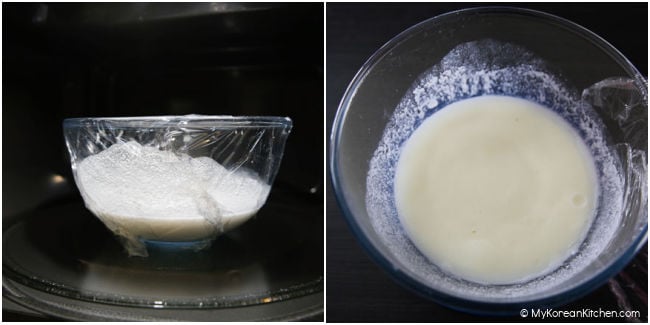
1. Combine the rice flour, cornstarch, fine salt, and 1/4 cup of boiling water in a microwave-safe bowl. Mix well. Add another 1/4 cup of boiling water and mix again until smooth. The mixture should be easy to stir, not stiff like cookie dough.
2. Cover the bowl with cling wrap, leaving a small gap for steam to escape. Microwave on high for 2 minutes (based on a 1250 W microwave).
3. Carefully remove the bowl, add another 1/4 cup of boiling water, and mix well. Cover again and microwave on high for a further 1 minute 30 seconds. Remove from the microwave.
4. Line a cutting board with a silicone baking mat or several layers of cling wrap to prevent sticking. Carefully transfer the hot rice cake dough onto the prepared surface.
5. Put on thick cotton gloves first, then food-safe gloves over them, as the dough will be very hot. Alternatively, you can use a single pair of thick, heat-resistant, food-safe gloves if you have them. Knead the dough, then pound it with a pestle for about 5 minutes until smooth and elastic.
Steamer Cooking Method
1. Combine the rice flour, cornstarch, and fine salt in a bowl. Gradually add 1/4 cup of boiling water, mixing gently so the flour is just moistened without becoming wet or soggy. The mixture should look lightly hydrated rather than fully fluid, not like a batter.
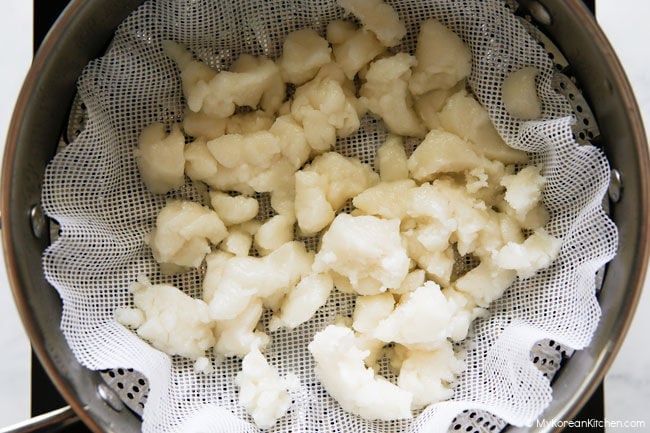
2. Line the steamer with a silicone steaming mat (recommended), baking paper with a few holes poked in to allow steam to pass through, or a clean tea towel. Spread the rice flour mixture evenly over the liner, breaking it up into smaller pieces rather than leaving it as one solid mass. This helps it cook through more quickly and evenly. Cover and steam over high heat for 15 minutes.
3. Line a cutting board with a silicone baking mat or several layers of cling wrap to prevent sticking while shaping the rice cake. Place the steamed rice cake dough on the mat.
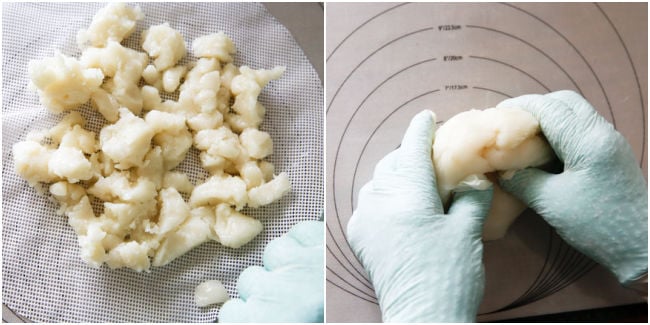
4. Put on thick cotton gloves first, then food-safe gloves over them, as the dough will be very hot. Alternatively, you can use a single pair of thick, heat-resistant, food-safe gloves if you have them. Knead the dough, then pound it with a pestle for about 5 minutes until smooth and elastic.
At this point, the rice cake dough is ready to be shaped. Follow the steps below depending on how you plan to use it.
Preparing for Tteokbokki
1. Divide the rice cake dough evenly into 5 pieces.
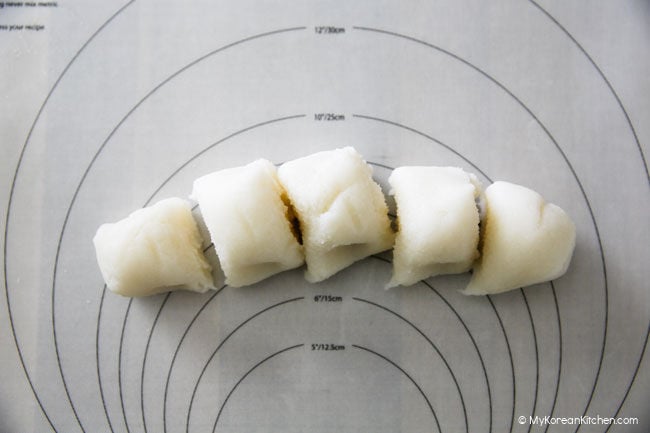
2. Lightly coat your palms with about 1/2 teaspoon of sesame oil and gently rub it over the rice cake pieces to prevent sticking.
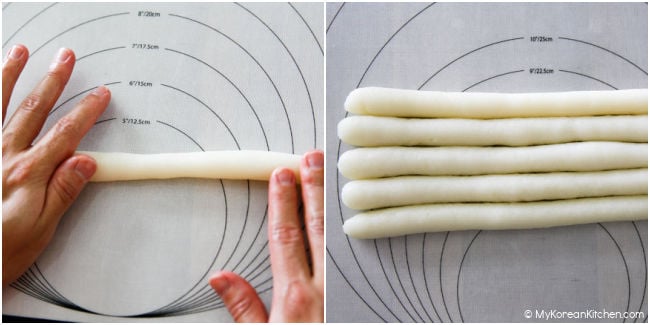
3. Roll each piece into a cylinder about 1 to 1.5 cm (0.4 to 0.6 inch) in diameter. Trim the ends, then cut the cylinders into 6 cm (about 2.5 inch) lengths, roughly the size of a little finger. The rice cakes are now ready to use in tteokbokki or other stir-fry dishes.
Preparing for Tteokguk
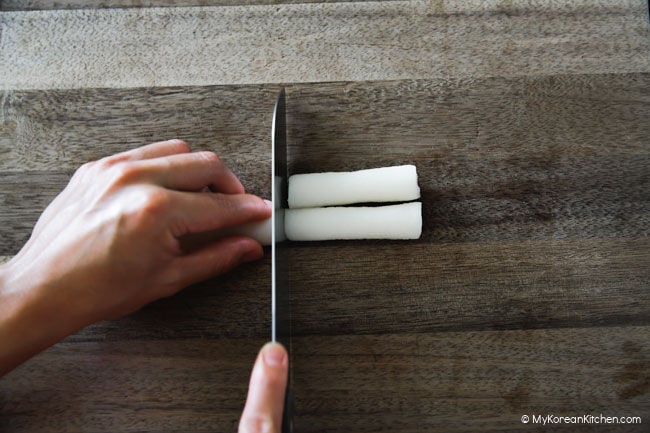
1. Divide the rice cake dough evenly into 2 pieces.
2. Lightly coat your palms with about 1/2 teaspoon of sesame oil and gently rub it over the rice cake pieces to prevent sticking. Roll each piece into a cylinder about 2 to 3 cm (0.8 to 1.2 inch) in diameter.
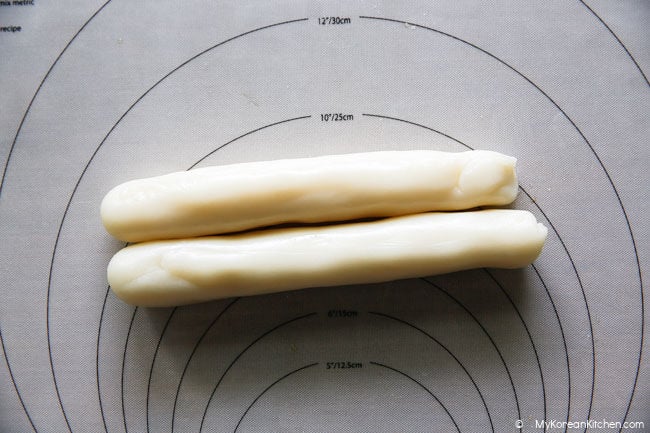
3. Place the rice cakes on a large plate, cover with cling wrap, and refrigerate for about 1 hour until firm, which makes them easier to slice. Slice thinly (about 0.5 cm / 0.2 inch thick) on a diagonal into oval shapes. If you’re short on time, you can slice them soon after shaping, but chilling is recommended for cleaner cuts. The rice cakes are now ready to use in tteokguk.

Storage and Freshness Tips
It is best to use the rice cake on the day you make it as it is fresher, softer and chewier. But if you want to store it for later use, you can freeze it for up to 1 month in a sealed plastic bag (e.g. ziplock bag). Be sure to slice the rice cake to your requirement prior to freezing.
Creative Ways to Use It
Here are some recipes that use garatteok as ingredients. They are all very delicious, addictive and enjoyable in different ways. I hope you get to try these recipes soon.
- Tteokbokki (Spicy Rice Cakes)
- Tteokguk (Korean Rice Cake Soup)
- Tteok-Kkochi (Rice Cake Skewers)
- Gungjung Tteokbokki (Non-Spicy Tteokbokki)
- Rabokki (Ramen Tteokbokki)
- Rose Tteokbokki
Discover More! Explore our site for authentic Korean recipes—from mastering the art of perfect Korean BBQ at home to creating delicious banchan (Korean side dishes) and other tasty, easy Korean dishes. Let us inspire your next meal!
Step-by-Step Video Tutorial
Garaetteok (Rice Cake Recipe)
Ingredients
- 2 cups wet-milled rice flour (300g), from short or medium grain (e.g. sushi rice)
- 1 Tbsp cornstarch
- 1 tsp fine salt
- 3/4 cups water (for microwave version, 175g), boiled, divided into three sets of 1/4 cups
- 1/4 cups water (for steamer version, 60g), boiled
- 1/2 tsp sesame oil
Instructions
HOW TO MAKE RICE FLOUR
- Rinse 2.5 cups of rice (short-grain or medium-grain rice, such as sushi rice, 535 g / 1.17 lb) under cold water until the water runs clear. Transfer the rice to a medium bowl and add enough water to fully submerge it. Cover and soak for about 12 hours or overnight.
- Drain the rice well and let it sit in a fine-mesh strainer at room temperature for about 1 hour to remove excess surface moisture. For reference, the soaked rice will weigh roughly 697 g (1.53 lb) once fully hydrated.
- Grind the rice in a powerful food processor until it becomes a fine, flour-like powder. If needed, work in batches so the rice grinds more evenly. Stop periodically to scrape down the sides and redistribute the rice so it grinds evenly.
- Sift the rice flour into a clean bowl in two or three batches, as it sifts more easily in smaller quantities. Remove any clumps or unground rice grains. Once all the flour has been sifted, sift it one more time to ensure it is very fine.If you find a noticeable amount of unground rice, return it to the food processor and grind it again, then sift once more. In our testing, we ran the rice through the grinder more than once to achieve an extra-fine texture. This step is important for smooth garaetteok, as insufficiently fine flour can result in gritty rice cakes.You should end up with about 4.5 cups of fine rice flour.
HOW TO MAKE RICE CAKE WITH A MICROWAVE
- Combine the rice flour, cornstarch, fine salt, and 1/4 cup of boiling water in a microwave-safe bowl. Mix well. Add another 1/4 cup of boiling water and mix again until smooth. The mixture should be easy to stir, not stiff like cookie dough.
- Cover the bowl with cling wrap, leaving a small gap for steam to escape. Microwave on high for 2 minutes (based on a 1250 W microwave).
- Carefully remove the bowl, add another 1/4 cup of boiling water, and mix well. Cover again and microwave on high for a further 1 minute 30 seconds. Remove from the microwave.
- Line a cutting board with a silicone baking mat or several layers of cling wrap to prevent sticking. Carefully transfer the hot rice cake dough onto the prepared surface.
- Put on thick cotton gloves first, then food-safe gloves over them, as the dough will be very hot. Alternatively, you can use a single pair of thick, heat-resistant, food-safe gloves if you have them. Knead the dough, then pound it with a pestle for about 5 minutes until smooth and elastic.
HOW TO MAKE RICE CAKE WITH A STEAMER
- Divide the rice cake dough evenly into 5 pieces.
- Line the steamer with a silicone steaming mat (recommended), baking paper with a few holes poked in to allow steam to pass through, or a clean tea towel. Spread the rice flour mixture evenly over the liner, breaking it up into smaller pieces rather than leaving it as one solid mass. This helps it cook through more quickly and evenly. Cover and steam over high heat for 15 minutes.
- Line a cutting board with a silicone baking mat or several layers of cling wrap to prevent sticking while shaping the rice cake. Place the steamed rice cake dough on the mat.
- Put on thick cotton gloves first, then food-safe gloves over them, as the dough will be very hot. Alternatively, you can use a single pair of thick, heat-resistant, food-safe gloves if you have them. Knead the dough, then pound it with a pestle for about 5 minutes until smooth and elastic.
PREPARE RICE CAKE FOR TTEOKBOKKI (SPICY RICE CAKE)
- Divide the rice cake dough evenly into 5 pieces.
- Lightly coat your palms with about 1/2 teaspoon of sesame oil and gently rub it over the rice cake pieces to prevent sticking.
- Roll each piece into a cylinder about 1 to 1.5 cm (0.4 to 0.6 inch) in diameter. Trim the ends, then cut the cylinders into 6 cm (about 2.5 inch) lengths, roughly the size of a little finger. The rice cakes are now ready to use in tteokbokki or other stir-fry dishes.
PREPARE RICE CAKE FOR TTEOKGUK (KOREAN RICE CAKE SOUP)
- Divide the rice cake dough evenly into 2 pieces.
- Lightly coat your palms with about 1/2 teaspoon of sesame oil and gently rub it over the rice cake pieces to prevent sticking. Roll each piece into a cylinder about 2 to 3 cm (0.8 to 1.2 inch) in diameter.
- Place the rice cakes on a large plate, cover with cling wrap, and refrigerate for about 1 hour until firm, which makes them easier to slice. Slice thinly (about 0.5 cm / 0.2 inch thick) on a diagonal into oval shapes. If you’re short on time, you can slice them soon after shaping, but chilling is recommended for cleaner cuts. The rice cakes are now ready to use in tteokguk.
Notes
- 1 Tbsp = 15 ml, 1 cup = 250 ml
- The amounts of water used above are based on homemade rice flour, which is wet-milled. Wet-milled rice flour is more moist than dry-milled rice flour, requiring less water for this recipe. If you are unable to find wet-milled rice flour from your grocer, I suggest you make your own following the instructions above. It's very easy to make at home!
- The above ingredients will result in about 450g (1 pound) rice cake.
- Cooking time above only accounts for making rice cake using a microwave. It doesn't count for making the rice flour from scratch.
- Lots of helpful tips are mentioned in the main post above. Be sure to read them before you make garaetteok to increase your chance of success.
Nutrition Info (per serving)
The nutrition information shown is an estimate provided by an online nutrition calculator. It should not be considered a substitute for a professional nutritionist’s advice.

 - Classic Chuseok Recipe")
")