Indulge in this creamy, easy-to-make vanilla custard. Its delightful sweet aroma is perfect in a shake, paired with fresh fruits, or enjoyed alone. This versatile treat is simply delicious and irresistible.
Today, I’m sharing my vanilla custard recipe. Although it’s not a dish that would typically feature on my website, I’ve decided to share it due to many questions about the type of vanilla custard I used in my Makgeolli Shake recipe.
In that particular recipe, I used store-bought vanilla custard (similar to milk packaged in paper or plastic cartons) that’s readily available in Australia.
Given that vanilla custard is a staple dessert ingredient in Western cuisine, I hadn’t realized that many of you were having trouble finding it. Your questions took me by surprise! So, in response to your queries, I’ve decided to share my secret recipe. I hope you enjoy it as much as I do!
Key Ingredients
The basic elements required to whip up a delightful vanilla custard are quite simple: egg yolks, sugar, whole milk, and a dash of real vanilla extract. I tend to avoid using vanilla flavoring as it misses out on the authentic taste that only genuine vanilla can provide. You could use a vanilla pod, but vanilla extract is just more convenient to use, stores well, and is cheaper.
For a hint of luxury and a rich, creamy finish, I’ve chosen to add a bit of butter to the mix. As my husband often quips, everything is better with butter – and in this case, I wholeheartedly agree.
To strike the perfect balance between a thick yet pourable custard that blends seamlessly into my shakes, I’ve opted to use flour as a thickening agent. This might seem unusual because cornstarch is often the preferred choice for many, lending custard its characteristic pudding-like consistency. However, flour works just as well, while ensuring the custard remains fluid enough for blending.
Some Crucial Tips to Make Your Vanilla Custard Flawless
- Before you add the flour, give the egg mixture a thorough whisking. This will ensure your base custard is smooth and free from any lumps.
- Keep a close eye on the milk mixture as it heats, stirring it often. This will help prevent any unwanted scorching at the bottom of your saucepan.
- To achieve a silky custard and avoid curdling the eggs, it’s essential that the milk mixture is warm, but not too hot.
- Remember, freshness is everything when it comes to custard. For optimal taste and texture, store it in the refrigerator and consume it within 2-3 days.
Why You Should Make Your Own Custard at Home
There’s a certain magic that surrounds homemade food, a unique charm that simply can’t be replicated by store-bought alternatives. This rings particularly true when it comes to my homemade vanilla custard recipe. It not only elevates the deliciousness of my makgeolli shake but also subtly tones down its alcohol flavor.
The result? A shake so irresistible, it’s hard to stop at just one glass! You know what that means! It’s too deliciously risky!
The homemade version also noticeably tastes more authentic and is richer and creamier than store-bought vanilla custard, especially when enjoyed alone. So, it’s definitely worth making at home!
Ingredients for Vanilla Custard
- 3 egg yolks
- 1/4 cup white sugar (about 57g / 2 ounce)
- 2 Tbsp plain flour (all purpose flour) (20g / 0.7 ounce)
- 1 cup whole milk (250g / 8.8 ounce)
- 15g / 0.5 ounce butter, salted
- 1/4 tsp vanilla extract
* 1 Tbsp = 15 ml, 1 Cup = 250 ml
How to Make Vanilla Custard
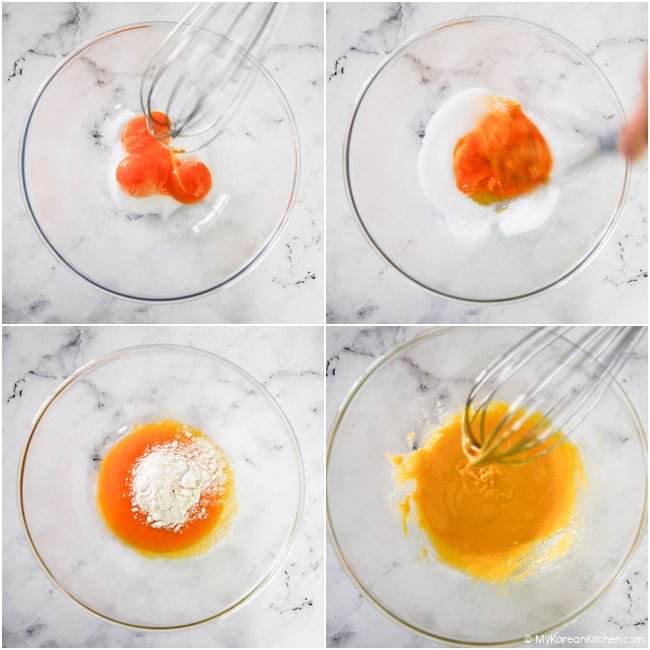
1. Combine egg yolks and white sugar in a large bowl, whisking them together until they blend seamlessly. Then, whisk in the flour until the mixture achieves a smooth consistency.
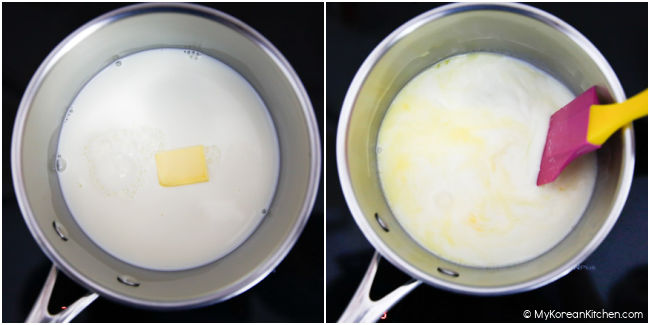
2. Place the milk and butter in a saucepan. Warm them over low heat, stirring frequently to ensure even heating. Keep the mixture on the heat until the butter is fully melted into the milk, which should take around 5 minutes.
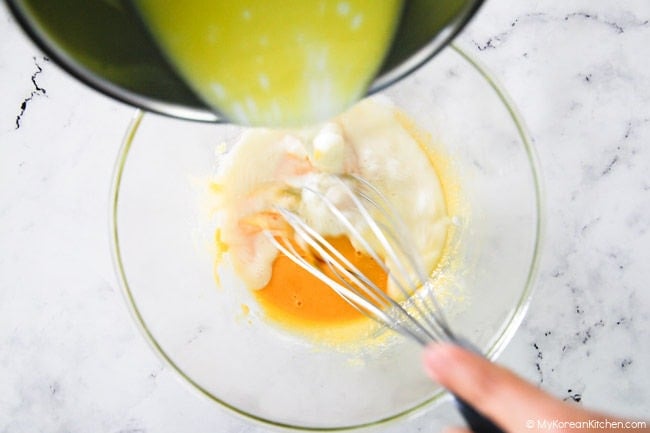
3. Gradually pour the warm milk and butter mixture into the bowl containing the egg mixture from step 1. Continuously whisk the ingredients while adding the milk to ensure a smooth combination.
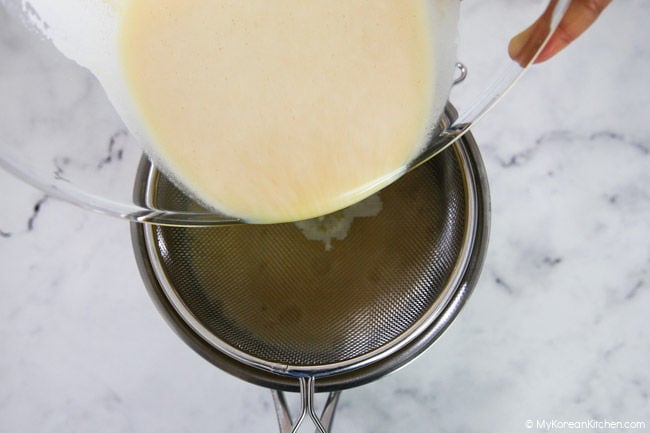
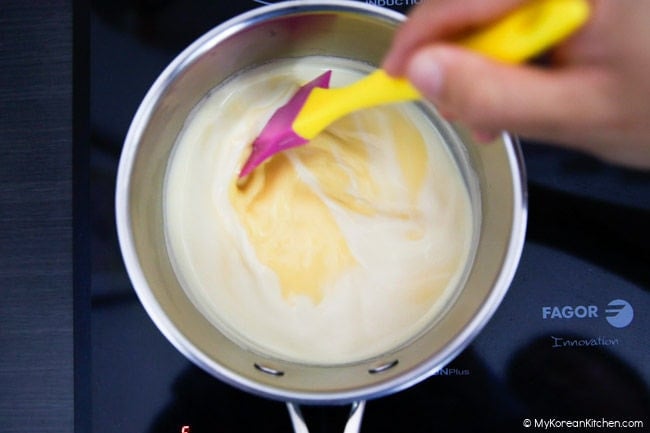
4. Strain the combined mixture through a fine-mesh strainer, returning it to the saucepan. This step will help eliminate any lumps, ensuring a silky custard. Stir in the vanilla extract, then return the saucepan to medium-low heat.
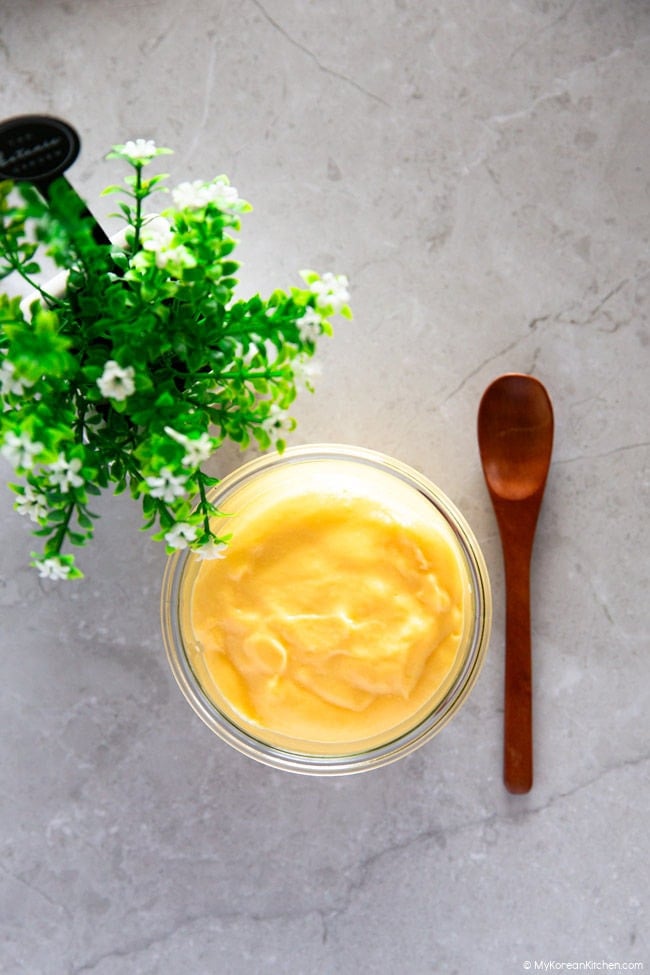
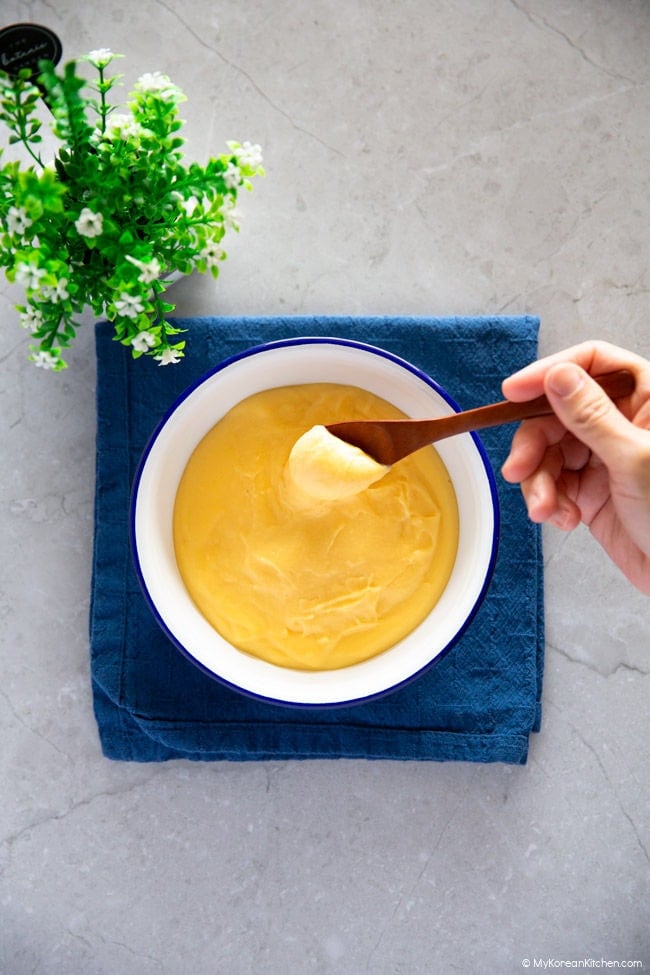
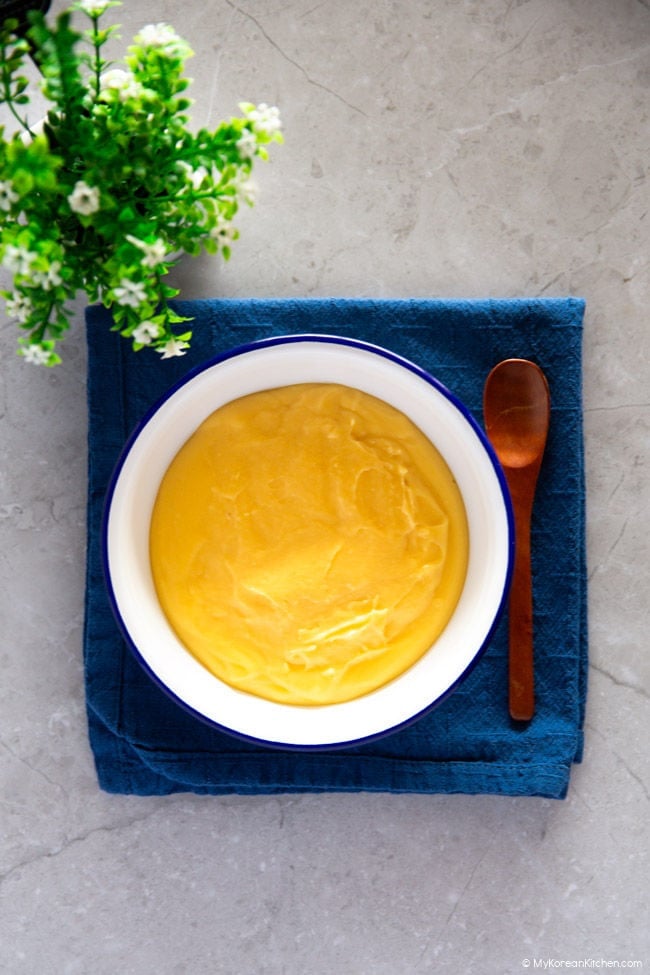
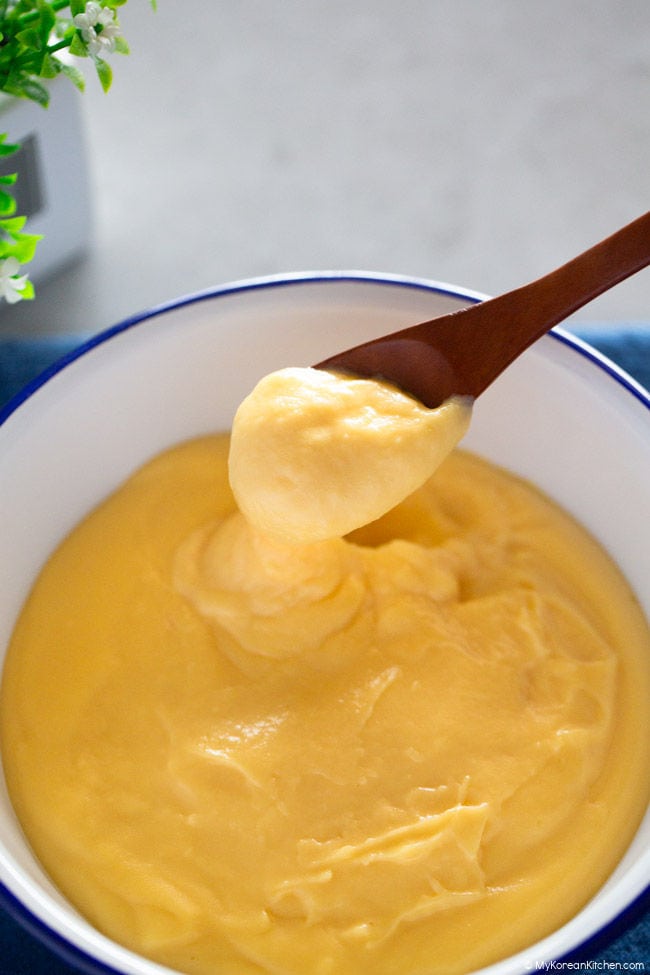
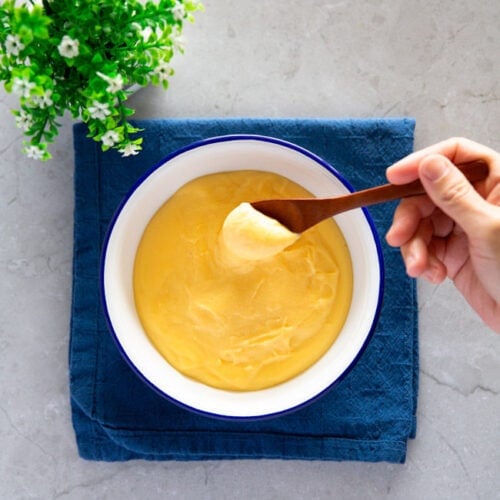
5. Continue stirring until the custard thickens to your preference. This process usually takes around 8-10 minutes. Once achieved, remove the saucepan from the heat and allow the custard to cool down for about 5 minutes. Refrigerate the custard for at least 2 hours to cool down and let it set properly.
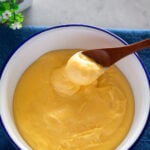
6. Your delicious homemade custard is now ready to enjoy. Use it in your shakes, such as a Makgeolli Shake, serve it with fresh fruit, or simply enjoy it on its own.
Love Korean food? Browse even more delicious ideas from my collection of easy Korean recipes. Don’t forget to subscribe to my newsletter to stay updated on new recipes, what the MKK community is cooking, and K-Dramas!
Vanilla Custard Recipe
Ingredients
- 3 egg yolks
- 1/4 cup white sugar (about 57g / 2 ounce)
- 2 Tbsp plain flour (all purpose flour) (20g / 0.7 ounce)
- 1 cup whole milk (250g / 8.8 ounce)
- 15 g butter , salted (0.5 ounce)
- 1/4 tsp vanilla extract
Instructions
- Combine egg yolks and white sugar in a large bowl, whisking them together until they blend seamlessly. Then, whisk in the flour until the mixture achieves a smooth consistency.
- Place the milk and butter in a saucepan. Warm them over low heat, stirring frequently to ensure even heating. Keep the mixture on the heat until the butter is fully melted into the milk, which should take around 5 minutes.
- Gradually pour the warm milk and butter mixture into the bowl containing the egg mixture from step 1. Continuously whisk the ingredients while adding the milk to ensure a smooth combination.
- Strain the combined mixture through a fine-mesh strainer, returning it to the saucepan. This step will help eliminate any lumps, ensuring a silky custard. Stir in the vanilla extract, then return the saucepan to medium-low heat.
- Continue stirring until the custard thickens to your preference. This process usually takes around 8-10 minutes. Once achieved, remove the saucepan from the heat and allow the custard to cool down for about 5 minutes. Refrigerate the custard for at least 2 hours to cool down and let it set properly.
- Your delicious homemade custard is now ready to enjoy. Use it in your shakes, such as a Makgeolli Shake, serve it with fresh fruit, or simply enjoy it on its own.
Notes
Nutrition Info (per serving)
The nutrition information shown is an estimate provided by an online nutrition calculator. It should not be considered a substitute for a professional nutritionist’s advice.

")
