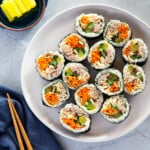
Delicious Korean rice rolls – tuna kimbap recipe. This savory tuna mayo-flavored dish has become a family favorite! It’s easy to make and so tasty. It’s one I can’t get enough of. You should give it a try!
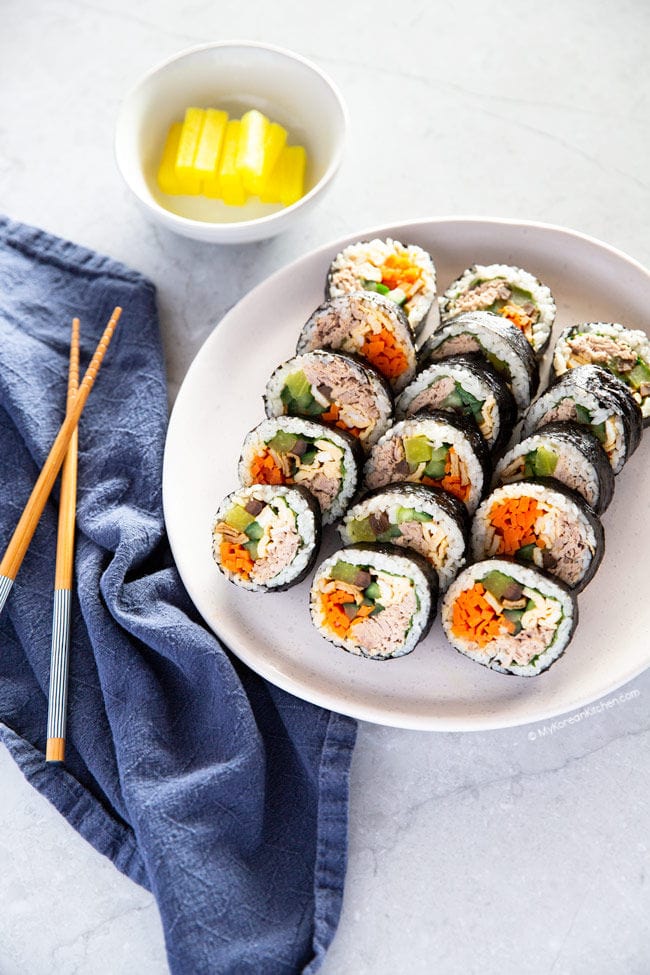
Tuna kimbap is my favorite kind of kimbap. It is a fantastic dish that’s packed with savory deliciousness. It has more flavor than my easy kimbap recipe and tastes great. The distinctive smell from the perilla leaves and tuna complement each other very well.
What is Tuna Kimbap
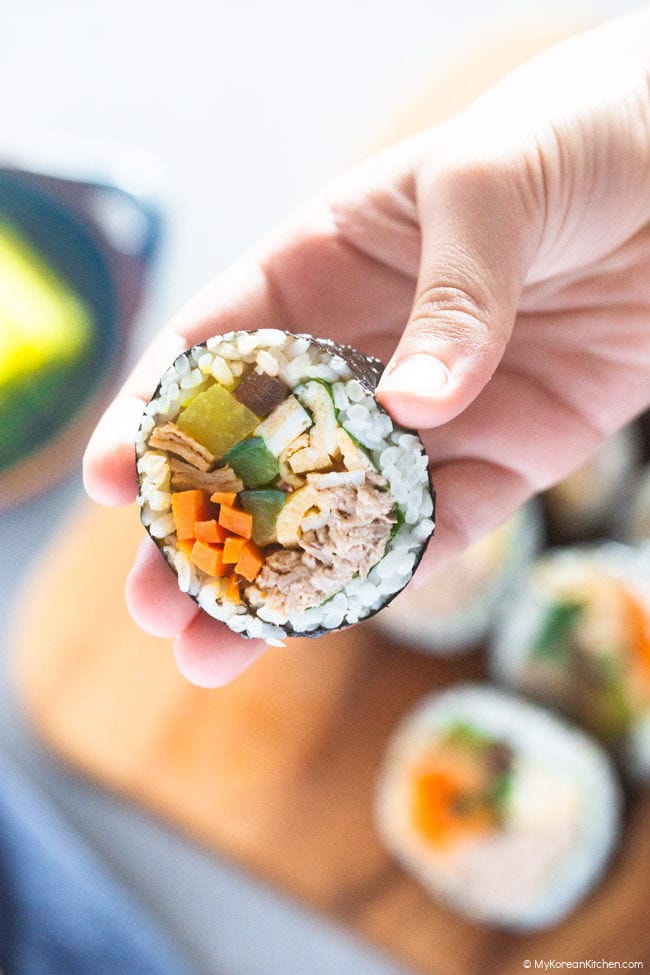
Tuna kimbap (Chamchi kimbap, 참치 김밥) is a popular Korean dish. It is a type of kimbap / gimbap (김밥), which are rice rolls with various ingredients inside.
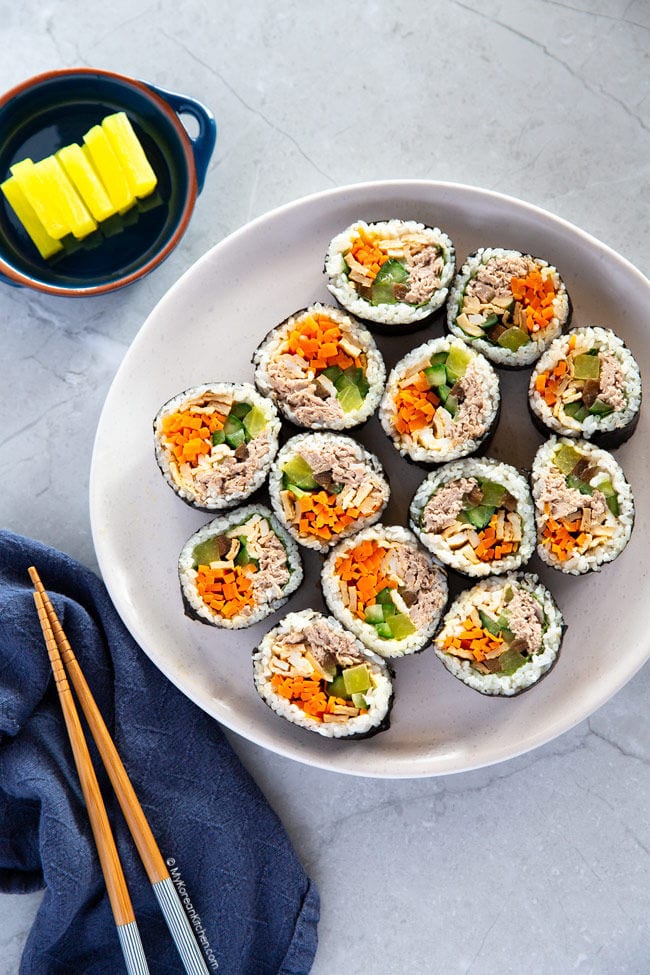
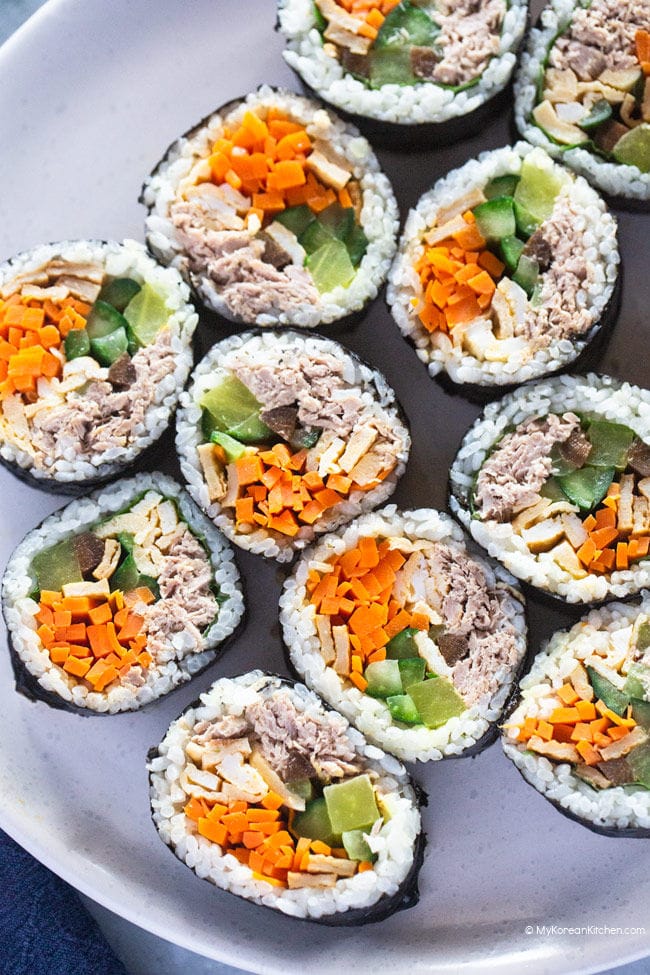
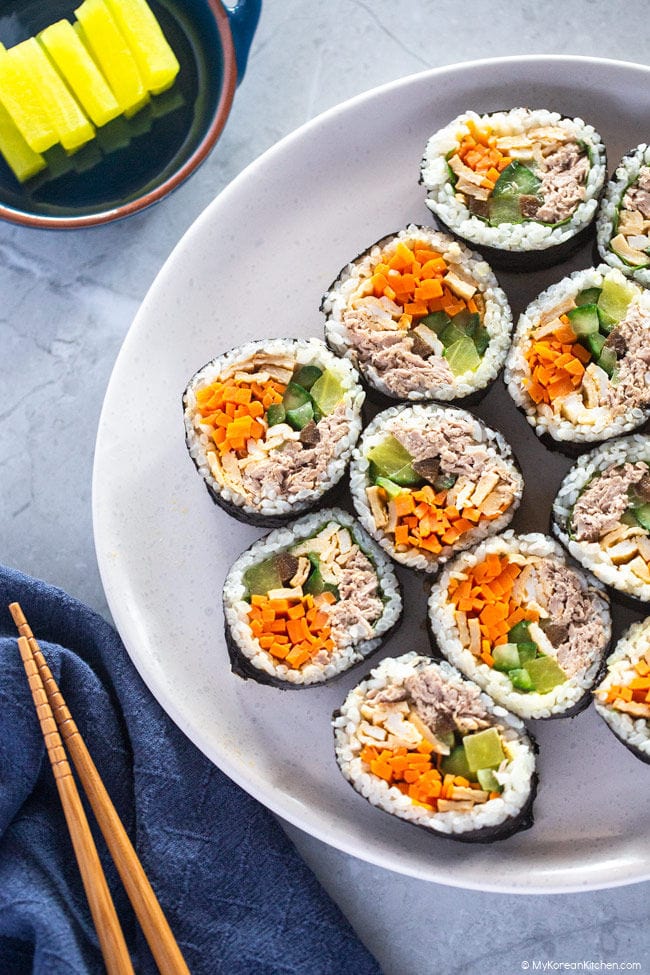
The main ingredients of tuna kimbap are canned tuna, egg, carrots, cucumber, yellow pickled radish, rice, and seaweed. The seaweed usually used for this dish is dried laver (gim, 김). The rice for this dish should be short-grain or medium-grain white rice. Some people also add seasoned burdock root, perilla leaves, or fish cakes to the roll to bring out more complex flavor and texture.
Tuna kimbap can be served as an appetizer or as a light meal. It is also a popular Korean picnic food.
Tips
Rolling kimbap may be tricky, especially if you’re a novice cook. Here are some important things to keep in mind that will make this process easier.
- Use slightly cooled down rice (enough to touch without burning the finger tips). Too-hot rice can make the seaweed shrivelled and soggy.
- Don’t overfill the side ends of the roll, particularly the tuna. It falls out easily when you start rolling. Also, be sure not to overstuff the kimbap or else it may break when you slice it.
- The trickiest part of the process is the initial lifting of the seaweed over the filling. When rolling kimbap, hold the ingredients together with your hands well, so that they don’t fall out of position. After an initial wrap of the fillings, press gently on the bamboo mat to shape the roll, then roll up all the way. Bring down the kimbap roll onto the bottom of the bamboo mat, roll kimbap up, and press firmly over it to finish shaping.
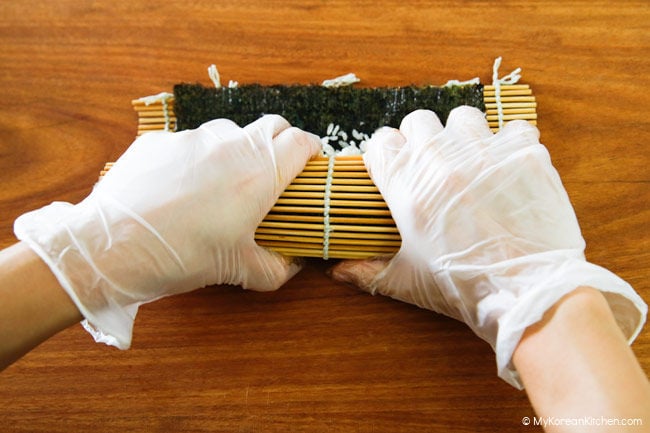
To help your understanding of the process, be sure to check out my video tutorial as well.
How To Make Tuna Kimbap (Video Tutorial)
How to Store Kimbap
Make sure to eat kimbap on the day that you make it or the next day at the latest for optimal eating experience. It should be refrigerated in an airtight container and only sliced into bite-sized pieces just before serving it to minimise the rice going dry.
Other Kimbap Recipes
Below are some of my other recipes, which highlight different ingredients and have uniquely delicious taste (which is something you won’t want to miss!)
INGREDIENTS FOR TUNA KIMBAP, MAKES 7 ROLLS
Main
- 1 English or Lebanese cucumber (350g/ 12.3 ounces)
- 4 eggs
- 3 carrots (320g / 11.3 ounces), julienned
- 2 sheets Korean fish cake (90g / 3.2 ounces), rinsed with hot water & thinly sliced
- 5 cups cooked rice (resulted from 2 cups of uncooked short or medium grain rice)
- 7 yellow radish pickles (danmuji), cut into long strips if you didn’t buy the pre-cut version (available at a Korean / Japanese grocery store)
- 14 strips seasoned edible burdock root (available at a Korean grocery store)
- 555g / 19.6 ounces canned tuna, drained (3 cans of tuna each weighing 185 grams / 6.5 ounces)
- 1/4 cups mayonnaise
- 7 dried seaweed sheets (gim / sushi nori)
- 7 to 14 perilla leaves (depending on its size, optional), rinsed
- 1 Tbsp sesame oil
- Cooking oil
Cucumber Seasoning
- 1/2 Tbsp fine sea salt
Egg Seasoning
- 1/8 tsp fine sea salt
- 1 tsp rice wine (mirin)
Fish Cake Seasoning
- 1 Tbsp soy sauce, regular
- 1/2 tsp sugar
Rice Seasoning
- 2 Tbsp sesame oil
- 1/2 tsp fine sea salt
HOW TO MAKE TUNA KIMBAP
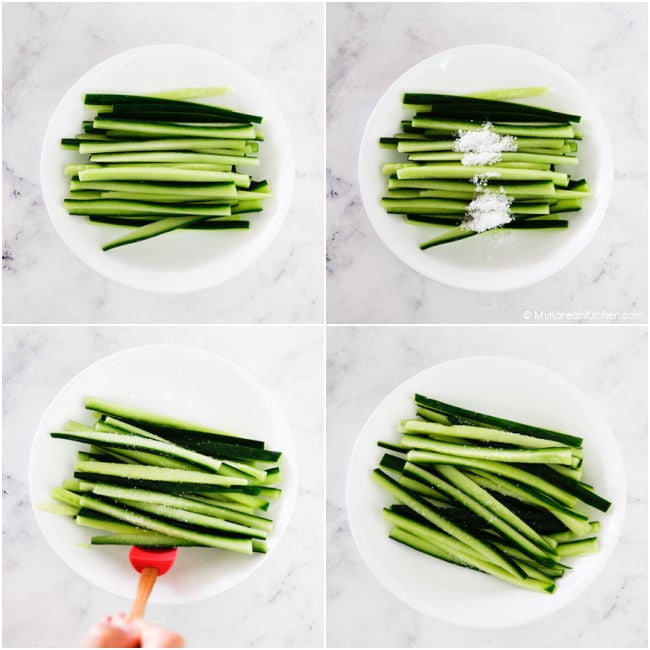
1. Cut the cucumber into long strips and remove the seeds. Place on a plate, season with the salt (1/2 Tbsp fine salt) and mix well. Set aside.
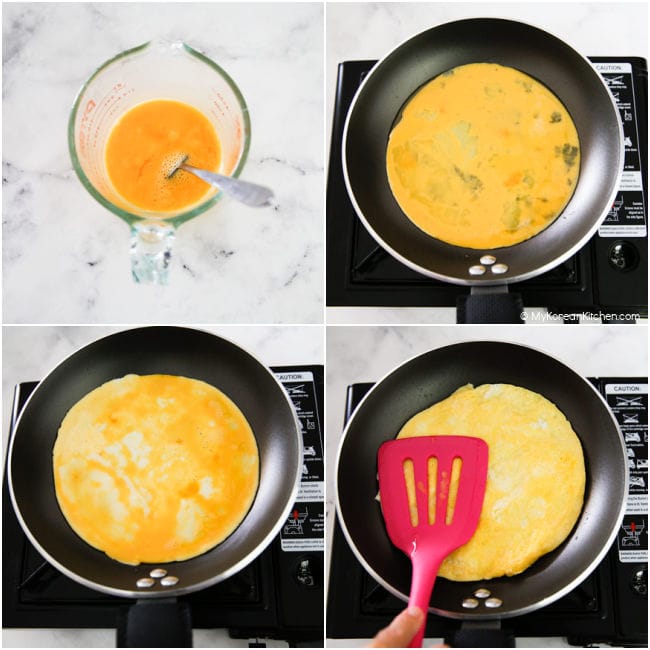
2. Break the eggs in a medium sized bowl and whisk them lightly. Add the egg seasoning (fine sea salt and rice wine) and mix them well. Preheat a pan and add a small dash of cooking oil. Add a thin layer (about one-third) of beaten egg and cook both sides well over low-medium heat.
Transfer to a plate or cutting board and cool it down. Repeat until you cook up the whole batch of beaten egg.
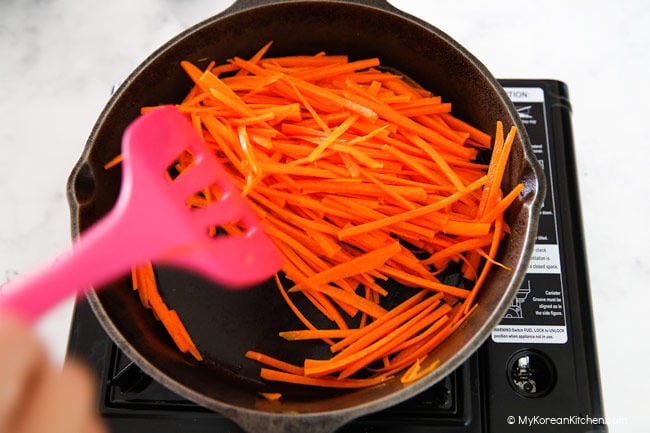
3. In a heated pan, add a small dash of cooking oil and cook the carrots over medium heat for about 2 to 3 mins. Transfer to a plate.
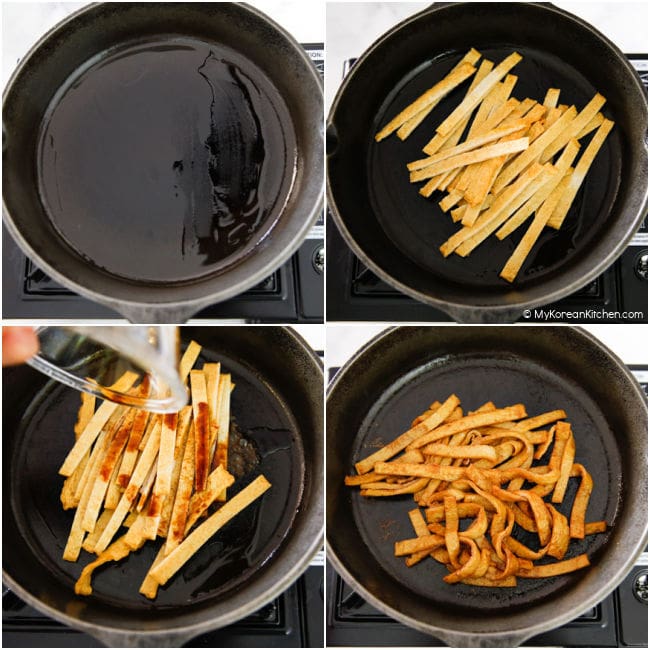
4. Wipe the pan with some kitchen paper, add a dash of cooking oil and cook the fish cakes with the seasoning (soy sauce and sugar) over medium heat for about 2 minutes. Transfer to a plate.
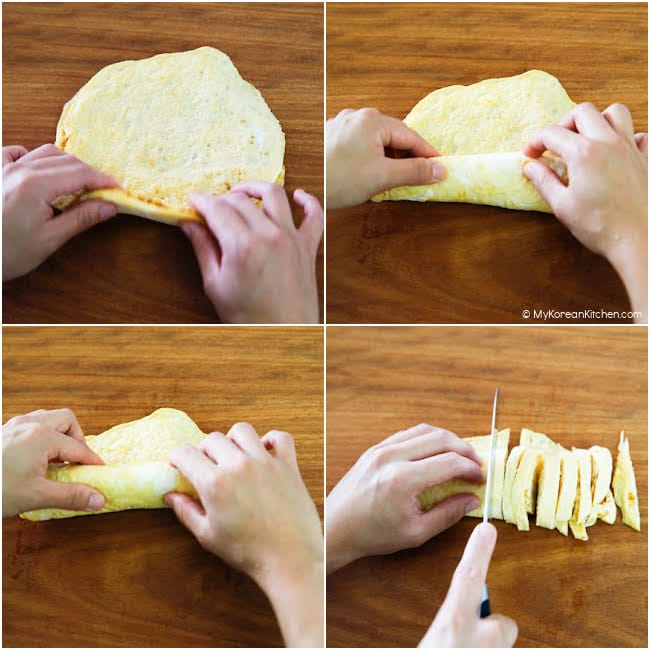
5. Stack the pan-fried eggs on top of each other, roll up, and thinly slice. Transfer to a plate.
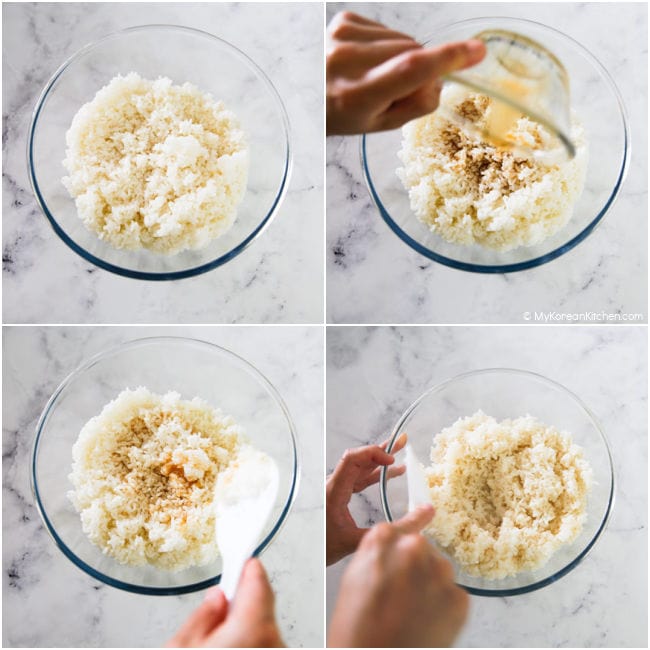
6. In a large bowl, mix the rice with the rice seasoning. Set it aside until it cools down.
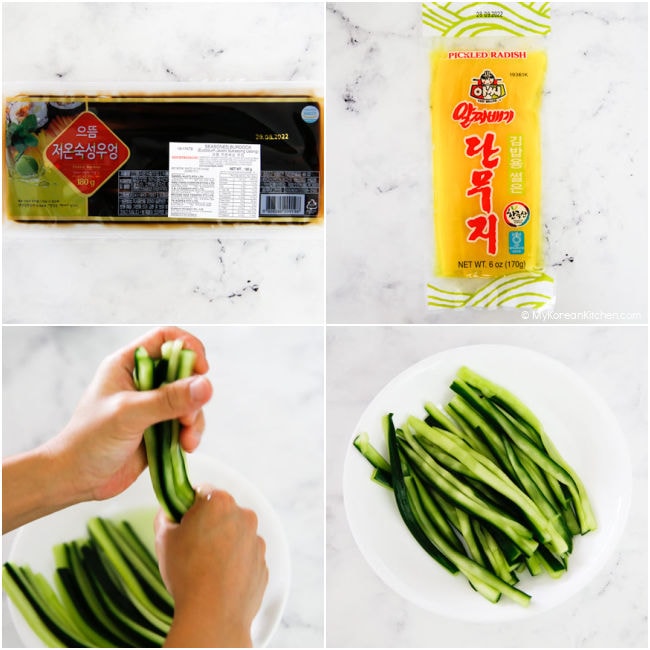
7. Squeeze the cucumber strips, yellow radish pickle, and seasoned edible burdock root to remove excess water. Transfer to a plate.
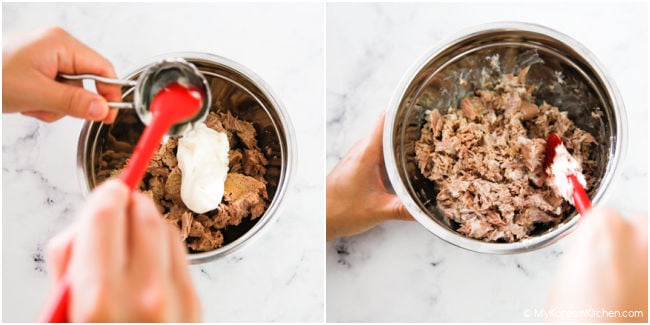
8. Prepare a medium sized bowl and put the drained tuna. Add the mayonnaise and mix them well. Set it aside.
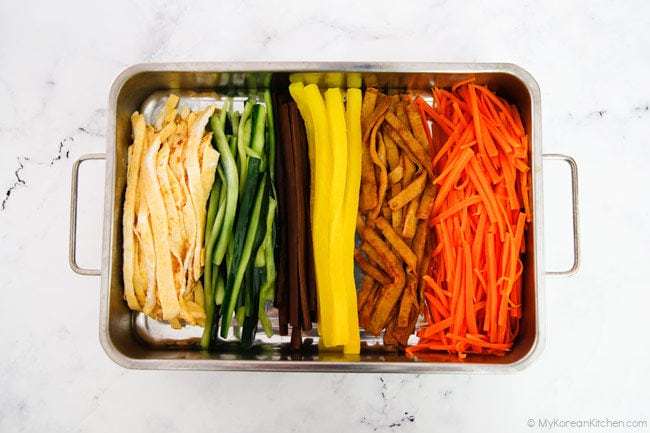
9. Gather all the kimbap ingredients at the ‘kimbap rolling station’. This makes it easy to assemble.
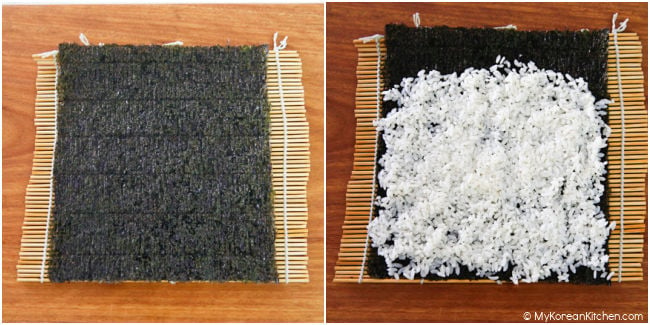
10. Place one dried seaweed sheet on the bamboo mat (shiny side facing down). Grab the rice (about tennis ball size) and put the rice on the seaweed sheet then spread it evenly and thinly to cover the seaweed, leaving about 5 cm / 2 inches gap at the top of the seaweed.
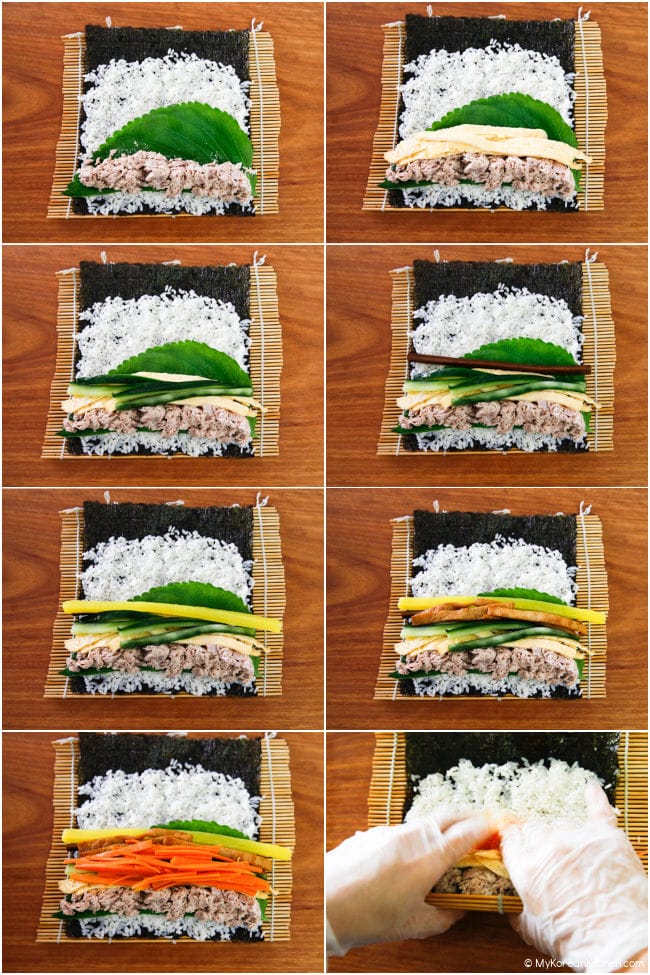
11. Now fill the seaweed with the filing ingredients. Make sure that you evenly distribute the ingredients so that you don’t run out later.
Place a perilla leaf (half if too big, two if too small), tuna on the middle of perilla leaves, then add one yellow radish pickle, and two burdock strips around it. Then pile up cucumber sticks, eggs omelette strips, fish cakes strips, and carrot sticks.
Then hold the ingredients together with your hands and start rolling the seaweed. To glue the top end of the seaweed, apply a few drops of water to the gap left in Step 10. Alternatively, put a few grains of cooked rice into this gap. Finish rolling the seaweed and shape the roll by pressing down with a bamboo mat. Set the finished rolls aside.
12. Repeat steps 10 to 11 with the remaining ingredients.
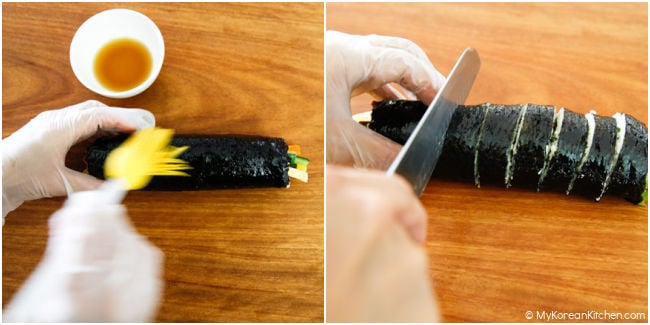
13. Line up all the kimbap on a cutting board and coat the seaweed surface with some sesame oil (about 1 Tbsp). Slice the kimbap into bite-sized pieces. Serve with some yellow pickled radish or kimchi.
Love Korean food? Browse lots more Korean recipes from my easy Korean recipe collections. And subscribe to my newsletter for all of the latest updates including new recipes, what MKK communities are cooking and K-Dramas!

Tuna Kimbap (Chamchi Kimbap)
Ingredients
MAIN
- 1 cucumber (English or Lebanese), (350g/ 12.3 ounces)
- 4 eggs
- 3 carrots (320g / 11.3 ounces), julienned
- 2 sheets Korean fish cake (90g / 3.2 ounces), rinsed with hot water & thinly sliced
- 5 cups cooked rice (resulted from 2 cups of uncooked short or medium grain rice)
- 7 strips yellow pickled radish (danmuji), cut into long strips if you didn’t buy the pre-cut version (available at a Korean / Japanese grocery store)
- 14 strips seasoned edible burdock root (available at a Korean grocery store)
- 555 g canned tuna (19.6 ounces), drained (3 cans of tuna each weighing 185 grams / 6.5 ounces)
- 1/4 cup mayonnaise
- 7 sheets dried seaweed (gim / sushi nori)
- 7 to 14 perilla leaves (depending on its size, optional), rinsed
- 1 Tbsp sesame oil
- cooking oil
CUCUMBER SEASONING
- 1/2 Tbsp fine sea salt
EGG SEASONING
- 1/8 tsp fine sea salt
- 1 tsp rice wine (mirin)
FISH CAKE SEASONING
- 1 Tbsp soy sauce , regular
- 1/2 tsp sugar
RICE SEASONING
- 2 Tbsp sesame oil
- 1/2 tsp fine sea salt
Instructions
- Cut the cucumber into long strips and remove the seeds. Place on a plate, season with the salt (1/2 Tbsp fine salt) and mix well. Set aside.
- Break the eggs in a medium sized bowl and whisk them lightly. Add the egg seasoning (fine sea salt and rice wine) and mix them well. Preheat a pan and add a small dash of cooking oil. Add a thin layer (about one-third) of beaten egg and cook both sides well over low-medium heat. Transfer to a plate or cutting board and cool it down. Repeat until you cook up the whole batch of beaten egg.
- In a heated pan, add a small dash of cooking oil and cook the carrots over medium heat for about 2 to 3 mins. Transfer to a plate.
- Wipe the pan with some kitchen paper, add a dash of cooking oil and cook the fish cakes with the seasoning (soy sauce and sugar) over medium heat for about 2 minutes. Transfer to a plate.
- Stack the pan-fried eggs on top of each other, roll up, and thinly slice. Transfer to a plate.
- In a large bowl, mix the rice with the rice seasoning. Set it aside until it cools down.
- Squeeze the cucumber strips, yellow radish pickle, and seasoned edible burdock root to remove excess water. Transfer to a plate.
- Prepare a medium sized bowl and put the drained tuna. Add the mayonnaise and mix them well. Set it aside.
- Gather all the kimbap ingredients at the ‘kimbap rolling station’. This makes it easy to assemble.
- Place one dried seaweed sheet on the bamboo mat (shiny side facing down). Grab the rice (about tennis ball size) and put the rice on the seaweed sheet then spread it evenly and thinly to cover the seaweed, leaving about 5 cm / 2 inches gap at the top of the seaweed.
- Now fill the seaweed with the filing ingredients. Make sure that you evenly distribute the ingredients so that you don’t run out later. Place a perilla leaf (half if too big, two if too small), tuna on the middle of perilla leaves, then add one yellow radish pickle, and two burdock strips around it. Then pile up cucumber sticks, eggs omelette strips, fish cakes strips, and carrot sticks.Then hold the ingredients together with your hands and start rolling the seaweed. To glue the top end of the seaweed, apply a few drops of water to the gap left in Step 10. Alternatively, put a few grains of cooked rice into this gap. Finish rolling the seaweed and shape the roll by pressing down with a bamboo mat. Set the finished rolls aside.
- Repeat steps 10 to 11 with the remaining ingredients.
- Line up all the kimbap on a cutting board and coat the seaweed surface with some sesame oil (about 1 Tbsp). Slice the kimbap into bite-sized pieces. Serve with some yellow pickled radish or kimchi.
Notes
- Use slightly cooled down rice (enough to touch without burning the finger tips). Too-hot rice can make the seaweed shrivelled and soggy.
- Don’t overfill the side ends of the roll, particularly the tuna. It falls out easily when you start rolling. Also, be sure not to overstuff the kimbap or else it may break when you slice it.
- The trickiest part of the process is the initial lifting of the seaweed over the filling. When rolling kimbap, hold the ingredients together with your hands well, so that they don’t fall out of position. After an initial wrap of the fillings, press gently on the bamboo mat to shape the roll, then roll up all the way. Bring down the kimbap roll onto the bottom of the bamboo mat, roll kimbap up, and press firmly over it to finish shaping.
Nutrition Info (per serving)
The nutrition information shown is an estimate provided by an online nutrition calculator. It should not be considered a substitute for a professional nutritionist’s advice.
