
If you enjoy chewy rice cakes and buttery baked treats, I think you’ll love this butter tteok. With its golden crust and soft, chewy center, it makes a wonderfully satisfying snack alongside a cup of coffee or tea. In fact, it’s the kind of snack that’s hard to stop at just one piece!
What is Butter Tteok
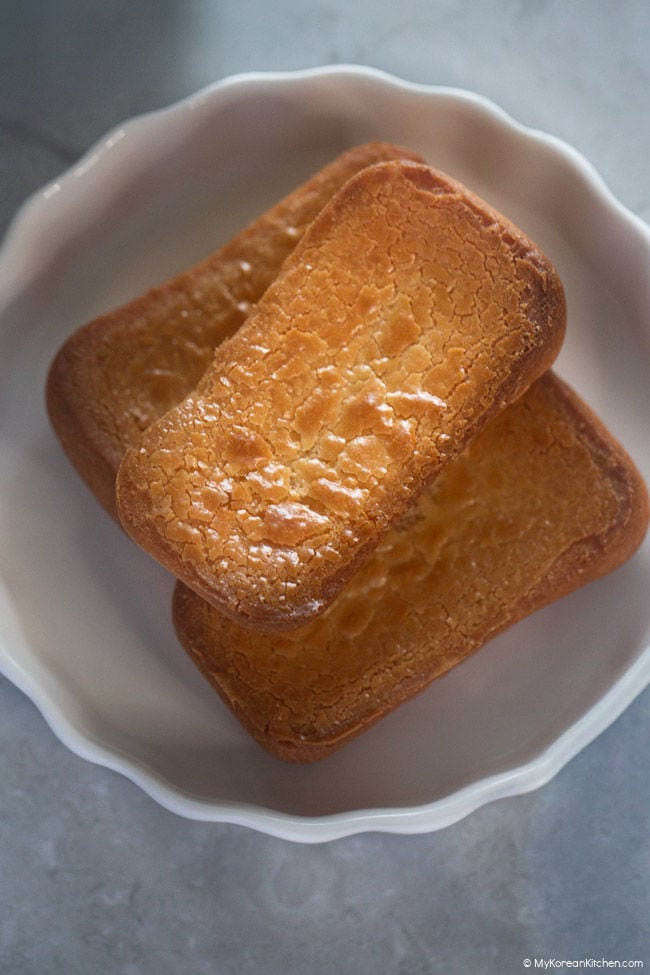
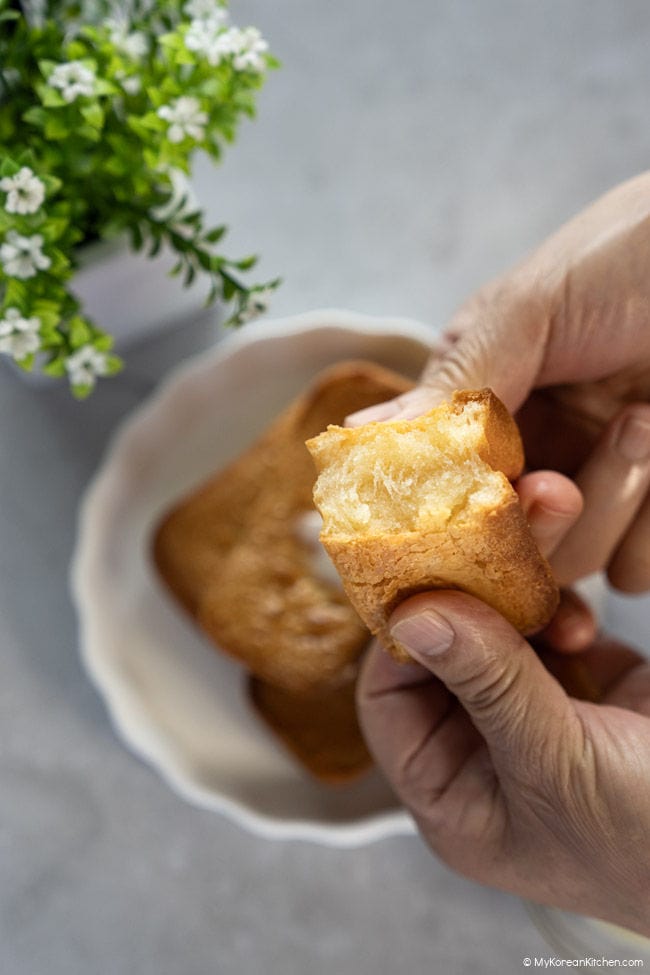
Butter tteok is a buttery baked rice cake made with glutinous rice flour, butter, milk, and eggs. Unlike many traditional Korean rice cakes, which are usually steamed, this one is baked, giving it a golden crust on the outside and a soft, chewy center inside.
While it has recently gained popularity at Korean bakeries and rice cake shops, it is considered a modern bakery-style rice cake rather than a traditional Korean tteok. From what I’ve read, similar butter rice cakes are believed to have originated in Shanghai before gaining popularity in Korea. The outside reminds me a little of a madeleine or butter cookie, while the inside has that pleasantly chewy rice cake texture, almost like injeolmi but slightly denser.
Why This Recipe Works
Inspired by the version I enjoyed most
After trying several versions from Korean bakeries and rice cake shops, I found myself repeatedly drawn to the rice cake shop style. It had the texture and flavor I enjoyed most, and that became the benchmark for this recipe. Through multiple rounds of testing, I refined the ingredients and ratios until I landed on a version that I genuinely enjoyed even more than the ones that inspired it.
A golden crust and chewy center
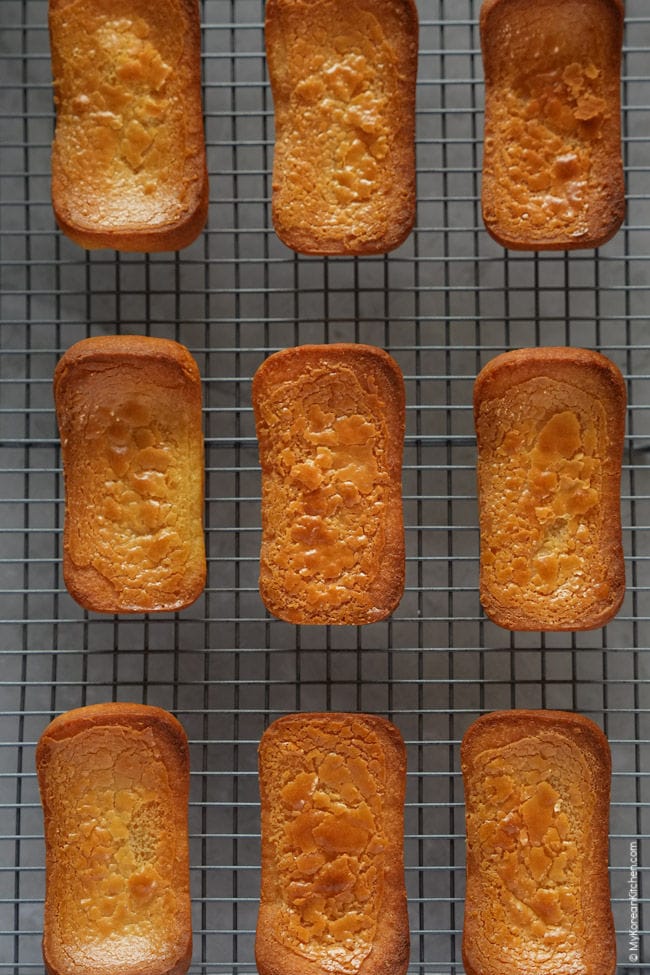
For me, the best butter tteok is all about texture. I wanted a golden crust on the outside with a soft, chewy center. To get there, I tested the recipe multiple times, including baking it in both metal and silicone pans. The silicone pan produced a softer crust, but I preferred the results from the metal pan. It created a more pronounced crust with lightly crisp, biscuit-like edges while the center remained soft and chewy.
Better after a short rest
Butter tteok needs a little time to settle after baking. Straight from the oven, it is too hot and soft to fully appreciate the flavor and texture. After at least 15 minutes of cooling, the center becomes chewier, the crust sets better, and the buttery flavor comes through more clearly. I actually enjoy it even more after it has rested for about 2 hours, when the texture feels more cohesive and pleasantly chewy.
Ingredients
Main
- 120 g (4.2 oz) salted butter
- 200 mL (6.8 fl oz) milk
- 200 g (7 oz) glutinous rice flour (about 1 1/2 cups + 2 Tbsp)
- 50 g (1.8 oz) tapioca flour (about 5 Tbsp)
- 95 g (3.4 oz) granulated sugar (about 6.5 Tbsp)
- 1/4 tsp fine salt
- 40 g (1.4 oz) sweetened condensed milk (2 Tbsp)
- 1 large egg
- 1/2 tsp vanilla extract
For the tray
- 25 g (0.7 oz) salted butter, softened
How to Make Butter Tteok
Preheat the oven
Preheat the oven to 170 C (340 F).
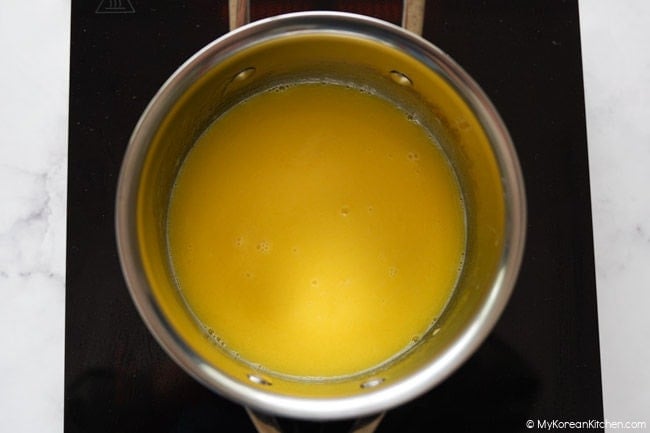
Warm the butter and milk
Add the butter and milk to a small saucepan. Warm over low heat, stirring occasionally, until the butter has melted and the mixture is well combined. Remove from the heat and let it cool until just warm to the touch.
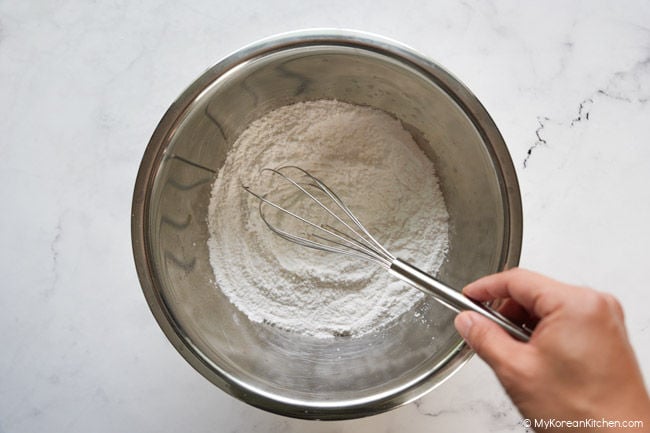
Mix the dry ingredients
In a bowl, whisk together the glutinous rice flour, tapioca flour, sugar, and salt.
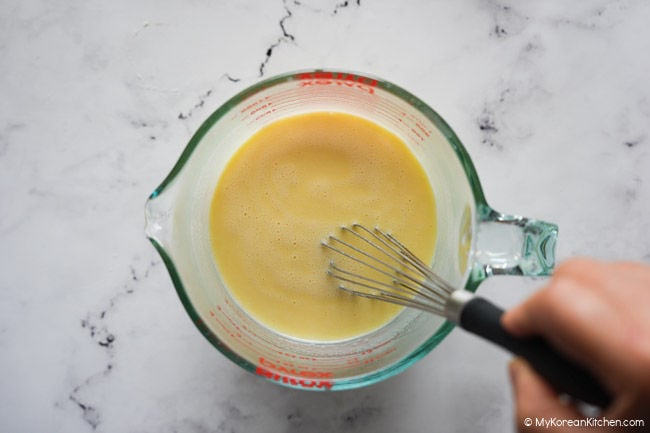
Mix the wet ingredients
In a large measuring cup or bowl, whisk together the warm milk mixture, sweetened condensed milk, egg, and vanilla extract until smooth.
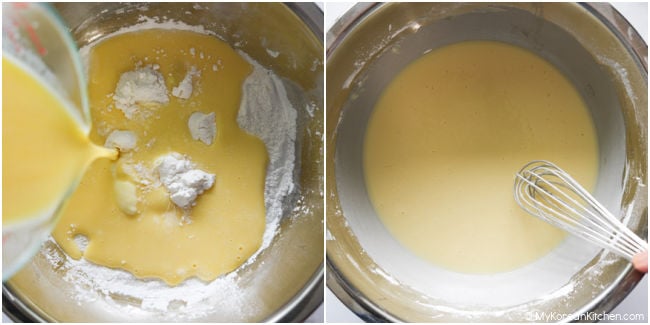
Make the batter
Pour the wet mixture into the dry ingredients and whisk until smooth. The batter should be pourable and slightly thick, but not watery.
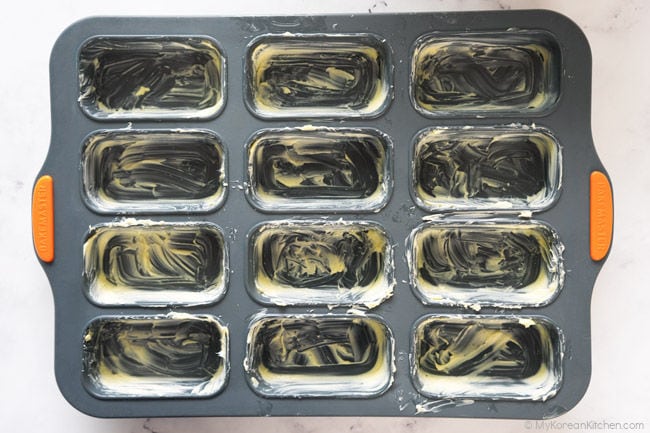
Prepare the pan
Generously grease each mini loaf cavity with the softened butter, making sure to coat the bottom and sides.
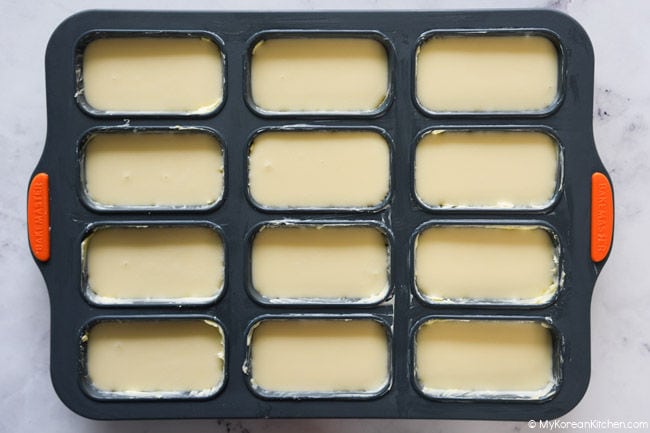
Fill the pan
Divide the batter evenly among the prepared cavities, filling each about three-quarters full. Tap the pan gently on the counter a few times to release any large air bubbles.
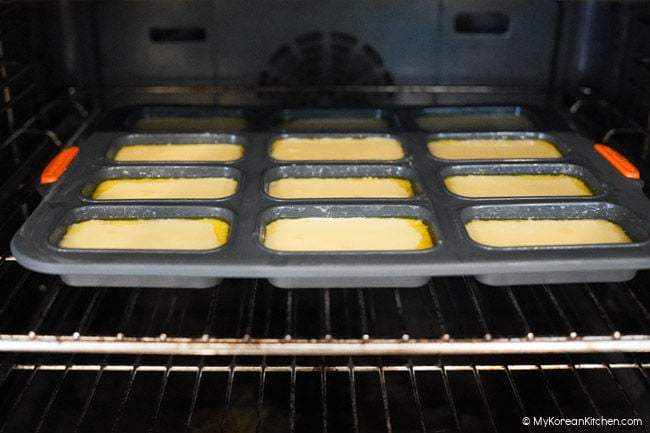
Bake
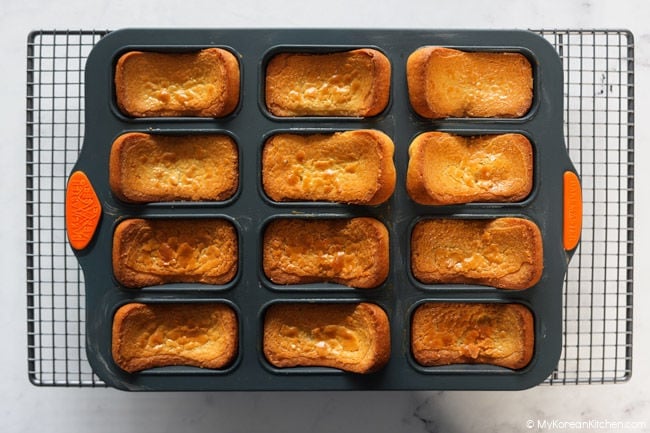
Bake for 35 minutes, or until the tops are golden brown and the edges are lightly crisp.
Cool
Let the cakes cool in the pan for 2 to 3 minutes, then carefully transfer them to a wire rack to cool for 15 to 20 minutes. They will continue to firm up as they cool and develop their signature chewy, buttery texture.
Recipe Notes:
Best Texture and Flavor
Butter tteok needs a little time to settle after baking. While it can be eaten once it has cooled enough to handle, I find the texture and flavor improve noticeably after at least 15 minutes of cooling. Personally, I enjoy it even more after about 2 hours, when the center becomes slightly chewier and the buttery flavor seems more developed.
Baking Pan Choice
I recommend using a metal baking pan if you want a more pronounced crust with crisp, biscuit-like edges. A silicone pan also works well if you prefer a softer crust, while still giving you a soft and chewy center.
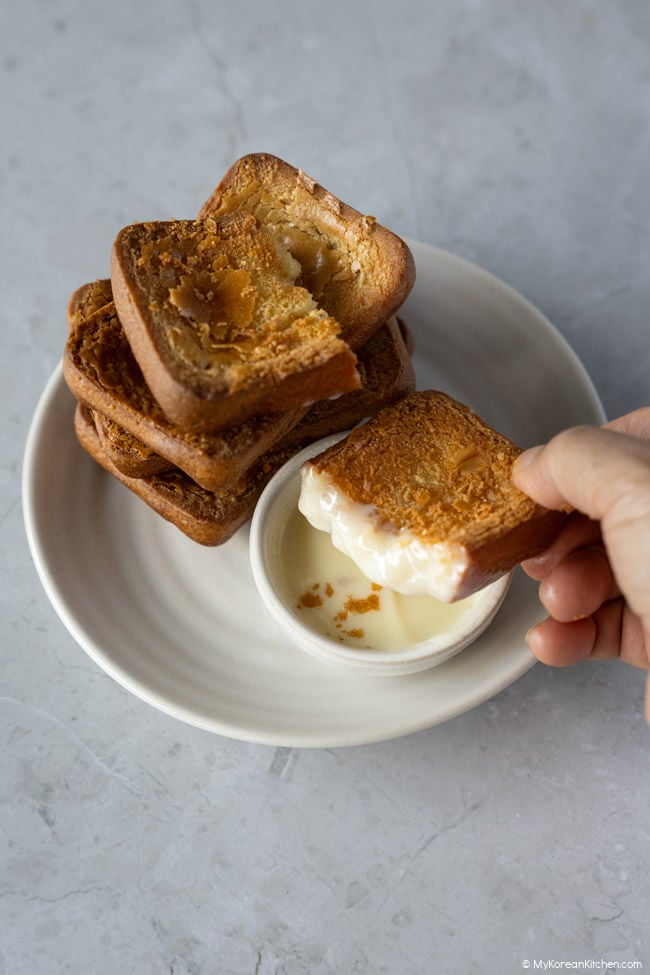
Serving Suggestions
Butter tteok is especially delicious with a cup of coffee, tea, or milk. You can also enjoy it dipped in sweetened condensed milk for an extra indulgent treat. While I enjoy it this way occasionally, I find the condensed milk can slightly overpower the buttery flavor of the rice cake itself.
Storage
Store the butter tteok in an airtight container at cool room temperature for up to 2 days.
For longer storage, I recommend freezing rather than refrigerating, as refrigeration can cause the cake to firm up and lose some of its soft, chewy texture. Wrap individual pieces tightly in plastic wrap, then place them in a freezer-safe bag or container and freeze for up to 1 month.
Reheating Tips
Butter tteok is delicious at room temperature, but I also enjoy reheating it. In fact, I slightly prefer it this way because it tastes remarkably close to freshly baked, with a crispier crust, a soft, chewy center, and a wonderfully buttery aroma.
- Room-temperature butter tteok: Air fry at 180°C (350°F) for 3 minutes, then let it rest for about 3 minutes.
- Frozen butter tteok: Air fry at 180°C (350°F) for 4 minutes, then let it rest for about 3 minutes.
You can also warm it in the oven until heated through.
More Korean Sweet Treats to Try
- Chapssaltteok (Red Bean Mochi)
If you love chewy rice cakes, chapssaltteok is well worth trying. Filled with sweet red bean paste and coated in a light layer of starch, it’s one of my favorite Korean rice cake treats. - Hodugwaja (Korean Walnut Cakes)
These little walnut-shaped cakes are filled with sweet red bean paste and chopped walnuts. They’re lightly sweet, wonderfully comforting, and perfect alongside a cup of coffee or tea. - Bungeoppang (Korean Fish-Shaped Pastry)
A beloved Korean street snack, bungeoppang features a crisp pastry shell filled with sweet red bean paste. I especially love eating it while it’s still warm. - Hotteok (Korean Sweet Pancakes)
Hotteok is one of Korea’s most popular street food snacks. Filled with a gooey mixture of brown sugar, cinnamon, and nuts, it’s especially comforting on a cold day.

Butter Tteok (Butter Rice Cake) - Golden Crust, Chewy Center
Ingredients
Main
- 120 g salted butter (4.2 oz)
- 200 ml milk (6.8 fl oz)
- 200 g glutinous rice flour (7 oz), (about 1 1/2 cups + 2 Tbsp)
- 50 g tapioca flour (1.8 oz), (about 5 Tbsp)
- 95 g granulated sugar (3.4 oz), (about 6.5 Tbsp)
- 1/4 tsp fine salt
- 40 g sweetened condensed milk (1.4 oz), (2 Tbsp)
- 1 egg
- 1/2 tsp vanilla extract
For the tray
- 25 g salted butter (0.7 oz), softened
Instructions
- Preheat the oven - Preheat the oven to 170 C (340 F).
- Warm the butter and milk - Add the butter and milk to a small saucepan. Warm over low heat, stirring occasionally, until the butter has melted and the mixture is well combined. Remove from the heat and let it cool until just warm to the touch.
- Mix the dry ingredients - In a bowl, whisk together the glutinous rice flour, tapioca flour, sugar, and salt.
- Mix the wet ingredients - In a large measuring cup or bowl, whisk together the warm milk mixture, sweetened condensed milk, egg, and vanilla extract until smooth.
- Make the batter - Pour the wet mixture into the dry ingredients and whisk until smooth. The batter should be pourable and slightly thick, but not watery.
- Prepare the pan - Generously grease each mini loaf cavity with the softened butter, making sure to coat the bottom and sides.
- Fill the pan - Divide the batter evenly among the prepared cavities, filling each about three-quarters full. Tap the pan gently on the counter a few times to release any large air bubbles.
- Bake - Bake for 35 minutes, or until the tops are golden brown and the edges are lightly crisp.
- Cool - Let the cakes cool in the pan for 2 to 3 minutes, then carefully transfer them to a wire rack to cool for 15 to 20 minutes. They will continue to firm up as they cool and develop their signature chewy, buttery texture.
Notes
Nutrition Info (per serving)
The nutrition information shown is an estimate provided by an online nutrition calculator. It should not be considered a substitute for a professional nutritionist’s advice.
")
")
