
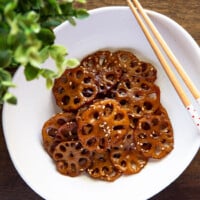
Braised lotus root (yeongeun jorim, 연근조림) was always on our family table when I was growing up, and it was one I always looked forward to. I can still picture my mom slicing the lotus root, the kitchen filling with the gentle aroma of soy sauce bubbling away. And honestly, it somehow tasted even better the next day, straight from the fridge.
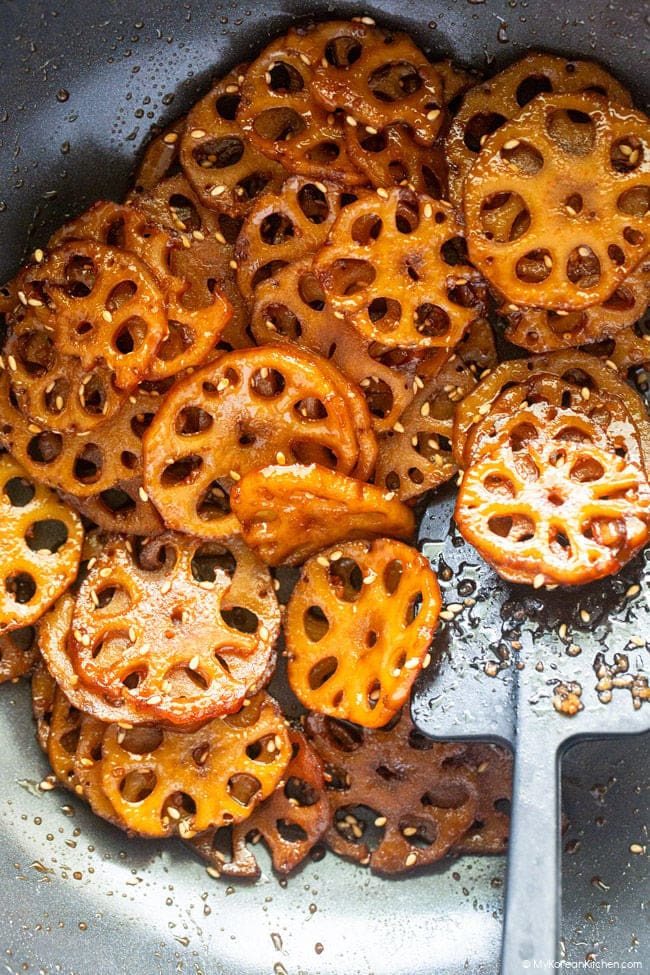
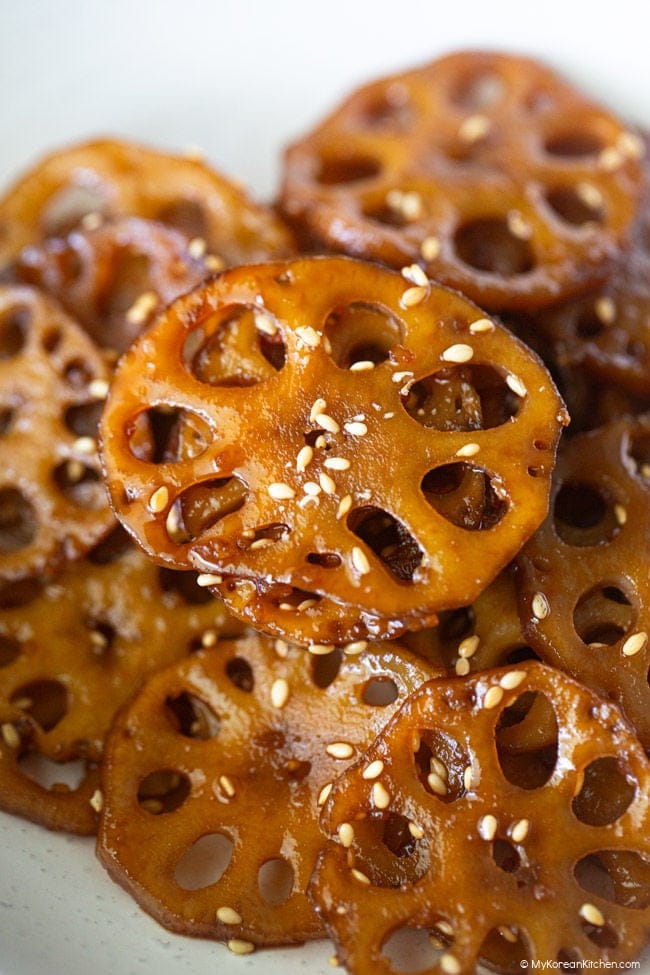
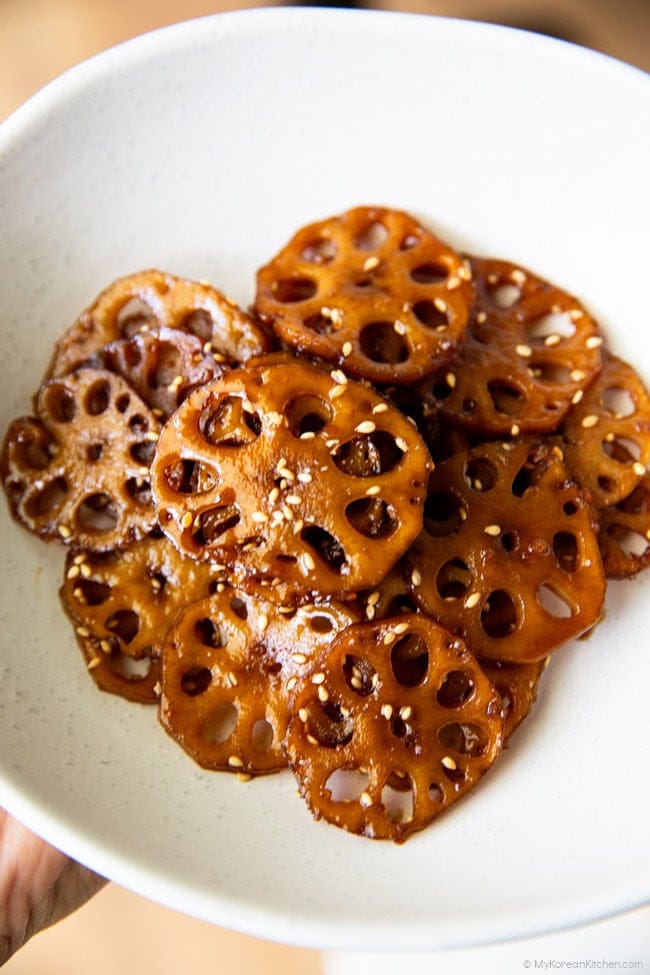
Lotus root has this naturally crisp texture and a pretty lace-like pattern. It’s simmered just long enough to turn tender but still keep a nice little bite. Each slice soaks up that savory sweet sauce, and the glossy finish makes it look just as tempting as it tastes. Best of all, it comes together in only about 20 minutes and keeps beautifully for 3 to 4 days.
Ingredients
Main
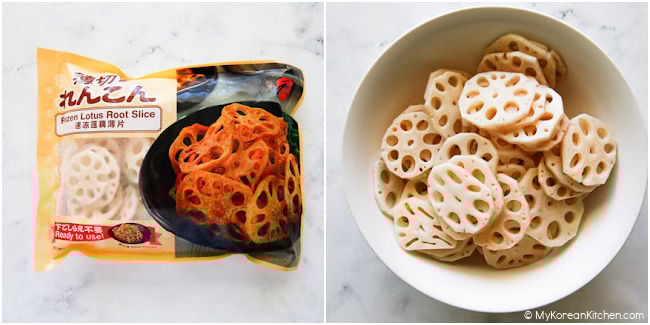
- 260 g (9.2 oz) lotus root (fresh: peel and slice; frozen: use ready sliced, rinsed and drained)
- 750 ml (3 cups) water
- 1/8 tsp apple cider vinegar
- 1 Tbsp neutral cooking oil – e.g., rice bran oil
Sauce
- 80ml (1/3 cup) water, or 125 ml (1/2 cup) kelp stock (see Step 2)
- 1 small piece dried kelp (kombu), about 3 cm / 1 inch, optional (for making kelp stock)
- 2 1/2 Tbsp soy sauce – Sempio 701 Yangjo Ganjang (샘표 양조간장 701) or Kikkoman brand
- 1/2 Tbsp sweet rice wine (mirin)
- 1 tsp minced garlic
- 1/2 tsp dark brown sugar
- 3 Tbsp golden syrup (preferred) or Korean rice syrup (ssalyeot, 쌀엿) or light corn syrup
To Finish
- 1/2 tsp toasted sesame oil
- 1 tsp toasted sesame seeds
Measurement note: 1 Tbsp = 15 ml, 1 cup = 250 ml
How to Make Braised Lotus Root
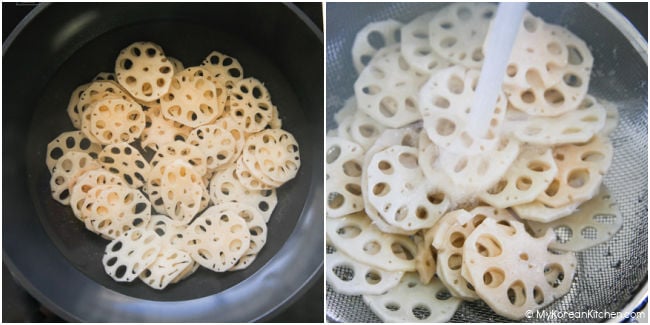
1. Blanch the lotus root
In a pot, bring 3 cups (750 ml) water and the apple cider vinegar to a boil. Add the lotus root and blanch for 2 to 3 minutes if using frozen slices, or 4 to 6 minutes if using fresh. Drain well and set aside.
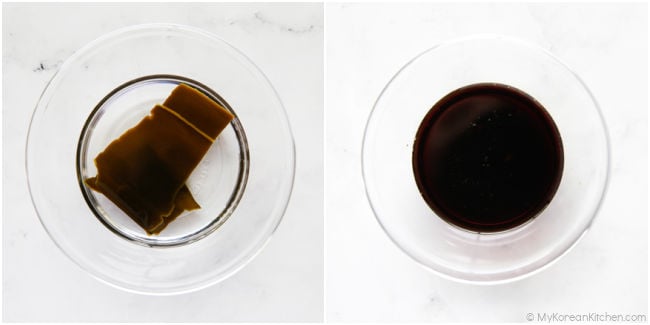
2. Prepare the sauce
If using kelp stock: Soak a small piece of dried kelp (kombu) in 1/2 cup (125 ml) water for 10 minutes, then remove the kelp. Add the soy sauce, mirin, garlic, and brown sugar directly to the kelp water, stirring until the sugar is fully dissolved. If using plain water, combine these ingredients with 1/3 cup (80 ml) water instead.
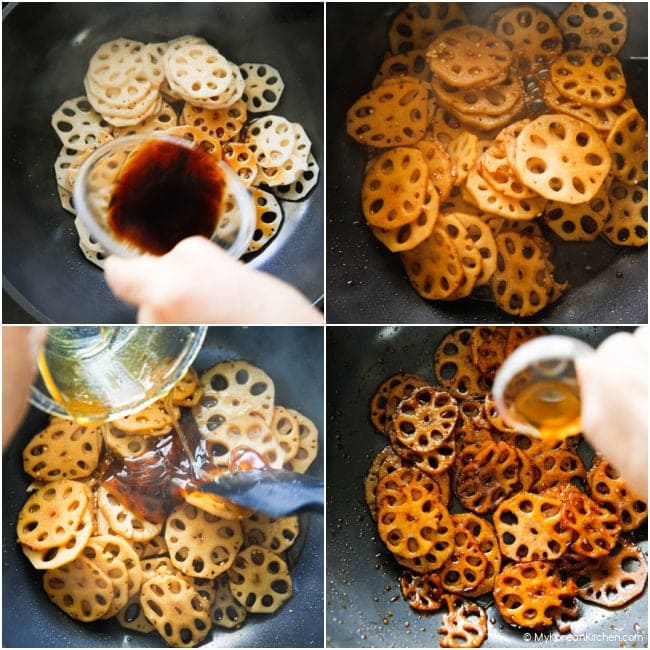
3. Simmer with sauce
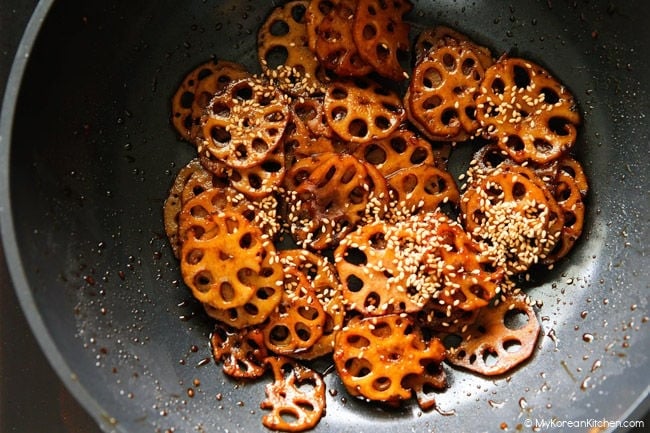
In a wide non-stick pan or braiser, heat the cooking oil and add the blanched lotus root. Stir briefly over medium heat. Add the prepared sauce and stir until the slices are evenly coated. Continue cooking until the liquid reduces to about one third of its original volume and begins to thicken.
Add the golden syrup (or rice syrup, or corn syrup) and stir continuously over medium to medium-low heat until the sauce turns glossy and coats the lotus root. If it begins to dry out too much, reduce the heat to prevent burning.
4. Finish and serve
When the sauce is mostly reduced, add the sesame oil and sesame seeds. Give it a quick stir to combine. Serve at room temperature or chilled.
Cook’s Notes
Vinegar – Vinegar helps the lotus root keep its fresh, pale color while gently mellowing its earthy flavor. It also gives a clean, crisp finish that makes each bite even more refreshing.
Kelp Stock – Kelp stock adds a gentle, savory depth. Water works just fine, but kelp stock gives a subtle umami lift that makes the sauce even more delicious.
Fresh vs Frozen Lotus Root – Fresh lotus root is best if you can get it. Peel, slice evenly, and blanch a little longer since it’s raw. Frozen lotus root is the next best thing. I love the kind made for Japanese renkon chips because the slices are thin and uniform. Other frozen varieties can vary in thickness, so check before cooking; thicker slices may need a bit more blanching and simmering.
Soy Sauce – Not all soy sauces are created equal. I usually stick to ones that are widely available so you can easily find them wherever you live. For this recipe, though, my family’s verdict is that Korean soy sauce wins. My mom’s current favorite for this dish is Sempio 701 Yangjo Ganjang (샘표 양조간장 701), with Kikkoman coming in as a close second.
Golden Syrup – Golden syrup adds a warm, caramel like sweetness with gentle toffee notes that make the glaze taste richer. I used the CSR brand, which has a smooth texture and a beautiful amber color that really shines in this dish. While it’s not a traditional Korean ingredient, I found it worked even better than the usual Korean go-to sweeteners (like rice syrup or corn syrup) here, so I decided to highlight it.
Korean Rice Syrup – If you can’t find golden syrup, Korean rice syrup gives a glossy finish and gentle sweetness with a hint of malty, nutty depth that corn syrup can’t match. It’s made from fermented grains like rice and barley, which develop richer flavor during malting.
How to Serve & Store
Braised lotus root tastes even better after a few hours in the fridge. The flavors deepen, the glaze sets, and the texture turns perfectly chewy with just a hint of crunch. Enjoy it with rice, kimchi, seasoned seaweed, or as part of a Korean BBQ spread. It’s also a favorite for packing into a dosirak (Korean lunchbox).
It keeps well in the fridge for 3 to 4 days. After that, the lotus root releases moisture into the sauce, which softens the glaze and mutes the flavor a little bit.
Other Korean Side Dishes You Might Like
If you love this braised lotus root, you’ll definitely enjoy some of these other classic Korean side dishes. They’re simple, full of flavor, and perfect for rounding out any meal.
- Korean Braised Potatoes (Gamja Jorim) – Baby potatoes simmered in a glossy sweet savory glaze that’s as addictive as it looks.
- Korean Cucumber Salad (Oi Muchim) – A crisp, refreshing salad tossed with garlic, sesame, and a gentle kick of spice.
- Korean Spinach Side Dish (Sigeumchi Namul) – Fresh spinach is quickly blanched, then seasoned with garlic and sesame oil for a nutty, garlicky side dish you’ll want to eat right away.
- Seasoned Bean Sprouts (Sukju Namul) – Crisp, juicy bean sprouts tossed in a sesame garlic mix that makes them surprisingly irresistible.
Korean Braised Lotus Root (Yeongeun Jorim) - Tender and Moreish
Ingredients
MAIN
- 260 g lotus root (9.2 oz), (fresh: peel and slice; frozen: use ready-sliced, rinsed and drained)
- 750 ml water (3 cups)
- 1/8 tsp apple cider vinegar or rice vinegar
- 1 Tbsp neutral cooking oil – e.g., rice bran oil
SAUCE
- 80 ml water (1/3 cup), or 125 ml (1/2 cup) kelp stock (see Step 2)
- 1 small piece dried kelp (kombu), about 3 cm / 1 inch, optional (for making kelp stock)
- 2 1/2 Tbsp soy sauce , Sempio 701 Yangjo Ganjang or Kikkoman brand
- 1/2 Tbsp sweet rice wine (mirin)
- 1 tsp minced garlic
- 1/2 tsp dark brown sugar
- 3 Tbsp golden syrup or Korean rice syrup (ssalyeot) or light corn syrup
TO FINISH
- 1/2 tsp toasted sesame oil
- 1 tsp toasted sesame seeds
Instructions
- Blanch the lotus rootIn a pot, bring 3 cups (750 ml) water and the apple cider vinegar to a boil. Add the lotus root and blanch for 2 to 3 minutes if using frozen slices, or 4 to 6 minutes if using fresh. Drain well and set aside.
- Prepare the sauceIf using kelp stock: Soak a small piece of dried kelp (kombu) in 1/2 cup (125 ml) water for 10 minutes, then remove the kelp. Add the soy sauce, mirin, garlic, and brown sugar directly to the kelp water, stirring until the sugar is fully dissolved. If using plain water, combine these ingredients with 1/3 cup (80 ml) water instead.
- Simmer with sauceIn a wide non-stick pan or braiser, heat the cooking oil and add the blanched lotus root. Stir briefly over medium heat. Add the prepared sauce and stir until the slices are evenly coated. Continue cooking until the liquid reduces to about one-third of its original volume and begins to thicken.Add the golden syrup (or rice syrup, or corn syrup) and stir continuously over medium to medium-low heat until the sauce turns glossy and coats the lotus root. If it begins to dry out too much, reduce the heat to prevent burning.
- Finish and serveWhen the sauce is mostly reduced, add the sesame oil and sesame seeds. Give it a quick stir to combine. Serve at room temperature or chilled.
Notes
Nutrition Info (per serving)
The nutrition information shown is an estimate provided by an online nutrition calculator. It should not be considered a substitute for a professional nutritionist’s advice.
This recipe was originally published on January 12, 2007, and updated on August 22, 2025, with improved explanations, new photos, and a refined recipe.

 - Classic Chuseok Recipe")
")