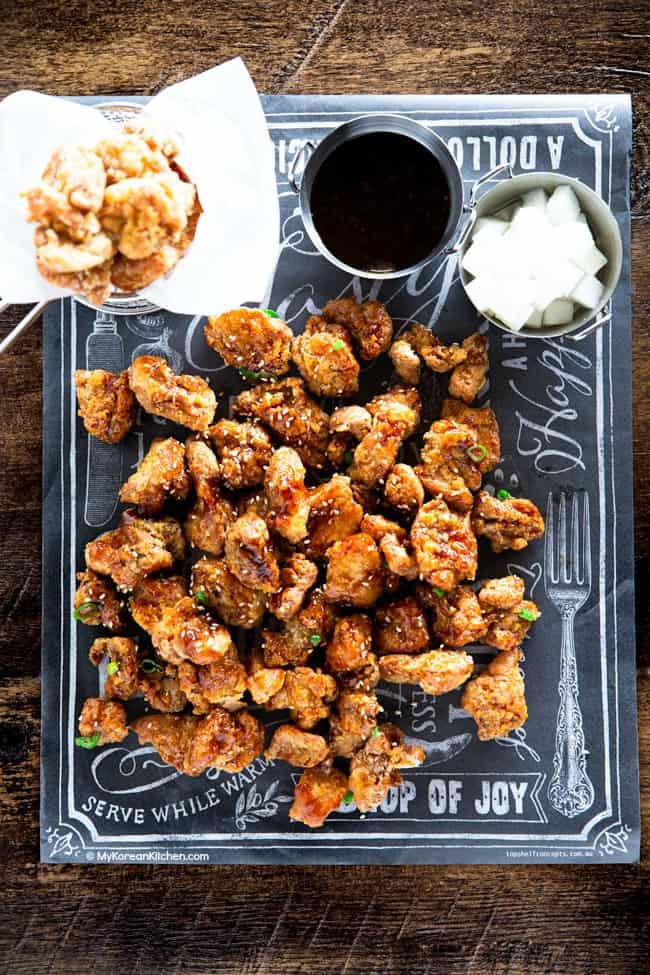
Try this super delicious and crunchy Dakgangjeong: Soy Garlic Fried Chicken recipe.
Bite sized chicken nuggets are twice deep fried then they are coated with sweet, savory and sticky soy garlic sauce. It is hugely addictive and will make a perfect snack or appetizer when you want to entertain your family and friends (e.g. Super Bowl Food).
Save This Recipe
What is Dakganjeong
Dakgangjeong (닭강정) is a version of Korean fried chicken.
Some people make dakgangjeong with chicken drumsticks or wings, but we prefer boneless chicken bites as it’s so much easier to eat. Small chicken nuggets (or popcorn chicken) are deep fried and coated with sticky delicious sauce.
Dakgangjeong sauce can be prepared either a sweet and spicy way – similar to Korean fried chicken sauce or a sweet and savory way using soy sauce, honey and garlic.
I have already shared the sweet and spicy version in the past, so be sure to check that one out as well.
What’s Special About Today’s Dakgangjeong Recipe
Today’s dakgangjeong is all about soy garlic fried chicken aka ganjang chicken, 간장 치킨. (Ganjang means soy sauce in Korean.) Ganjang chicken is another popular Korean fried chicken variety, and kids particularly love it.
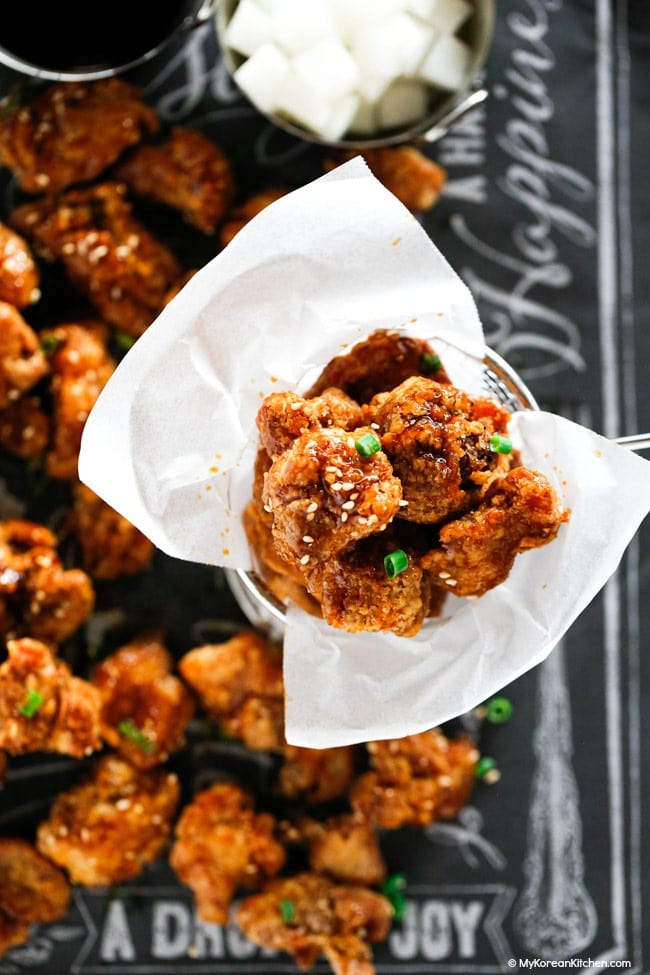
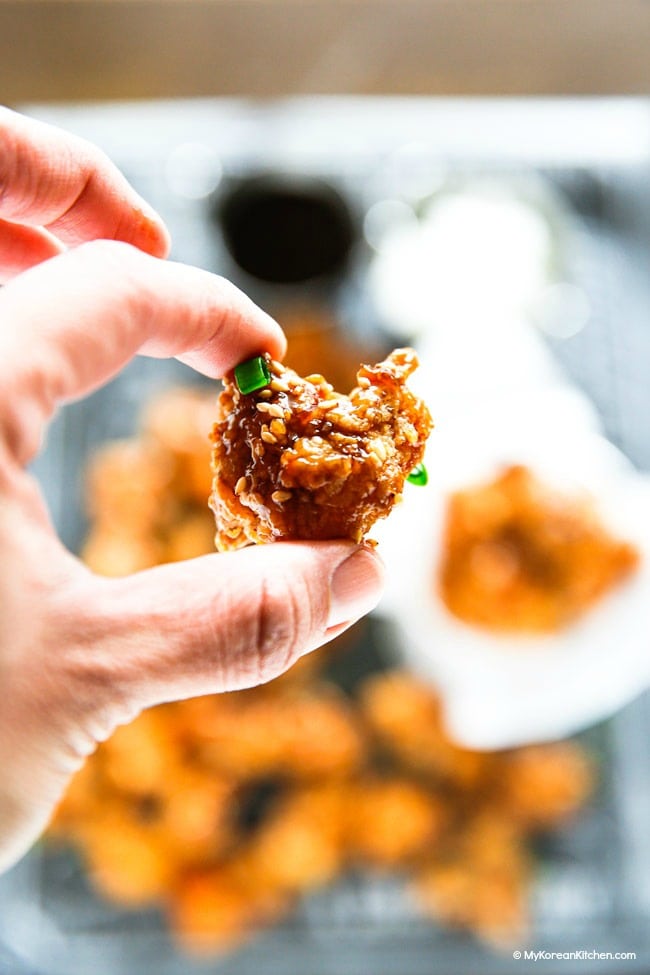
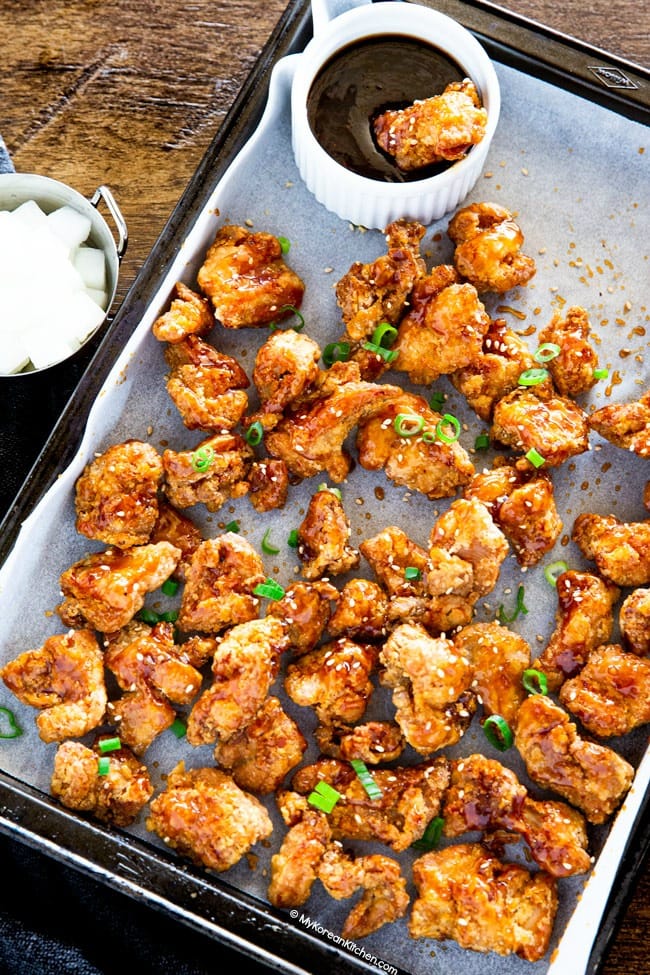
The main highlights are boneless and bite sized chicken nuggets (aka popcorn chicken) and they are double deep fried to ensure their crunchiness and basted with lip-smackingly delicious soy garlic sauce. This popcorn chicken can stay crunchy for a few hours and seriously they taste so good!
Can You Make with Other Parts of Chicken?
Yes, this recipe will work well with chicken drumsticks or wings too. We just won’t call it popcorn chicken, which I have been referring to intermittently.
Can You Make Dakgangjeong In an Air Fryer?
In short, yes, you can do it. Though I much prefer when it is deep fried in oil because it tastes better and feels less dried.
I think it’s because you can still taste and feel corn starch particles when you fry the chicken bites in an air fryer, even if you shake it off well before cooking. (I even use a lot less corn starch (e.g. less than 1 cup) for air fryer since you have to shake it off anyway.) Also, the air fried version results in not as crunchy texture as when you double deep fry.
Despite these flaws, if you want to go with an air fryer method, here’s what you can do.
- Spray cooking oil on the air fryer basket.
- Place the chicken pieces, without overlapping, onto the basket. Spray some oil lightly over the chicken pieces. (While it is optional, chicken browns better with extra oil coating.)
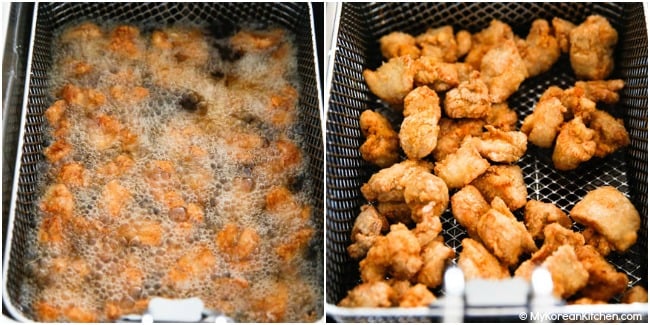
- Cook at 200 C / 390 F for 6 to 7 mins. Turn them over and spray oil lightly to cover the dried white spots (from corn starch). Cook for another 6 to 7 mins, or until golden brown.
As each air fryer has a different capacity, cooking time may vary. Also, if you’re using different chicken cuts other than bite sized boneless chicken thigh, you will have to adjust the cooking time.
More Korean Chicken Recipes
There are many delicious ways to enjoy chicken in the Korean style. Here are some of my picks.
- Korean Fried Chicken
- Korean Popcorn Chicken (with Sweet and Spicy Sauce)
- Baked Korean Chicken Wings
Ingredients for Soy Garlic Dakgangjeong, Serves 4 – 6
Chicken & Seasonings
- 900g / 2 pounds boneless chicken thigh fillets, cut into bite size pieces
- 2 Tbsp rice wine
- 1 tsp onion powder
- 1 tsp garlic powder
- 1 tsp fine sea salt
- 1/4 tsp ginger powder
- A few cracks ground black peppers
Other
- 1.5 cups corn starch (or potato starch)
- cooking oil for deep frying (I used rice bran oil)
Soy Garlic Sauce
- 1/4 cup soy sauce
- 2 Tbsp brown sugar
- 2 Tbsp honey
- 2 Tbsp water
- 2 Tbsp rice wine
- 1/2 Tbsp minced ginger
- 1/2 Tbsp minced garlic
- A few sprinkle ground black pepper
- (optional) 3 dried chilies
- (optional) 2 green onions, white part
Slurry
- 2 tsp corn starch
- 2 tsp water
Garnish
- toasted sesame seeds
- green onions, thinly sliced
* 1 Tbsp = 15 ml, 1 Cup = 250 ml
** Dried chilies give a very subtle dose of spiciness, so you may omit it if you can’t tolerate it.
*** If you want to know more about Korean ingredients, check my essential Korean ingredients list.
How to Make Dakgangjeong
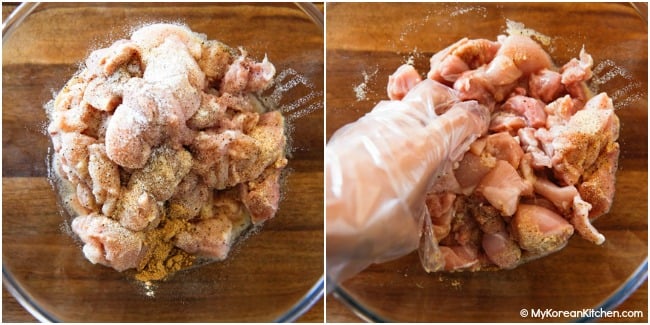
1. In a large bowl, place the chopped chicken and add rice wine, onion powder, garlic powder, salt, ginger powder, and ground black pepper. Combine them well. Set aside.
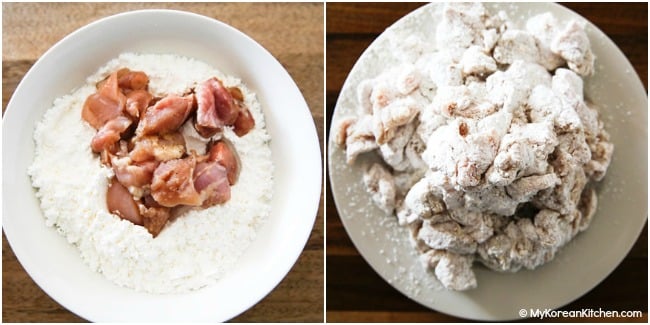
2. Place the corn starch in a large bowl. Dredge the seasoned chicken pieces in the corn starch and evenly coat them.
3. In a deep saucepan (or fryer) add a generous amount of oil and heat it until the oil temperature reaches 175 C / 347 F. Start adding the chicken carefully and fry them until they cook. (It takes 4 to 5 mins depending on the size of chicken). Do not overcrowd the pan, and cook in batches if needed. (It might be useful to use a grease splatter screen if you have one as it minimises oil splatter.)
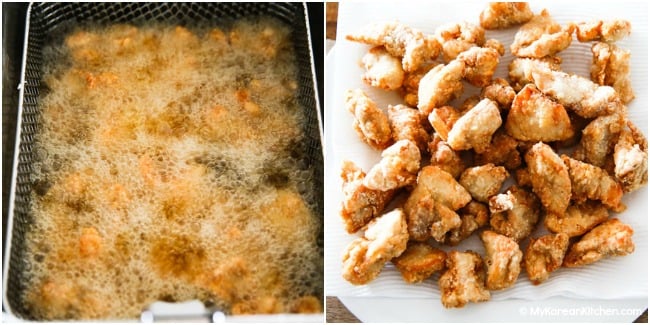
4. Take out the cooked chicken and place them onto some kitchen paper to soak up excess oil. Quickly scoop out any floating debris from the oil using a skimmer. Deep fry the chicken again when the oil temperature reaches 175 C / 347 F. Fry them until the batter is golden and crisp. (The second time frying is shorter than the first time, 2 to 3 mins.) Set aside.
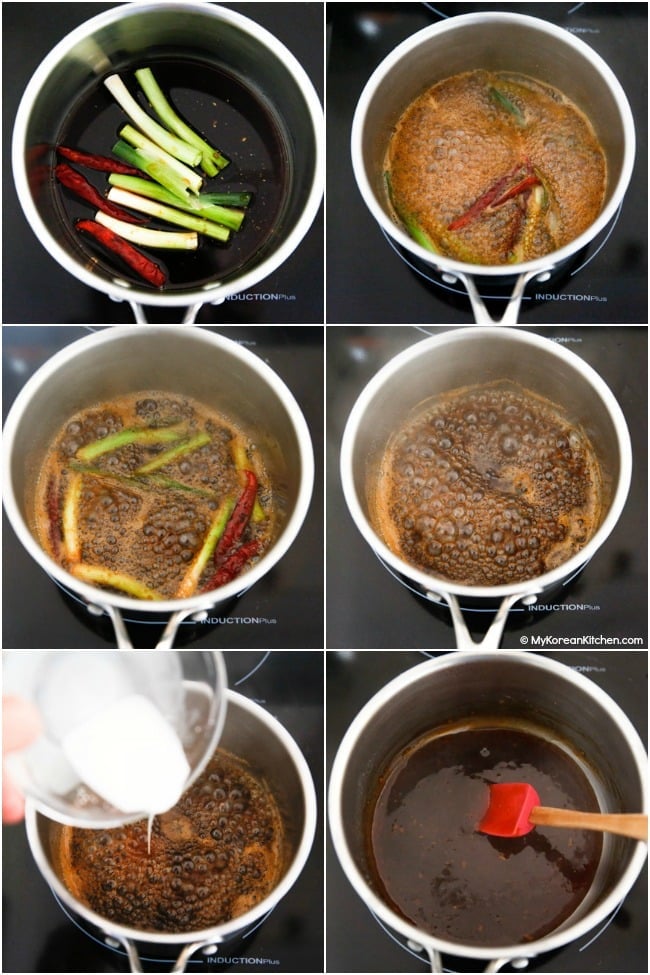
5. In a separate pan, combine all the sauce ingredients. Bring it to boil over medium low heat while stirring often. Once the sauce starts bubbling, take out the chilies and green onion pieces. In a separate bowl, combine and mix the slurry ingredients then pour it over the sauce. Stir often. Once the sauce thickens or turns to glaze (within 1 – 2 mins), remove from the heat and cool down for 5 mins.
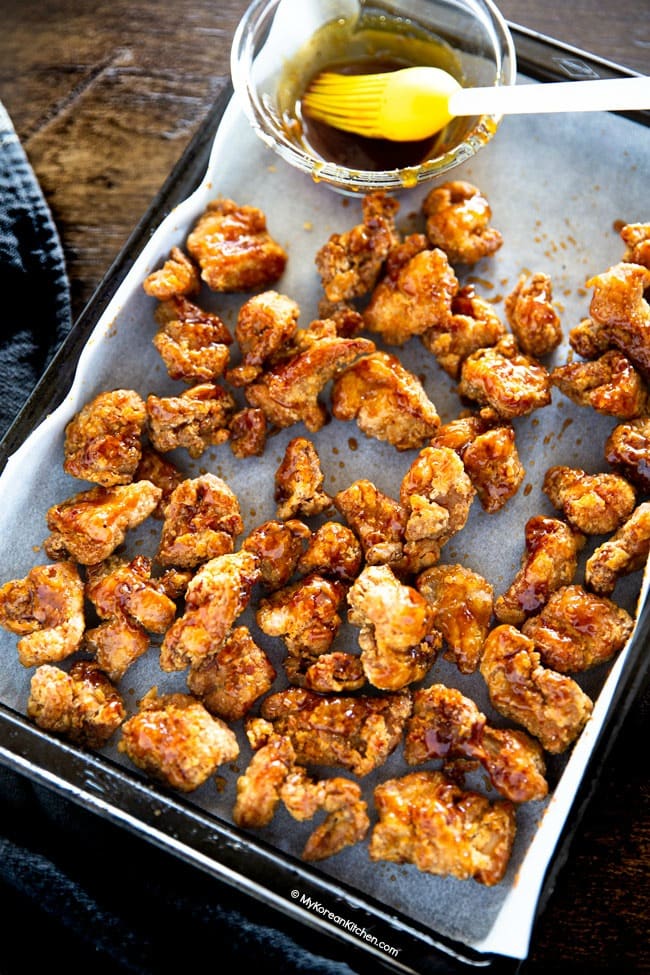
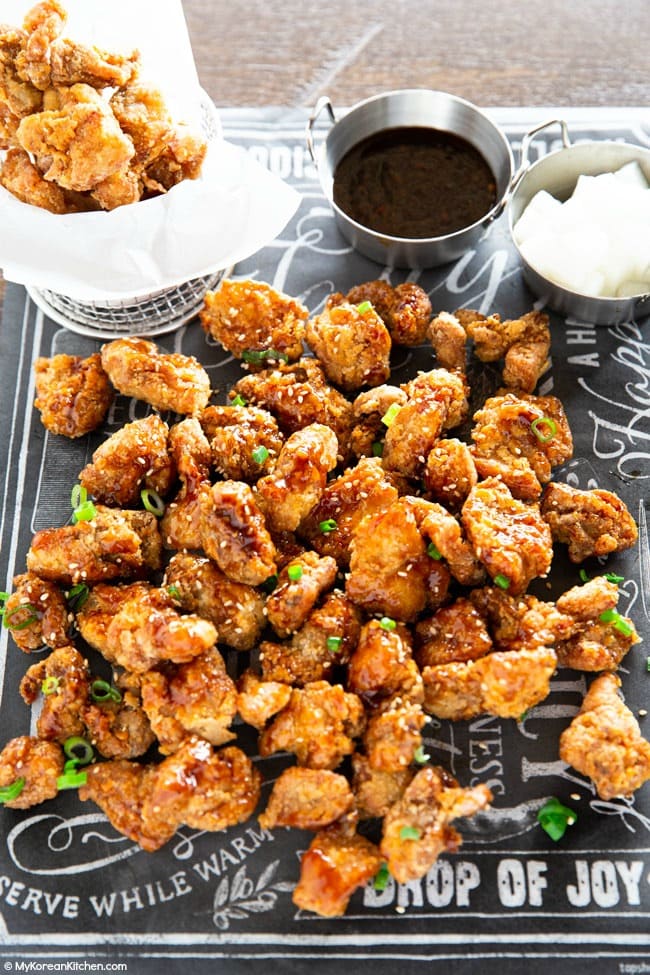
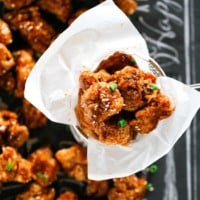
6. Place the double fried chicken onto the lined baking sheet, then using a cooking brush, gently baste the chicken with the sauce. Once all the chicken is coated with the sauce, garnish with sesame seeds and green onions. Serve.
It will go well with coleslaw, corn cheese, Korean macaroni salad or pickled radish. Leftover chicken can be refrigerated for a day or two and eaten cold or reheated.
Love Korean food? Browse lots more Korean recipes from my easy Korean recipe collections. Also, subscribe to my newsletter and follow along on Facebook, Pinterest and Instagram for all of the latest updates.
Dakgangjeong - Soy Garlic Fried Chicken
Ingredients
CHICKEN & SEASONINGS
- 900 g boneless chicken thigh fillets (2 pounds), cut into bite size pieces
- 2 Tbsp rice wine
- 1 tsp onion powder
- 1 tsp garlic powder
- 1 tsp fine sea salt
- 1/4 tsp ginger powder
- A few cracks ground black pepper
OTHER
- 1.5 cups corn starch
- cooking oil for deep frying (I used rice bran oil)
SOY GARLIC SAUCE
SLURRY
- 2 tsp corn starch
- 2 tsp water
GARNISH
- toasted sesame seeds
- green onions , thinly sliced
Instructions
Deep Frying Method
- In a large bowl, place the chopped chicken and add rice wine, onion powder, garlic powder, salt, ginger powder, and ground black pepper. Combine them well. Set aside.
- Place the corn starch in a large bowl. Dredge the seasoned chicken pieces in the corn starch and evenly coat them.
- In a deep saucepan (or fryer) add a generous amount of oil and heat it until the oil temperature reaches 175 C / 347 F. Start adding the chicken carefully and fry them until they cook. (It takes 4 to 5 mins depending on the size of chicken). Do not overcrowd the pan, and cook in batches if needed. (It might be useful to use a grease splatter screen if you have one as it minimises oil splatter.)
- Take out the cooked chicken and place them onto some kitchen paper to soak up excess oil. Quickly scoop out any floating debris from the oil using a skimmer. Deep fry the chicken again when the oil temperature reaches 175 C / 347 F. Fry them until the batter is golden and crisp. (The second time frying is shorter than the first time, 2 to 3 mins.) Set aside.
- In a separate pan, combine all the sauce ingredients. Bring it to boil over medium low heat while stirring often. Once the sauce starts bubbling, take out the chilies and green onion pieces. In a separate bowl, combine and mix the slurry ingredients then pour it over the sauce. Stir often. Once the sauce thickens or turns to glaze (within 1 – 2 mins), remove from the heat and cool down for 5 mins.
- Place the double fried chicken onto the lined baking sheet, then using a cooking brush, gently baste the chicken with the sauce. Once all the chicken is coated with the sauce, garnish with sesame seeds and green onions. Serve.
Air Fryer Method (Frying Only)
- Spray cooking oil on air fryer basket.
- Place the chicken pieces, without overlapping, onto the basket. Spray some oil lightly over the chicken pieces. (While it is optional, chicken browns better with extra oil coating.)
- Cook at 200 C / 390 F for 6 to 7 mins. Turn them over and spray oil lightly to cover the dried white spots (from corn starch). Cook for another 6 to 7 mins, or until golden brown.
Notes
- 1 Tbsp = 15 ml, 1 Cup = 250 ml
- Dried chilies give a very subtle dose of spiciness, so you may omit it if you can’t tolerate it.
- If you want to know more about Korean ingredients, check my essential Korean ingredients list.
- Since small chicken pieces are dredged in corn starch, the outcome is superior when you actually deep fry rather than air frying them. I just put up the air fryer instructions above for those who still prefer the air frying method regardless of the outcome.
- Dakgangjeong will go well with coleslaw, corn cheese, Korean macaroni salad or pickled radish.
- Leftover chicken can be refrigerated for a day or two and eaten cold or reheated.
Nutrition Info (per serving)
The nutrition information shown is an estimate provided by an online nutrition calculator. It should not be considered a substitute for a professional nutritionist’s advice.


