Easy dongchimi recipe. This light and refreshing radish water kimchi is a perfect kimchi for your spring and summer weather!
What is Dongchimi?
Dongchimi (동치미) is a popular water kimchi made with Korean radish. The kimchi is often prepared in late (Korean) fall or early winter using radishes harvested in fall. Apparently, these radishes are more plump and sweeter.
The radishes are then salted for a day or two to soften then placed in a jar of pickling brine until it develops a umimi rich kimchi flavor.
Traditionally dongchimi is made with good looking, whole small radishes (i.e. non-sliced), so the kimchi typically takes longer than a few weeks to properly ferment and develop a good taste.
It is also meant to last for a long time (like 3 months of winter), so it has been a popular winter side dish in Korea for centuries.
Save This Recipe
However, today’s recipe is more practical, particularly if you don’t have the patience to wait for the kimchi to ferment for a long time. Because it can be ready to eat as early as 48 hrs to 72 hrs after making it. Woohoo~!
It’s also great when you’re only making a small portion of kimchi for your small household. FYI, the below recipe is for enough for 15 to 20 small serves.
What Does Dongchimi Taste Like?
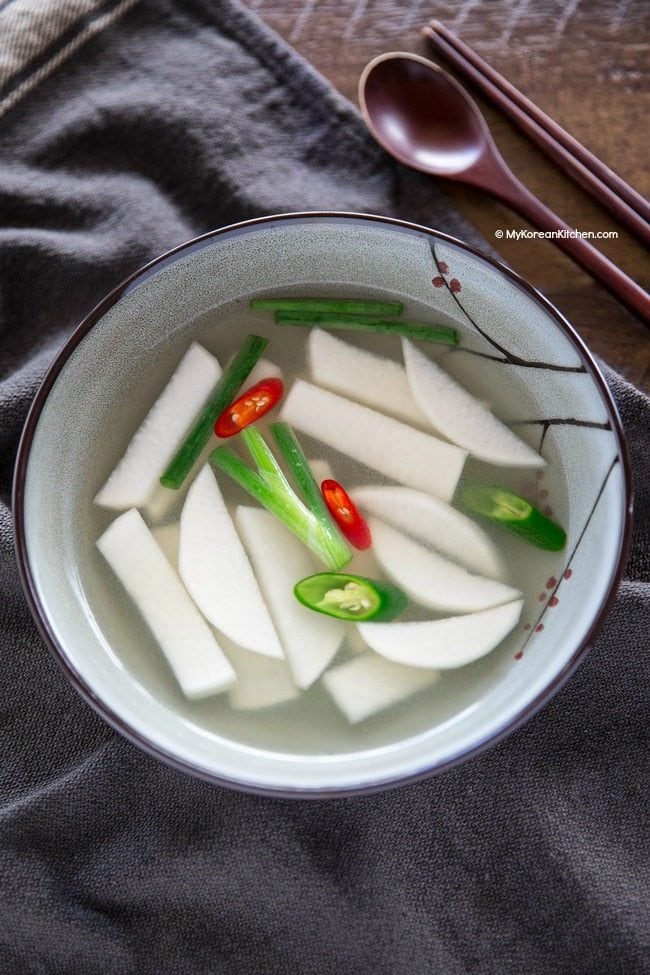
In short, dongchimi tastes like light and refreshing cold clear soup.
Obviously, you can taste the slightly bitter sweet taste of radishes. (The strength of these traits will vary radish to radish.) But, when these radishes are combined with sweet and salty brine, it will bring out more of those fruity and savory flavors too.
Well fermented dongchimi should taste slightly salty, sweet and tangy. Also, let’s not forget that some radishes are naturally spicy so you could notice this taste in your dongchimi broth.
How to Serve Dongchimi
Dongchimi can be served as a side dish with a main meal. But my daughter loves having it as an appetizer instead. She finishes her bowl of dongchimi before she starts her main meal. She’s a true Korean! 🙂
Dongchimi also goes well with Korean BBQ, particularly the spicy kinds (e.g. dakgalbi – Spicy Korean chicken). Many Korean BBQ restaurants serve dongchimi as a complimentary side dish.
Also, Koreans love having dongchimi with boiled/baked sweet potatoes and porridge. Apparently it helps with digestion!
Finally, you can also use fermented dongchimi broth when making Korean cold noodle soup too. I will show you how in the next few months.
About The Recipe
As the title suggests, this easy dongchimi is really easy to make! Just follow my simple 5 step process below.
I combined my techniques from my radish kimchi (kkakdugi) recipe and my white kimchi (Baek kimchi) recipe, which worked out quite brilliantly if I say so myself. 😉 Anyway, hope you like my easy dongchimi recipe!
Ingredients for Easy Dongchimi
Main
- 800g / 1.8 pounds Korean radish or daikon radish
- 2 Tbsp coarse sea salt
- 2 Tbsp (raw) sugar
- 25g / 0.9 ounces green onion, cut into 5cm / 2 inch length
- (optional) 1 to 3 chilies, rinsed, both ends trimmed then halved – it will make the your dongchimi spicy, so only add if you want spicy flavor.
Dongchimi Brine
- 4 cups water
- 1 Tbsp coarse sea salt
- 300g / 11 ounces Korean pear / nashi or bosc pear, peeled and seeded
- 150g / 5.3 ounces red apple (royal gala or fuji), core removed
- 50g / 1.8 ounces onion, peeled
- 20g / 0.7 ounces garlic, peeled
- 15g / 0.5 ounces ginger, peeled
*1 Tbsp = 15 ml, 1 Cup = 250 ml
**If you want to learn about Korean ingredients, check my essential Korean ingredients list.
How to Make Easy Dongchimi
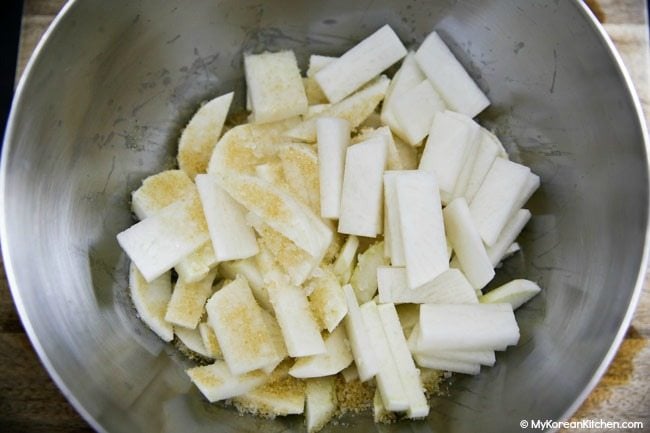
1. Wash the radish thoroughly and peel the skin. Slice them into 5cm / 2 inch sticks and place them into a mixing bowl. Add 2 Tbsp coarse sea salt and 2 Tbsp sugar then gently mix them well. Rest it for 30 mins allowing the radish to soften.
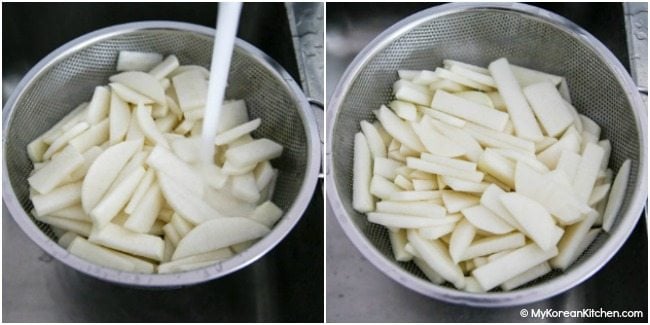
2. Rinse the radish under cold running water a few times to remove any residue salt and sugar. Drain away excess water on a sieve for 5 mins.
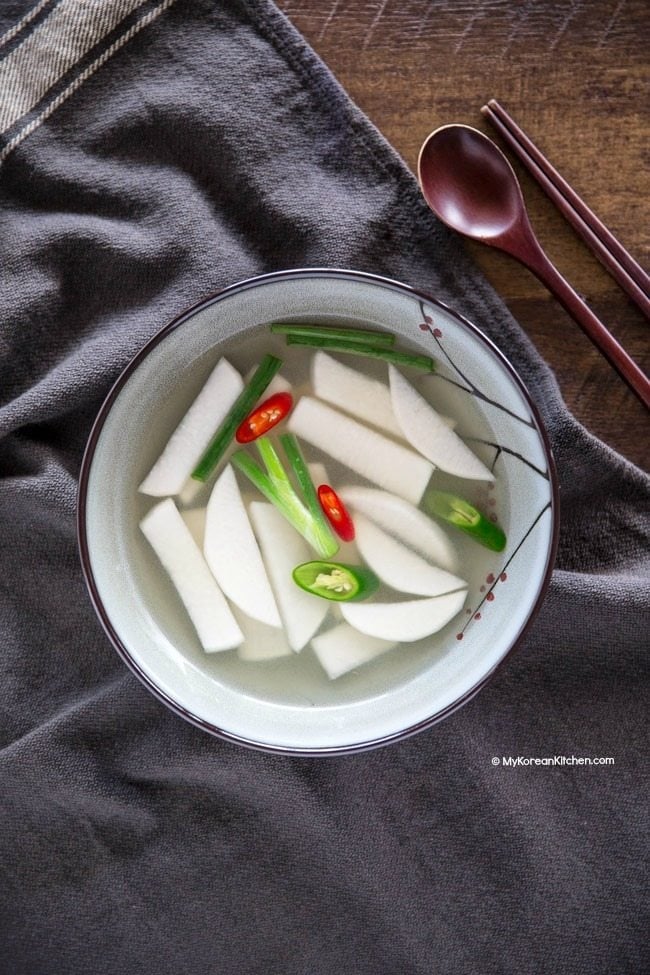
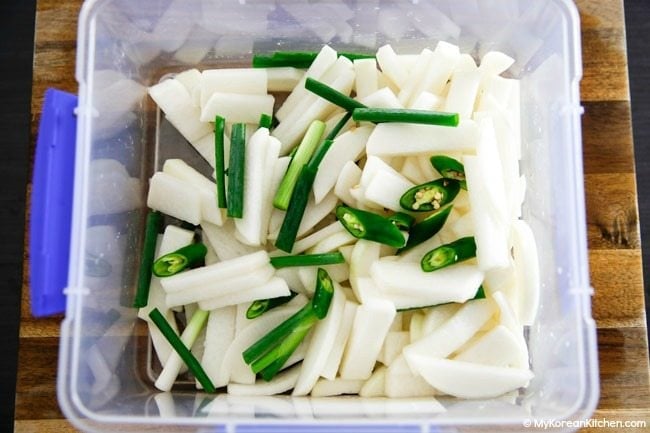
3. Place the radish, green onion and chilies (if adding) into the kimchi container. As an indicator, I used a 5 L container and it was only half full.
4. Blend the kimchi brine ingredients in a mixer or food processor until pureed. Strain the pureed kimchi brine through the cheese cloth / muslin cloth and catch any liquid that comes out of it into the kimchi container (from step 3). Squeeze out all the juice from the cloth into the kimchi container. Discard any chunky leftovers.

5. Close the kimchi container and leave it at room temperature for 18 hrs to 24 hrs depending on your room temperature, then move it to the fridge. You can start eating it from 48 hrs to 72 hrs after making it. (You may notice some bubbles in the broth. That means it’s fermenting well.) Dongchimi should be good for 3 to 4 weeks when refrigerated. If you don’t mind the sour taste you can keep it even longer.
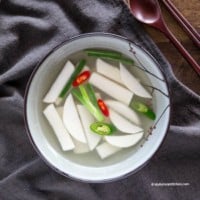
Easy Dongchimi
Ingredients
MAIN
- 800 g Korean radish or daikon radish (1.8 pounds)
- 2 Tbsp coarse sea salt
- 2 Tbsp sugar (raw)
- 25 g green onion , cut into 5cm / 2 inch length (0.9 ounces)
- 1-3 chilies (optional), rinsed and both ends trimmed then halved – it will make the your dongchimi spicy so only add if you want spicy flavor.
DONGCHIMI BRINE
- 4 cups water
- 1 Tbsp coarse sea salt
- 300 g Korean pear / nashi or bosc pear, peeled and seeded (11 ounces)
- 150 g red apple (royal gala or fuji), core removed (5.3 ounces)
- 50 g onion , peeled (1.8 ounces)
- 20 g garlic , peeled (0.7 ounces)
- 15 g ginger , peeled (0.5 ounces)
Instructions
- Wash the radish thoroughly and peel the skin. Slice them into 5cm / 2 inch sticks and place them into a mixing bowl. Add 2 Tbsp coarse sea salt and 2 Tbsp sugar then gently mix them well. Rest it for 30 mins allowing the radish to soften.
- Rinse the radish under cold running water a few times to remove any residue salt and sugar. Drain away excess water on a sieve for 5 mins.
- Place the radish, green onion and chilies (if adding) into the kimchi container. As an indicator, I used a 5 L container and it was only half full.
- Blend the kimchi brine ingredients in a mixer or food processor until pureed. Strain the pureed kimchi brine through the cheese cloth / muslin cloth and catch any liquid that comes out of it into the kimchi container (from step 3). Squeeze out all the juice from the cloth into the kimchi container. Discard any chunky leftovers.
- Close the kimchi container and leave it at room temperature for 18 hrs to 24 hrs depending on your room temperature, then move it to the fridge. You can start eating it from 48 hrs to 72 hrs after making it. (You may notice some bubbles in the broth. That means it’s fermenting well.) Dongchimi should be good for 3 to 4 weeks when refrigerated. If you don’t mind the sour taste you can keep it even longer.
Nutrition Info (per serving)
The nutrition information shown is an estimate provided by an online nutrition calculator. It should not be considered a substitute for a professional nutritionist’s advice.
")

