
Easy kimchi jjim (braised kimchi) recipe.
Try slices of melt in your mouth kimchi and pork scotch fillet (pork butt). These combinations are so flavorful and delicious.
Slightly sour and pungent kimchi goes perfectly well with otherwise bland pork fillet. Strong sauce might not be necessary with kimchi, but with a bit of extra sauce, the whole braised kimchi moves up to the next level.

What is Kimchi Jjim
Kimchi jjim (김치찜), in essence, is braised kimchi. It somewhat resembles kimchi stew but is slightly different. Another similar recipe of mine would be slow cooker kimchi beef .
It is made with staple Korean ingredients – aged kimchi (or mukeunji), meat and Korean spices. I cook mine with pork scotch fillet (pork butt) and it is slowly braised over the stove for 1 hour. The result is super tender and tasty kimchi and pork. It is simply heavenly.
Another thing I like about kimchi jjim is that it’s quite effortlessly prepared (only 4 steps – including serving!) It makes a perfect dish to any kimchi lover. It will steal your rice away in no time. You really don’t need any other main dishes, side dishes or soup, as it has it all.
Tips
- It works best with aged kimchi, at least one month old. But if your kimchi is on a fresher side, add 1 Tbsp of rice vinegar in the sauce to give an aged kimchi taste.
- Best types of kimchi is pogi kimchi (포기김치), meaning the head of cabbage is intact, rather than pre-sliced. That being said, you can use pre-sliced kimchi if that’s all you have too.
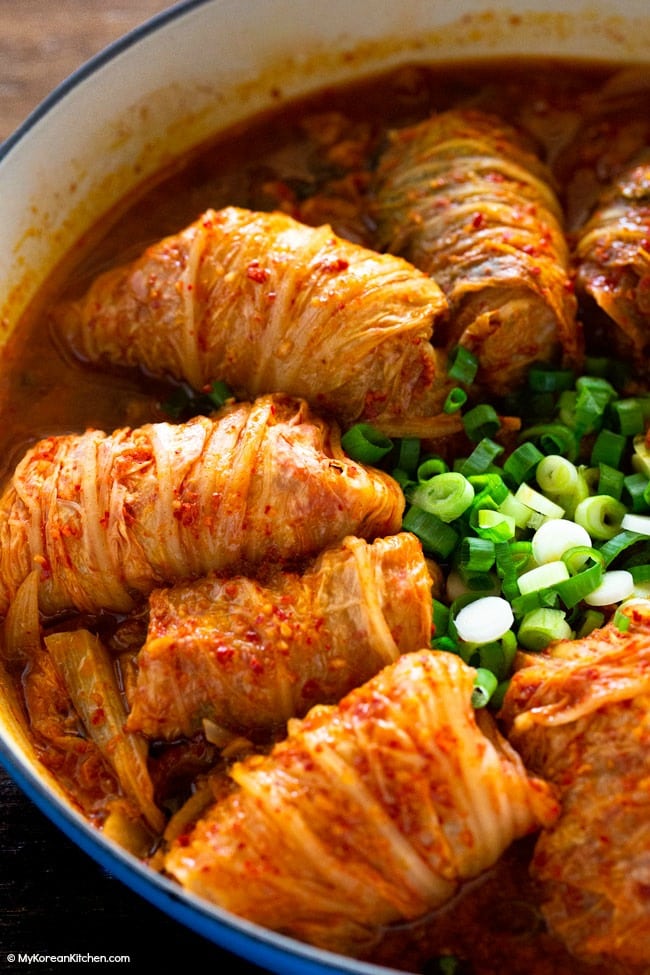
- If you want to go a bit fancy, you could roll the meat inside of the kimchi leaf. Then present it as in the picture below. This will only work if you use unsliced kimchi. However, I find that this is less practical as you don’t normally get a lot of long leaf kimchi per kimchi head. Also, it is more time consuming.
- Typically, you don’t add other meat or vegetables in kimchi jjim. But if you want to clean out your fridge, tofu, mushrooms and zucchini can go well in this. You don’t need to add more sauce or water.
If you want to know more about how to use your aged kimchi, check my 14 Delicious Ways to Eat Kimchi post.
Ingredients Kimchi Jjim (4-6 Servings)

Main
- 800g / 28 ounces kimchi (aged kimchi), if you buy 1kg kimchi, that will give you about 800g – 850g of kimchi. The rest is kimchi juice.
- 500g / 18 ounces pork butt (scotch fillet), sliced to medium thickness (1 cm-1.5 cm / 0.5 inches) and length (6 cm-7 cm / 2 inches)
- 2 Tbsp rice wine (mirin)
- A few cracks ground black pepper
- 1 cup rice water (obtained from rinsing rice) or use dried anchovies and dried kelp soup stock
- 1/2 onion (60g / 2 ounces), thinly sliced
- 30g / 1 ounce green onion, thinly sliced
- (optional) 1-2 green chilies, thinly sliced
Sauce
- 1 Tbsp gochugaru (Korean chili flakes)
- 1 Tbsp soy sauce
- 1 Tbsp minced ginger
- 1 Tbsp minced garlic
- 1/2 Tbsp doenjang (Korean soybean paste)
- 1/2 Tbsp sugar
* While obtaining the rice water, rinse the rice a couple of times first, and then reserve the water from the third rinse.
** 1 Tbsp = 15 ml, 1 Cup = 250 ml
*** If you want to learn more about Korean ingredients, check my essential Korean ingredients list.
How to Make Kimchi Jjim
1. Combine the meat with rice wine and a few cracks of ground black pepper in a small bowl. Mix well and set aside.
2. Combine all sauce ingredients in a small bowl and mix them well. Set aside.
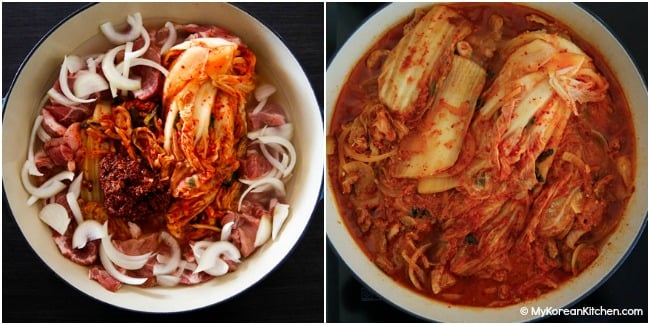
3. Put all ingredients except for the green onions and chilies in a braising pot and bring it to boil over medium high heat (5 – 6 mins) covered. Then reduce the heat to medium low heat and simmer for 1 hour or until your desired tenderness is achieved. While simmering, stir around occasionally. Garnish with green onions and chilies. Remove from the heat.
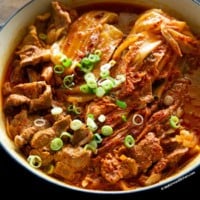
4. Serve with cooked rice (i.e. Korean purple rice). Use a pair of scissors and tongs to cut the kimchi.

How to Store
Any leftover can be refrigerated 3-4 days in an air tight container or up to 1 month in the freezer.
Love Korean food? Browse lots more Korean recipes from my easy Korean recipe collections. And subscribe to my newsletter and follow along on Facebook, Pinterest and Instagram for all of the latest updates.
Kimchi Jjim (Braised Kimchi)
Ingredients
MAIN
- 800 g kimchi (28 ounces), (aged kimchi), if you buy 1kg kimchi, that will give you about 800g - 850g of kimchi. The rest is kimchi juice.
- 500 g pork butt (scotch fillet), sliced to medium thickness (1 cm-1.5 cm / 0.5 inches) and length (6 cm-7 cm / 2 inches)
- 2 Tbsp rice wine (mirin)
- A few cracks ground black pepper
- 1 cup rice water (obtained from rinsing rice) or use dried anchovies and dried kelp soup stock
- 1/2 onion (60g / 2 ounces), thinly sliced
- 30 g green onion (1 ounce), thinly sliced
- 1-2 green chilies (optional), thinly sliced
Instructions
- Combine the meat with rice wine and a few cracks of ground black pepper in a small bowl. Mix well and set aside.
- Combine all sauce ingredients in a small bowl and mix them well. Set aside.
- Put all ingredients except for the green onions and chilies in a braising pot and bring it to boil over medium high heat (5 - 6 mins) covered. Then reduce the heat to medium low heat and simmer for 1 hour or until your desired tenderness is achieved. While simmering, stir around occasionally. Garnish with green onions and chilies. Remove from the heat.
- Serve with cooked rice (i.e. Korean purple rice). Use a pair of scissors and tongs to cut the kimchi.
Notes
Nutrition Info (per serving)
The nutrition information shown is an estimate provided by an online nutrition calculator. It should not be considered a substitute for a professional nutritionist’s advice.

")
