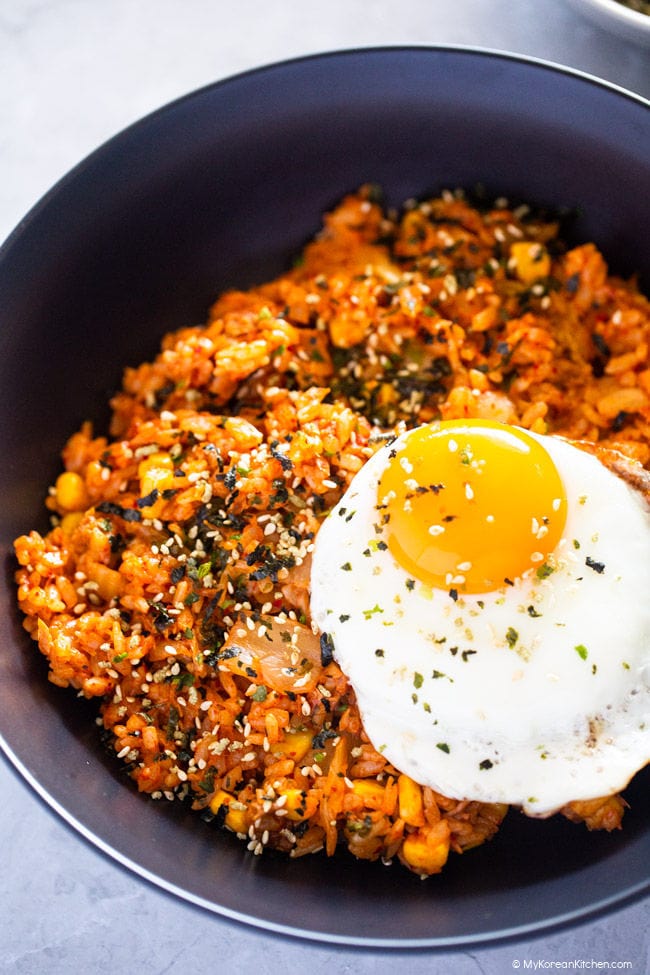
Try this easy kimchi tuna fried rice recipe! It’s made with pantry staples, canned tuna and Korean food lover’s fridge staple, kimchi. It only takes 15 minutes to cook this dish! You should really try it or you’ll regret it!
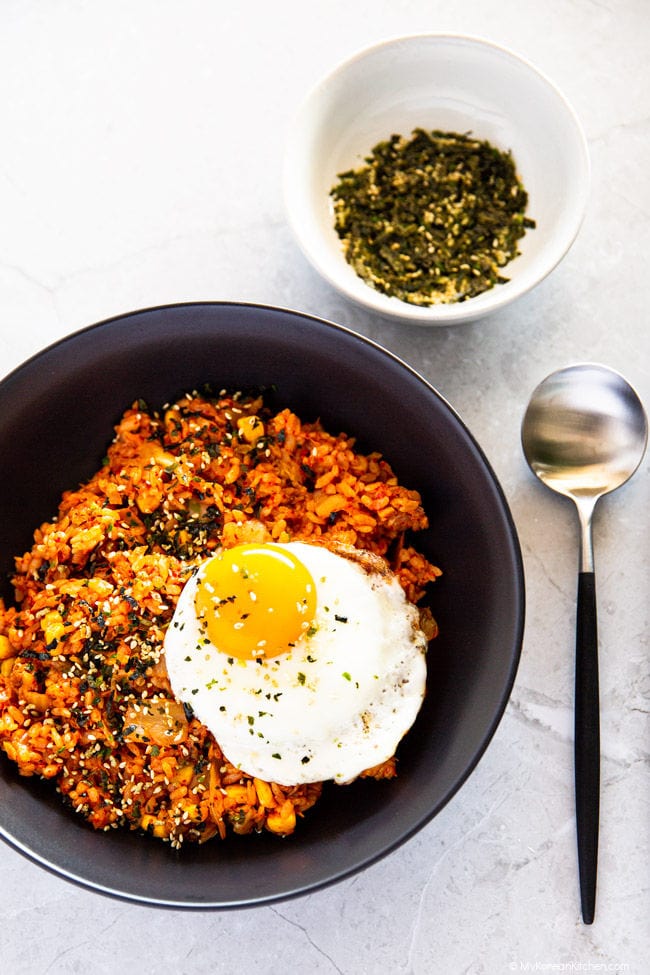
About Kimchi Tuna Fried Rice
Koreans love fried rice. It makes an easy meal. It’s also a great way to clear out your fridge as well.
Many people make kimchi fried rice at home and you can literally add anything you like. Though, the most common pairs are kimchi + bacon and kimchi + canned tuna. Kimchi + spam combination is also getting popular as well.
Kimchi tuna fried rice (Kimchi Chamchi Bokkeumbap, 김치참치 볶음밥) is made with aged kimchi, canned tuna, cooked rice, gochujang, soy sauce, and sesame oil as the main ingredients.
Unlike kimchi fried rice made with bacon or spam, tuna kimchi fried rice has a lighter flavor and is not as smoky or greasy. Nonetheless, it is saucy, delicious and full of umami rich flavor thanks to its delicious sauce.
Best Cooking Tips
- Kimchi – For fried rice, you should use sour kimchi that is at least two weeks old. So, I typically call it ‘aged kimchi”. Mix in 1/4 teaspoon rice vinegar to 1/2 teaspoon if your kimchi is fresh and needs more tanginess.
- Canned Tuna – You can use canned tuna either in oil or in water, it doesn’t matter too much which one. Oil-based canned tuna will give you a more savory taste and a more complex flavor than water-based canned tuna.
- Rice variety – Koreans typically eat short or medium grain, japonica rice. These varieties are shorter, rounder, and stickier than long-grain, indica rice. Well-known examples include Calrose rice and Koshihikari rice. These are also known as sushi rice, as they are used when you make sushi. So this is the rice I used for my recipe. You could use a long-grain rice, such as Jasmine or Basmati, but I personally prefer short-grain rice because it gives me a more natural, sweet taste and a fuller feeling.
- Best rice for fried rice – For optimal fried rice consistency, it is best to use day-old rice that has been chilled in the refrigerator. However, if you don’t have this, you can make this by cooking the rice with slightly less water than usual. This will result in drier textured rice. Cool down the rice by spreading it on a baking sheet or wide plate for 10 minutes before cooking it.
- Garnish – The most popular garnish for kimchi fried rice is a sunny-side up fried egg. You can also try shredded dried seaweed, toasted sesame seeds, and thinly sliced green onions. For convenience, I used a Japanese furikake (rice seasoning flakes) bottle that contains dried seaweed and sesame seeds. It works just as well.
Korean Canned Tuna Recipes
If you want to learn other Korean dishes using canned tuna, check the recipes below!
- Tuna Kimchi Jjigae (Chamchi Kimchi Soup)
- Tuna Kimbap (Chamchi Kimbap)
- Tuna Mayo Triangle Kimbap (Samgak Kimbap)
- Korean Spicy Tuna
Also, if you have lots of kimchi in your fridge and are looking for some creative ideas, don’t forget to check my 14 delicious ways to eat kimchi post!
Ingredients for Kimchi Tuna Fried Rice (Serves 2 to 3)
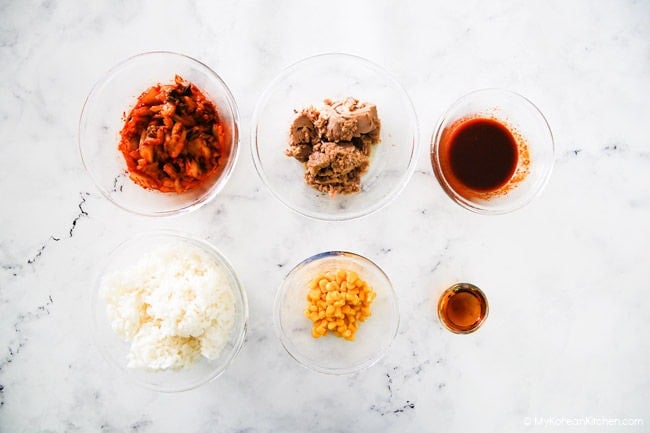
Main
- Some cooking oil
- 1 cup kimchi, cut into small pieces
- 185g / 6.5 ounces canned tuna, drained
- 2 cups cooked rice
- (optional) 50g / 1.8 ounces canned corn kernels, drained
- 1 Tbsp toasted sesame oil
Seasoning Sauce
- 1 Tbsp kimchi juice (liquid from kimchi container)
- 1 Tbsp gochujang (Korean chili paste), reduce if you don’t tolerate spicy food
- 1/2 Tbsp soy sauce, regular (I use Kikkoman brand)
- 1/2 Tbsp sugar (raw sugar or brown sugar)
Garnish (Optional)
- green onions, thinly sliced
- toasted sesame seeds
- dried seaweed strips
- sunny side up fried egg
Notes
- Ideally, the kimchi should be at least two weeks old. If not, add 1/4 teaspoon to 1/2 teaspoon rice vinegar into the kimchi juice to make it sour.
- 1 Tbsp = 15 ml, 1 Cup = 250 ml
- If you want to learn more about Korean ingredients, check my essential Korean ingredients list.
How to Make Kimchi Tuna Fried Rice
1. Add the ingredients for the seasoning sauce to a bowl and mix well. Set aside. Place a pan over medium-high heat and add cooking oil when it’s hot enough. Spread around with a spatula.
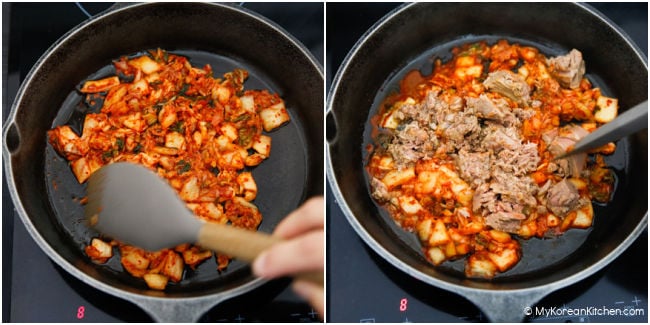
2. Add the kimchi and stir for 2 to 3 minutes, until softened. Add the canned tuna and mix until well combined.
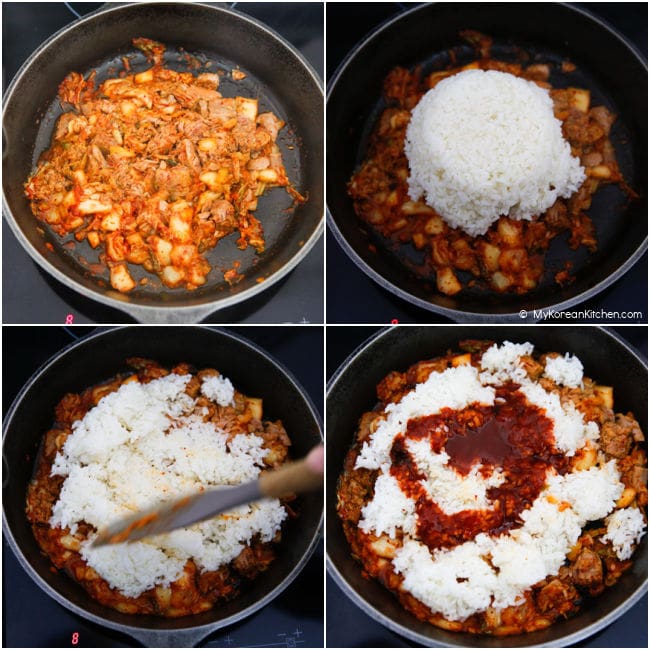
3. Add the rice and the seasoning sauce, mix them together thoroughly.
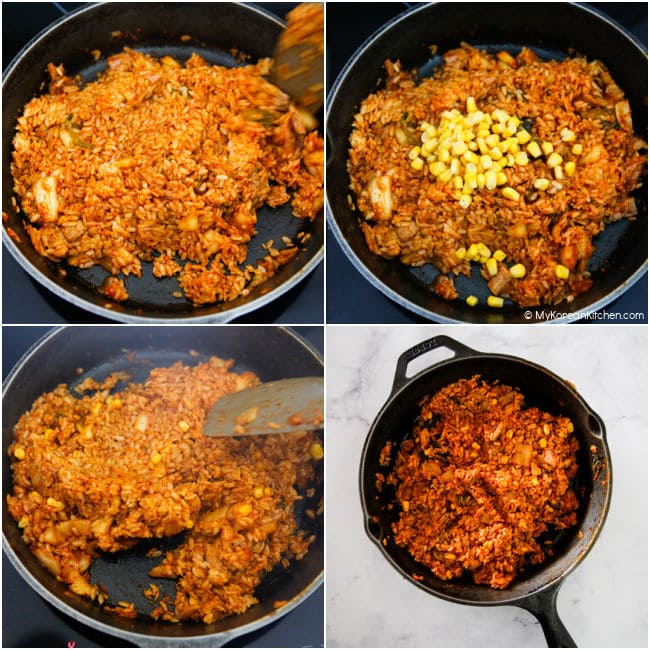
4. Add the corn kernels (optional) and sesame oil. Mix until well combined. Serve. Garnish with sesame seeds, green onion, and dried seaweed strips. Place a sunny side egg on top. Enjoy!

Love Korean food? Browse lots more Korean recipes from my easy Korean recipe collections. And subscribe to my newsletter for all of the latest updates including new recipes, what MKK communities are cooking and K-Dramas!

Kimchi Tuna Fried Rice
Ingredients
MAIN
- Some cooking oil , I use rice bran oil
- 1 cup kimchi , cut into small pieces
- 185 g canned tuna (6.5 ounces), drained
- 2 cups cooked rice
- 50 g canned corn kernels (1.8 ounces), (optional), drained
- 1 Tbsp toasted sesame oil
SEASONING SAUCE
GARNISH (OPTIONAL)
- green onions , thinly sliced
- toasted sesame seeds
- dried seaweed strips
- egg , sunny side up
Instructions
- Add the ingredients for the seasoning sauce to a bowl and mix well. Set aside. Place a pan over medium-high heat and add cooking oil when it’s hot enough. Spread around with a spatula.
- Add the kimchi and stir for 2 to 3 minutes, until softened. Add the canned tuna and mix until well combined.
- Add the rice and the seasoning sauce, mix them together thoroughly.
- Add the corn kernels (optional) and sesame oil. Mix until well combined. Serve. Garnish with sesame seeds, green onion, and dried seaweed strips. Place a sunny side egg on top. Enjoy!
Notes
- Ideally, the kimchi should be at least two weeks old. If not, add 1/4 teaspoon to 1/2 teaspoon rice vinegar into the kimchi juice to make it sour.
- 1 Tbsp = 15 ml, 1 Cup = 250 ml
- If you want to learn more about Korean ingredients, check my essential Korean ingredients list.
Nutrition Info (per serving)
The nutrition information shown is an estimate provided by an online nutrition calculator. It should not be considered a substitute for a professional nutritionist’s advice.

