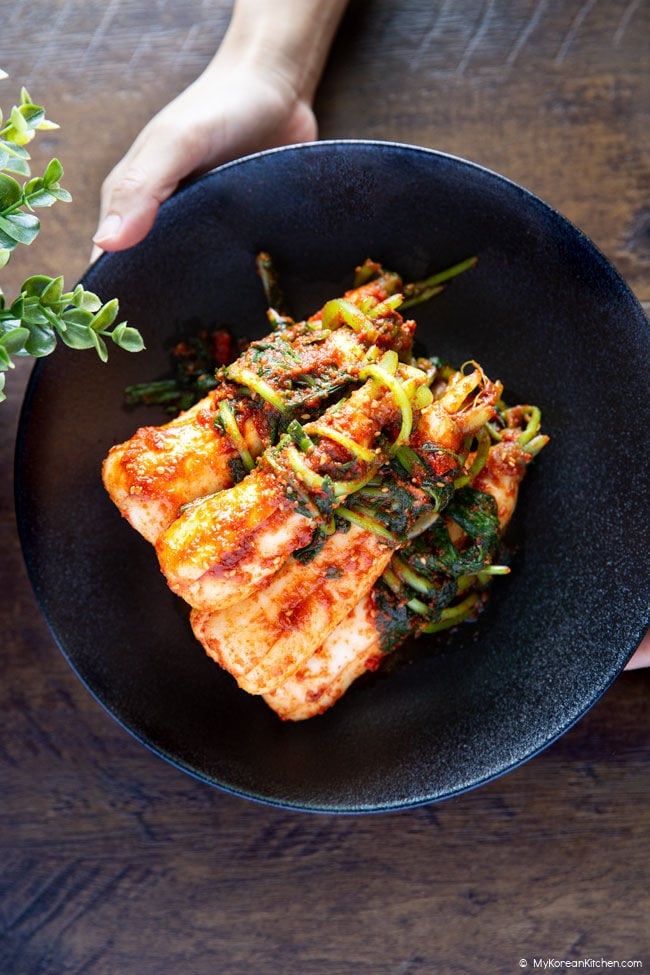
If you love the crunch of Korean radish kimchi, I think you’ll really enjoy chonggak kimchi (총각김치), also known as ponytail kimchi. It’s made with small Korean radishes and their leafy greens, coated in a flavorful kimchi seasoning.
What I especially love is how the radishes stay crisp even as they ferment, while the greens gradually soften and absorb the seasoning. It’s delicious with a simple bowl of steamed rice, but I particularly enjoy it alongside a hot Korean soup or stew.
What Is Chonggak Kimchi?
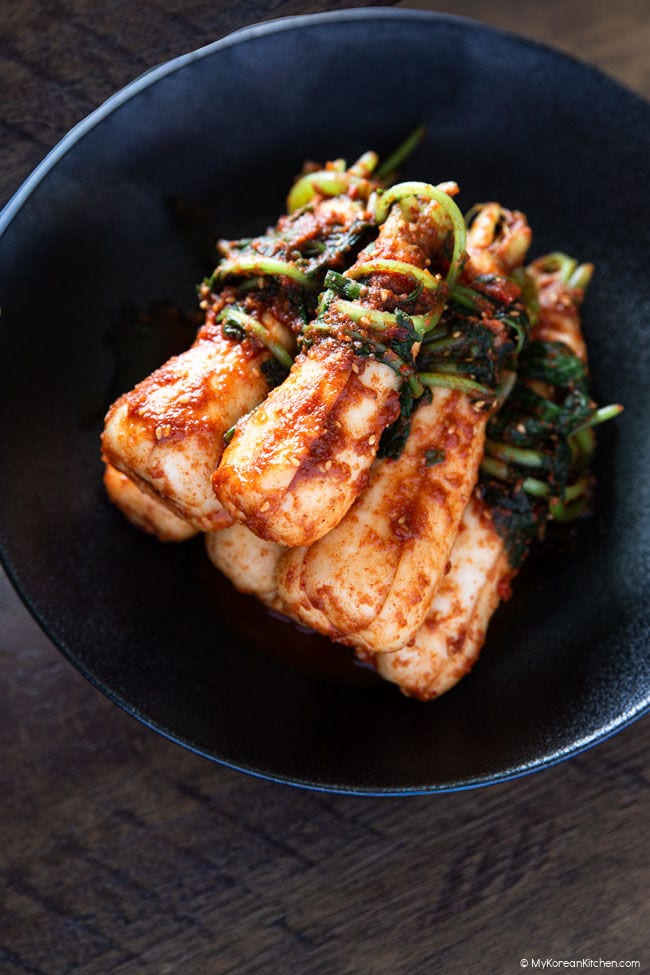
Chonggak kimchi (총각김치) is a traditional Korean kimchi made with chonggakmu (총각무), also known as altari radish (알타리무). Unlike kkakdugi, which is made with cubed radish, chonggak kimchi uses small radishes with their leafy greens still attached. The radishes can be left whole or cut lengthwise into smaller pieces.
The name chonggak means “bachelor” in Korean. One common explanation is that the leafy greens resemble the hairstyle once worn by unmarried young men in Korea. Another theory links the name to the shape of the radish itself. Although the exact origin is uncertain, the resemblance of the greens to tied-up hair helps explain why it’s commonly called “ponytail kimchi” in English.
Why You’ll Love This Recipe
- Extra crunchy radishes. I love how well ponytail radishes hold their crunch. In my experience, they stay crisp longer than the radishes in kkakdugi (cubed radish kimchi), even as they ferment.
- Flavorful seasoning with less heat. A combination of Korean chili flakes and paprika powder gives this kimchi a milder heat, while Korean soup stock adds a savory depth of flavor to the seasoning.
- My mom’s little trick. Ponytail radishes can sometimes have a sharp, peppery taste or a hint of bitterness. My mom adds a little Sprite to help mellow those flavors, and I’ve found that it works well.
Ingredient Highlights
Here are a few ingredients I’d like to highlight before you get started.
Chonggak radishes (총각무): Look for small, firm radishes with fresh, healthy-looking greens still attached. Avoid radishes that feel soft or have wilted, yellowing leaves. Smaller radishes are generally more tender and easier to eat whole. If you can’t find chonggak radishes, you can use regular Korean radish or daikon instead. Cut them into large, irregular chunks or thick, lengthwise pieces rather than small cubes. Just keep in mind that the texture and overall character of the kimchi will be different. This style of radish kimchi is closer to seokbakji (섞박지).
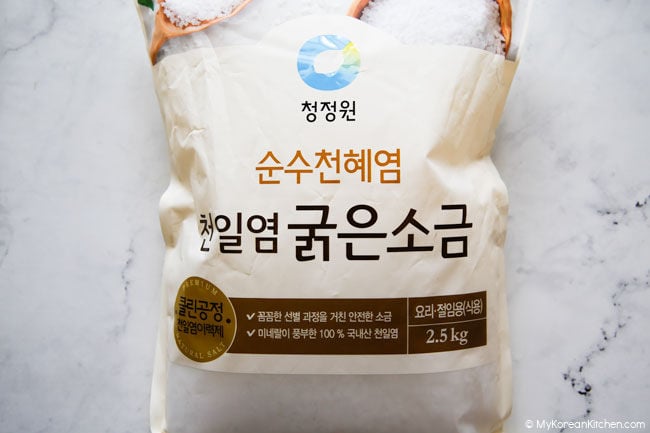
Korean coarse sea salt (굵은소금): This is traditionally used for salting vegetables when making kimchi. Look for Korean coarse sea salt, often labeled cheonilyeom (천일염). If you can’t find the Korean version, you can use regular coarse salt, such as Saxa Natural Rock Salt, instead.
Red sweet pointed peppers or Korean red chili peppers: For a milder kimchi, use red sweet pointed peppers, which add natural sweetness without much heat. For a regular-heat version, you can use mildly hot Korean red chili peppers (hong-gochu, 홍고추) instead. Blend half of the peppers until smooth, then briefly pulse in the rest, leaving some small pieces to help the seasoning coat the radishes and their greens.
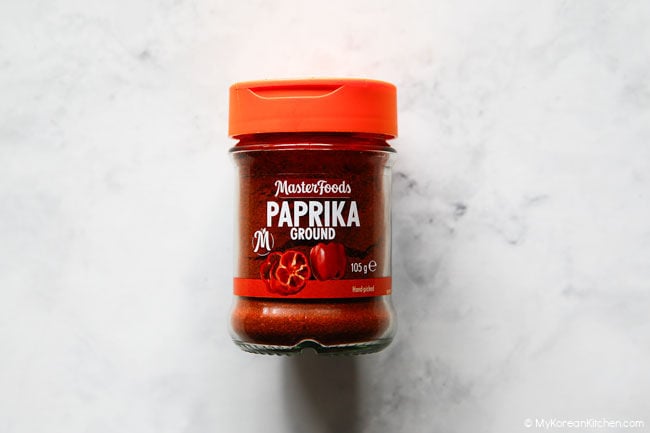
Korean chili flakes (gochugaru) and paprika powder: For this batch, we used a combination of Korean chili flakes and unsmoked paprika powder to make the kimchi milder for family members who prefer less heat. We also make it using only Korean chili flakes. If you prefer this version, simply replace the paprika powder with the same amount of additional Korean chili flakes.
Korean soup stock: Instead of plain water, use Korean soup stock to make the sweet rice flour paste. It gives the kimchi seasoning a little extra savory flavor.
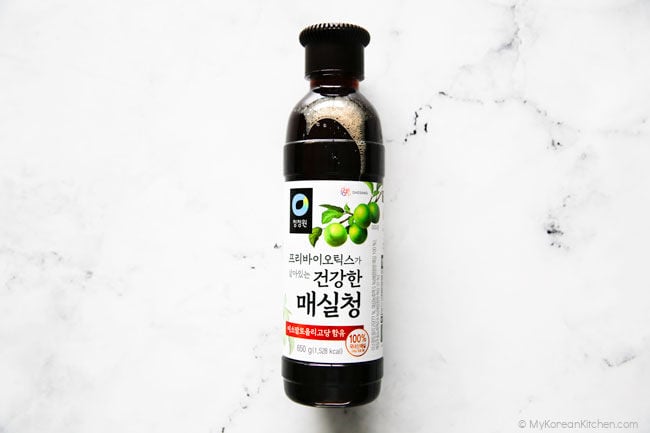
Apple and maesil-cheong (매실청): The apple adds natural sweetness and a mild fruity flavor, while maesil-cheong (Korean green plum syrup) brings a balance of sweetness and tanginess to the seasoning. If you can’t find maesil-cheong, you can leave it out and add a little extra sugar to taste.
Sprite or 7UP: This is one of my mom’s little tricks. Chonggak radishes can sometimes have a sharp, peppery taste or a hint of bitterness. My mom adds a little lemon-lime soda to help mellow those flavors, and I’ve found that it works well.
How to Make It
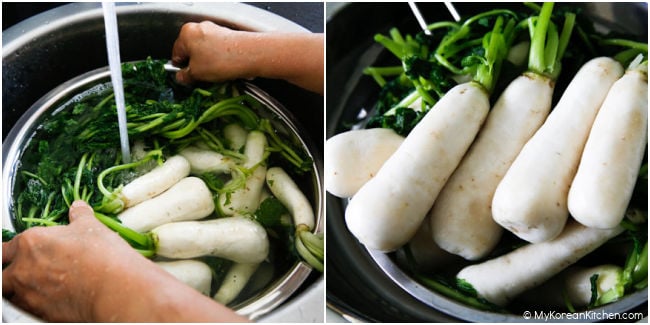
Prepare the radishes.
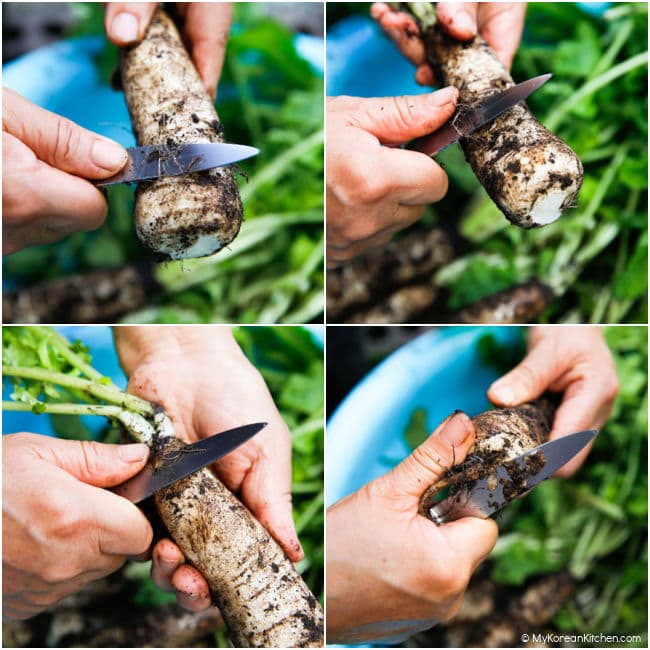
Trim away any thin, straggly roots, wilted leaves, and damaged stems. Gently scrape off any stubborn dirt around the radish roots and where the stems meet the radish, taking care not to remove too much of the skin. Wash thoroughly under running water to remove any remaining soil.
Prepare the brine and salt the radishes.
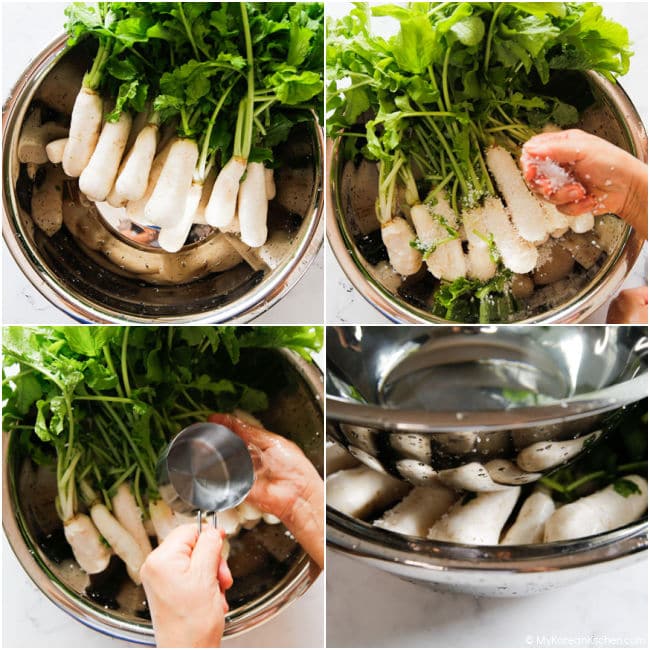
Place the radishes in a large container, with the leafy tops resting above the roots. Sprinkle the coarse salt over the radish roots, then add the warm water, Sprite or 7UP, and sugar. Gently stir to distribute the salt and sugar.
Place a clean bowl filled with water on top to weigh down the radish roots, keeping most of the leafy tops above the brine.
Let the roots salt for 1 to 1 1/2 hours, turning them after about 1 hour so they salt evenly. Then submerge the leafy tops for another 30 minutes. This gives the roots more time to soften without over-salting the delicate greens.
The total salting time should be about 1 1/2 to 2 hours, depending on the size and firmness of the radishes.
Rinse and drain.
Give the salted radishes a quick rinse under cold running water. Drain well in a colander for 20 to 30 minutes.
Make the sweet rice flour paste.
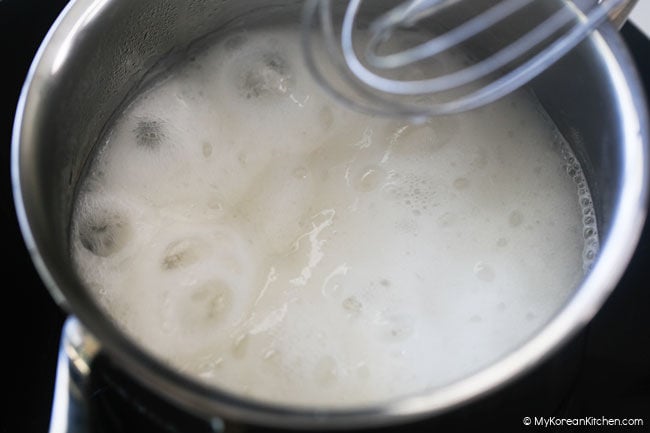
Combine the sweet rice flour and Korean soup stock in a small saucepan, whisking until smooth. Cook over medium heat, stirring continuously, until the mixture thickens into a smooth paste. Remove from the heat and let it cool completely.
Make the kimchi seasoning.
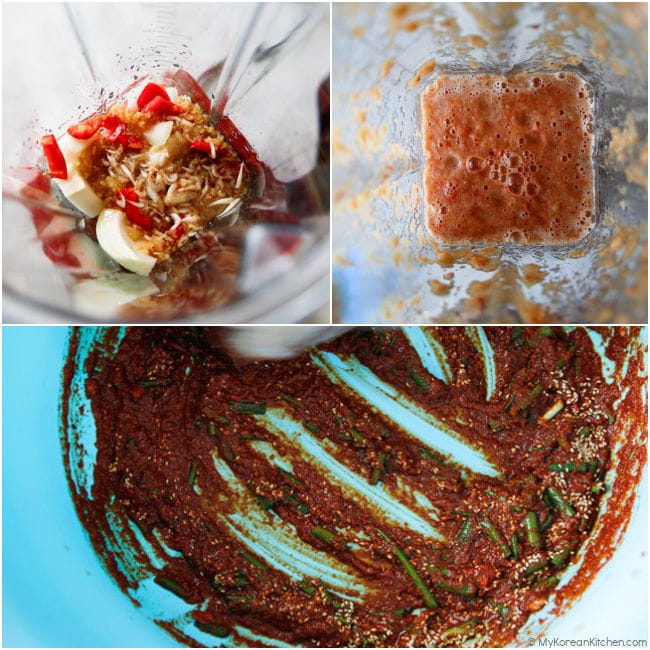
Add half of the fresh red peppers, garlic, apple, onion, maesil-cheong, paprika powder, gochugaru, saeujeot, saeujeot brine, anchovy fish sauce, and cooled sweet rice flour paste to a blender. Blend until fairly smooth.
Add the remaining red peppers and pulse briefly, leaving some small pieces for texture.
Transfer the mixture to a large mixing bowl. Add the green onions, sugar, fine sea salt, and ginger, and mix well to combine.
Cut the radishes.
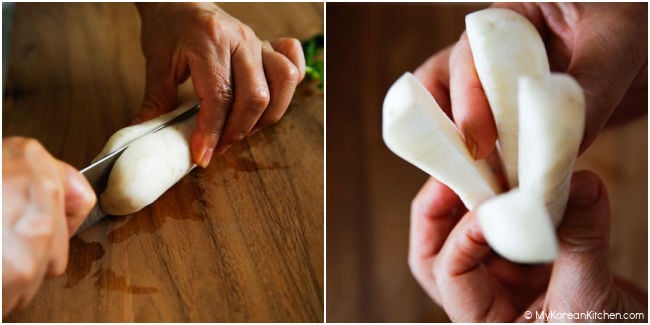
Cut the radish roots lengthwise into halves or quarters, depending on their size, to make them easier to eat. Leave smaller radishes whole if they’re already bite-sized.
Season the kimchi.
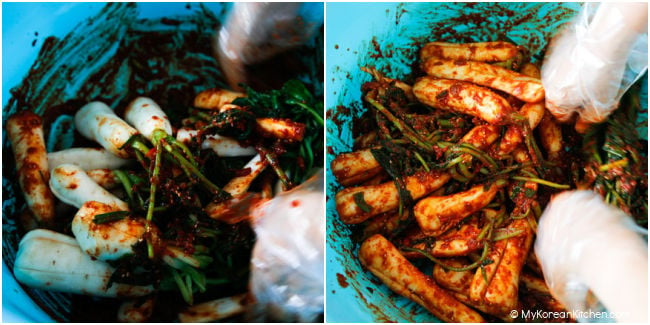
Add the drained radishes to the seasoning mixture. Gently toss until the radish roots and leafy tops are evenly coated.
Pack and ferment
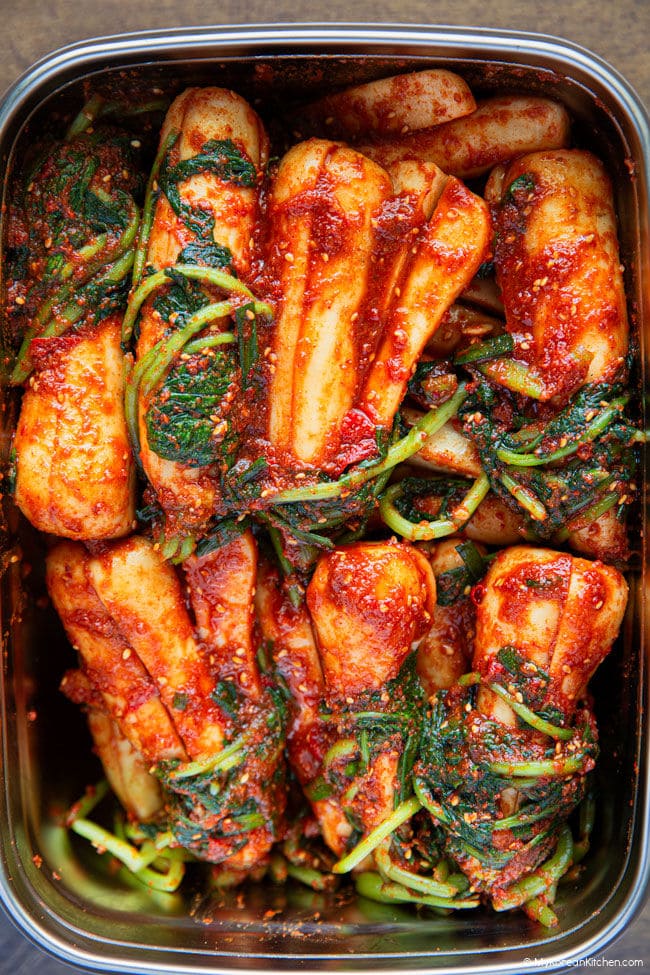
Pack the kimchi into a clean fermentation-safe container (we used a 4.8 L / 5.1 qt container), pressing it down gently as you go. Leave some space at the top to allow room for expansion during fermentation.
Leave it at room temperature for about 24 hours, then transfer it to the refrigerator to continue fermenting slowly. Enjoy when the kimchi reaches your preferred level of tanginess.
How to Ferment and Store
I personally prefer chonggak kimchi when it’s still fresh and crunchy, with just a little tanginess rather than a strong sour taste. To achieve this, I start the fermentation at room temperature before letting it continue slowly in the refrigerator.
For this batch, I left the kimchi at room temperature for 24 hours, with daytime temperatures around 22–24°C (72–75°F) and nighttime temperatures around 16–20°C (61–68°F). I then transferred it to the refrigerator for another 4–5 days before eating. By then, the kimchi was just right for my taste. My mom prefers a more developed, tangier flavor, so she likes it after about 13 days in the refrigerator.
If you want your kimchi to ferment faster, you can leave it at room temperature a little longer. I sometimes take out a small portion before refrigerating the main batch and leave it in a separate container at room temperature for another day. That way, I can enjoy some tangier kimchi sooner while keeping the rest fresher and crunchier for longer.
You can also use this trick later if your refrigerated kimchi is taking longer than you’d like to develop a tangy flavor. Just transfer a small portion to a separate, clean container and let it ferment at room temperature until it’s to your liking, then refrigerate it.
Fermentation speed depends on the temperature, so check the flavor as it develops, especially in warmer weather. You may not notice obvious signs of fermentation during the first 24 hours, and that’s normal.
More Korean Kimchi Recipes You Might Like
- Radish Kimchi (Kkakdugi) – Made with cubed Korean radish, this is another great choice if you enjoy the satisfying crunch of radish kimchi.
- Napa Cabbage Kimchi (Baechu Kimchi) – A classic Korean kimchi made with napa cabbage. It’s a good recipe to explore if you want to try another traditional fermented kimchi.
- Green Onion Kimchi (Pa Kimchi) – Made with whole green onions, this kimchi has a more pronounced onion flavor that develops as it ferments.
- Cucumber Kimchi (Oi Kimchi) – A quick and easy kimchi made with crunchy cucumbers tossed in a spicy, slightly sweet seasoning. It’s especially good in summer and pairs beautifully with steamed rice or Korean BBQ.
Ponytail Kimchi (Chonggak Kimchi)
Ingredients
Radish and Brine
- 3 kg chonggak radish (young ponytail radish), (6.6 lb)
- 3/4 cup coarse sea salt
- 2 1/2 cups warm water
- 1 cup Sprite or 7UP, or Korean Chilsung Cider
- 1/2 cup granulated sugar
Seasoning
- 100 g red sweet pointed peppers (or mildly hot Korean red chili peppers for a regular-heat version), (3.5 oz), roughly chopped
- 35 g garlic cloves , peeled, (1.2 oz), or about 2 Tbsp minced garlic
- 120 g red apple , cored and roughly chopped, (4.2 oz)
- 100 g onion , roughly chopped (3.5 oz)
- 1/3 cup maesil-cheong Korean plum syrup
- 1/2 cup paprika powder (unsmoked)
- 1/2 Tbsp gochugaru (Korean red pepper flakes)
- 1 Tbsp saeujeot (salted fermented shrimp)
- 1/2 Tbsp saeujeot (salted fermented shrimp), brine only
- 1/3 cup Korean soup stock
Sweet Rice Flour Paste
- 2 Tbsp sweet rice flour (glutinous rice flour)
- 1 cup Korean soup stock
Final Seasoning
- 60 g green onion , cut into short lengths, (2.1 oz)
- 2 Tbsp granulated sugar
- 2 tsp fine sea salt
- 1/2 tsp minced ginger
Instructions
- Prepare the radishes. Trim away any thin, straggly roots, wilted leaves, and damaged stems. Gently scrape off any stubborn dirt around the radish roots and where the stems meet the radish, taking care not to remove too much of the skin. Wash thoroughly under running water to remove any remaining soil.
- Prepare the brine and salt the radishes. Place the radishes in a large container, with the leafy tops resting above the roots. Sprinkle the coarse salt over the radish roots, then add the warm water, Sprite or 7UP, and sugar. Gently stir to distribute the salt and sugar.Place a clean bowl filled with water on top to weigh down the radish roots, keeping most of the leafy tops above the brine.Let the roots salt for 1 to 1 1/2 hours, turning them after about 1 hour so they salt evenly. Then submerge the leafy tops for another 30 minutes. This gives the roots more time to soften without over-salting the delicate greens.The total salting time should be about 1 1/2 to 2 hours, depending on the size and firmness of the radishes.
- Rinse and drain. Give the salted radishes a quick rinse under cold running water. Drain well in a colander for 20 to 30 minutes.
- Make the sweet rice flour paste. Combine the sweet rice flour and Korean soup stock in a small saucepan, whisking until smooth. Cook over medium heat, stirring continuously, until the mixture thickens into a smooth paste. Remove from the heat and let it cool completely.
- Make the kimchi seasoning. Add half of the fresh red peppers, garlic, apple, onion, maesil-cheong, paprika powder, gochugaru, saeujeot, saeujeot brine, anchovy fish sauce, and cooled sweet rice flour paste to a blender. Blend until fairly smooth.Add the remaining red peppers and pulse briefly, leaving some small pieces for texture.Transfer the mixture to a large mixing bowl. Add the green onions, sugar, fine sea salt, and ginger, and mix well to combine.
- Cut the radishes. Cut the radish roots lengthwise into halves or quarters, depending on their size, to make them easier to eat. Leave smaller radishes whole if they’re already bite-sized.
- Season the kimchi. Add the drained radishes to the seasoning mixture. Gently toss until the radish roots and leafy tops are evenly coated.
- Pack and ferment. Pack the kimchi into a clean fermentation-safe container (we used a 4.8 L / 5.1 qt container), pressing it down gently as you go. Leave some space at the top to allow room for expansion during fermentation.Leave it at room temperature for about 24 hours, then transfer it to the refrigerator to continue fermenting slowly. Enjoy when the kimchi reaches your preferred level of tanginess.
Notes
The nutrition information shown is an estimate provided by an online nutrition calculator. It should not be considered a substitute for a professional nutritionist’s advice.
Save This Recipe For Later
You can unsubscribe at any time