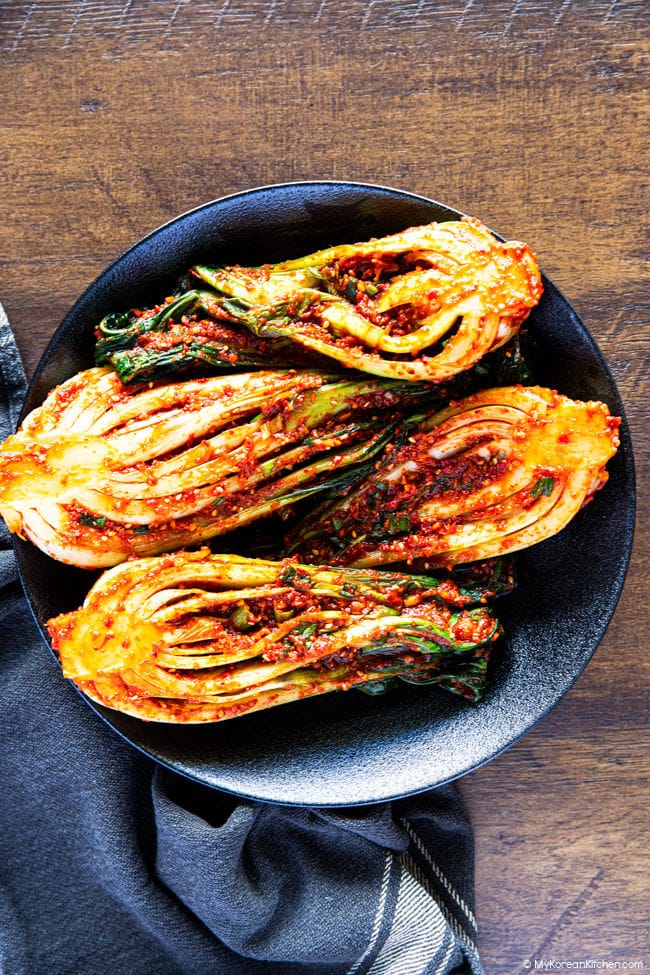
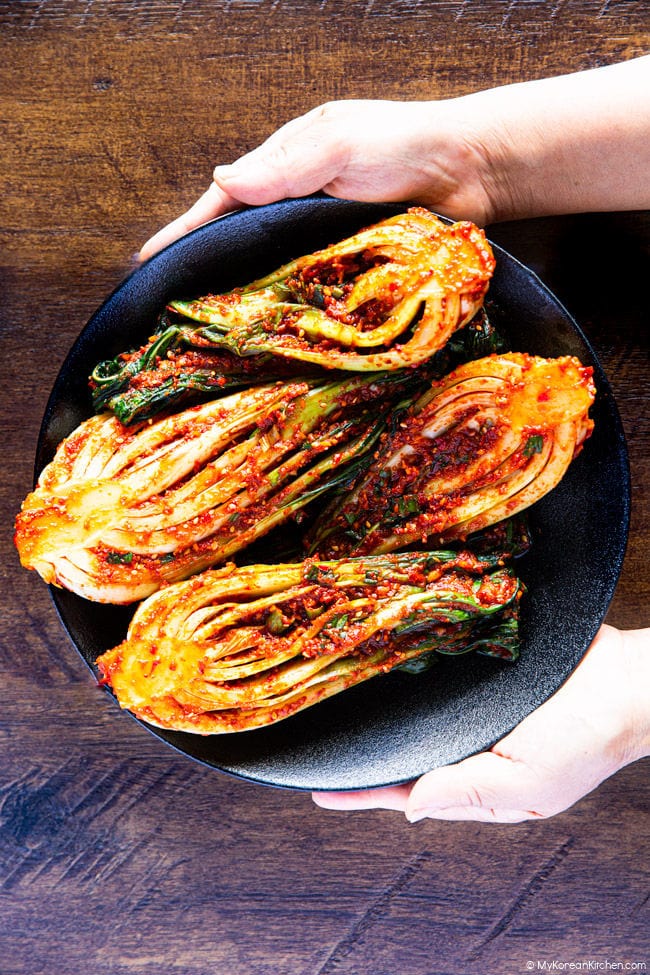
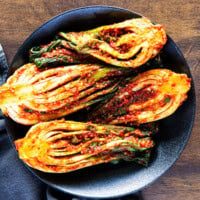
Bok choy kimchi isn’t a substitute for napa cabbage kimchi – it’s a different style of kimchi altogether. We often make it when our garden is producing plenty of bok choy and we need a delicious way to use the harvest.
Bok choy has a fresh, green flavor that’s quite different from napa cabbage. The juicy stems have a clean, crisp bite that reminds me a little of celery, giving this kimchi a character that’s uniquely its own.
Save This Recipe For Later
You can unsubscribe at any time
Why You’ll Love This Recipe
- A delicious way to use up bok choy. Whether you’re harvesting it from your garden or have an extra bunch in the fridge, this recipe transforms bok choy into a flavorful homemade kimchi.
- Simple to make. The kimchi paste comes together with a handful of Korean pantry staples, and the bok choy requires minimal preparation, making this an approachable recipe for home cooks.
- Delicious at every stage. Enjoy it freshly made for its bright, fresh character, or let it ferment for a few days to develop a deeper, tangier flavor.
- Easy to adjust the heat. Through repeated testing, my mom and I found a way to make this kimchi much milder without sacrificing its vibrant colour or fresh flavour. If you’re sensitive to spice, you can replace part of the gochugaru with paprika while still achieving a beautifully colored kimchi.
Ingredients
Bok choy
- 1 kg (2.2.lb) bok choy
Brine
- 1/2 cup Korean coarse salt (or rock salt)
- 5 cups lukewarm water
Seasoning
- 120 g (4.2 oz) red apple, roughly chopped
- 6 medium garlic cloves (or 2 Tbsp jarred minced garlic)
- 5 g (0.2 oz) fresh ginger, peeled (or 1 tsp jarred minced ginger)
- 1 Tbsp salted shrimp
- 3 Tbsp Korean fish sauce
- 1 Tbsp Korean plum syrup
- 110 g (3.9 oz) red sweet pointed pepper, thinly sliced, divided (optional)
- 5 – 6 Tbsp Korean chili flakes (gochugaru)*
- 2 Tbsp granulated sugar
- 2 Tbsp roasted sesame seeds
- 100 g (3.5 oz) onion, julienned
- 75 g (2.6 oz) carrot, julienned
- 40 g (1.4 oz) green onion, chopped
Flour paste
- 1 Tbsp plain flour
- 2 Tbsp water
* For a milder kimchi, use 2 Tbsp Korean chili flakes (gochugaru) plus 3–4 Tbsp paprika powder (not smoked) instead.
** For more information about the Korean ingredients used in this recipe, see my guide to Essential Korean Ingredients.
*** 1 Tbsp = 15 ml, 1 Cup = 250 ml
How to Make Bok Choy Kimchi
Prepare the bok choy
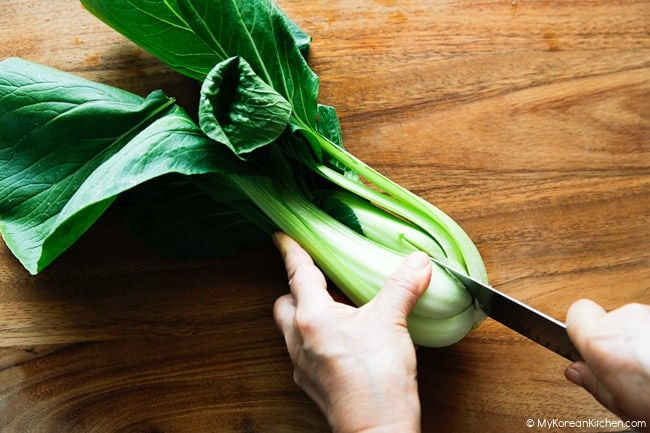
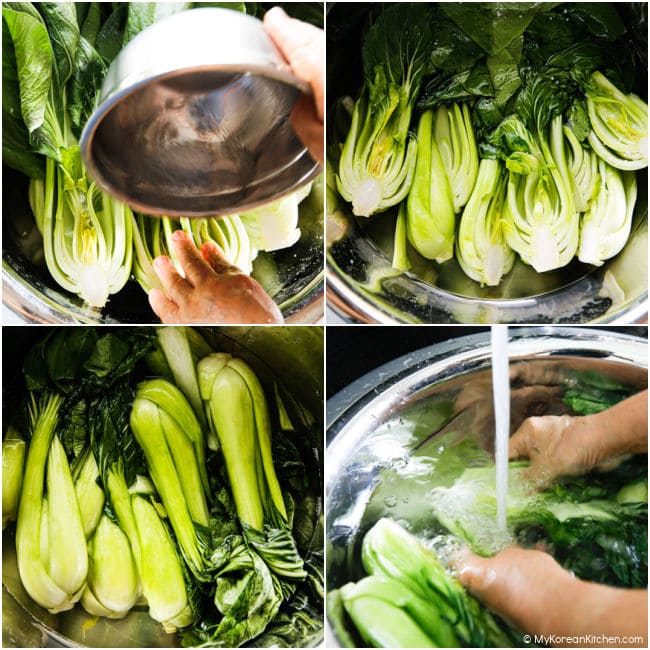
Trim a thin slice off the root end of each bok choy, leaving enough to keep the leaves attached. Halve each bok choy lengthwise. Rinse thoroughly under cold running water, paying particular attention to the base, where dirt tends to collect between the leaves. Drain well in a colander.
Brine the bok choy
In a large bowl, dissolve the coarse salt in the water. Add the bok choy and soak in the brine.
The brining time will vary depending on the size of the bok choy and the thickness of the stems. If the stems are thick and firm, brine for about 90 minutes so the salt penetrates evenly. If the stems are thinner, 60 minutes is usually sufficient. Turn the bok choy 2 to 3 times during brining for even brining.
Once brined, rinse the bok choy lightly under running water once, then drain well.
Make the seasoning paste
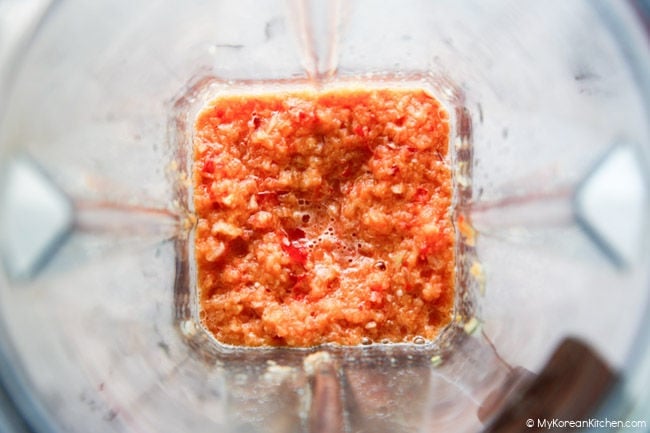
Add the apple, garlic, ginger, salted shrimp, fish sauce, plum syrup, and half of the red sweet pointed pepper (if using) to a blender. Pulse until combined. Add the remaining red sweet pointed pepper (if using) and pulse once or twice more, leaving small pieces of pepper throughout the seasoning.
Make the flour paste
In a small microwave-safe bowl, combine the flour and water until smooth. Microwave for about 15 seconds, then stir. If it has thickened to the consistency of a thin porridge, it’s ready to use. If it is still runny, microwave in 5 to 10 second intervals, stirring after each, until thickened.
Mix the kimchi
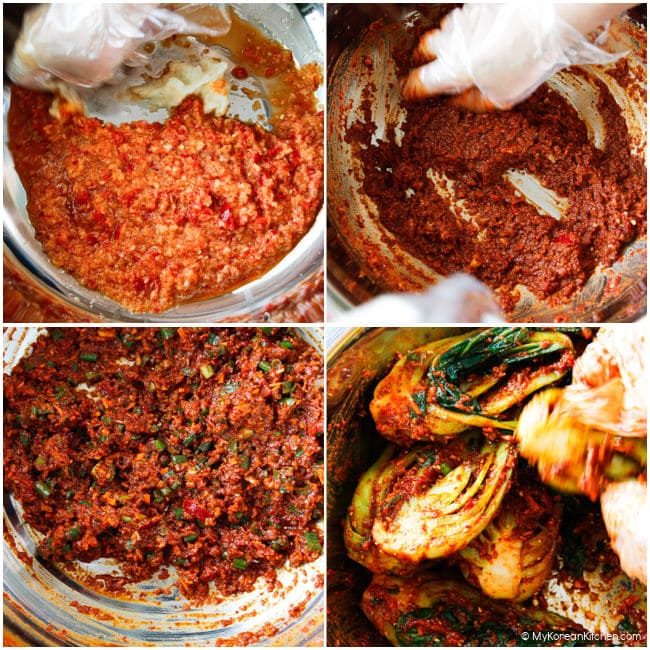
Transfer the blended seasoning to a large bowl. Add the Korean chili flakes, sugar, and sesame seeds. If making the milder version, use 2 Tbsp Korean chili flakes and 3–4 Tbsp paprika powder instead. Add the flour paste and stir until well combined. Add the onion, carrot, green onion, and the remaining red sweet pointed pepper (if using), then mix until evenly combined.
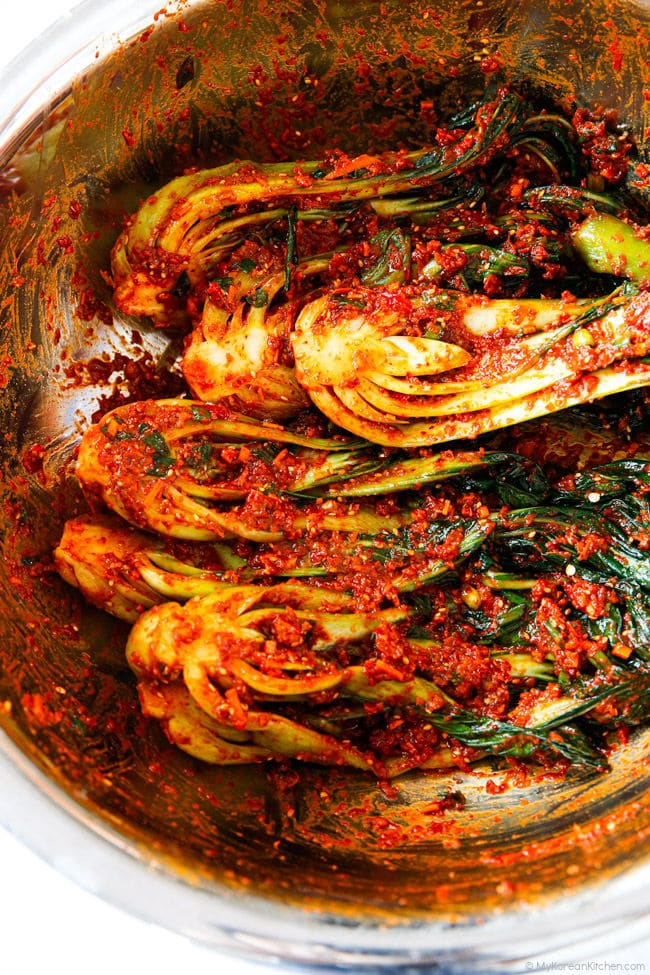
Add the bok choy and gently toss until each piece is evenly coated with the seasoning. The leaves are delicate, so avoid squeezing or handling them roughly.
Enjoy fresh or ferment
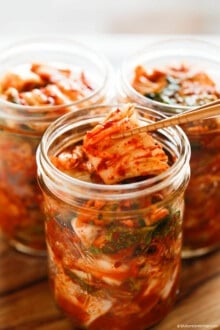
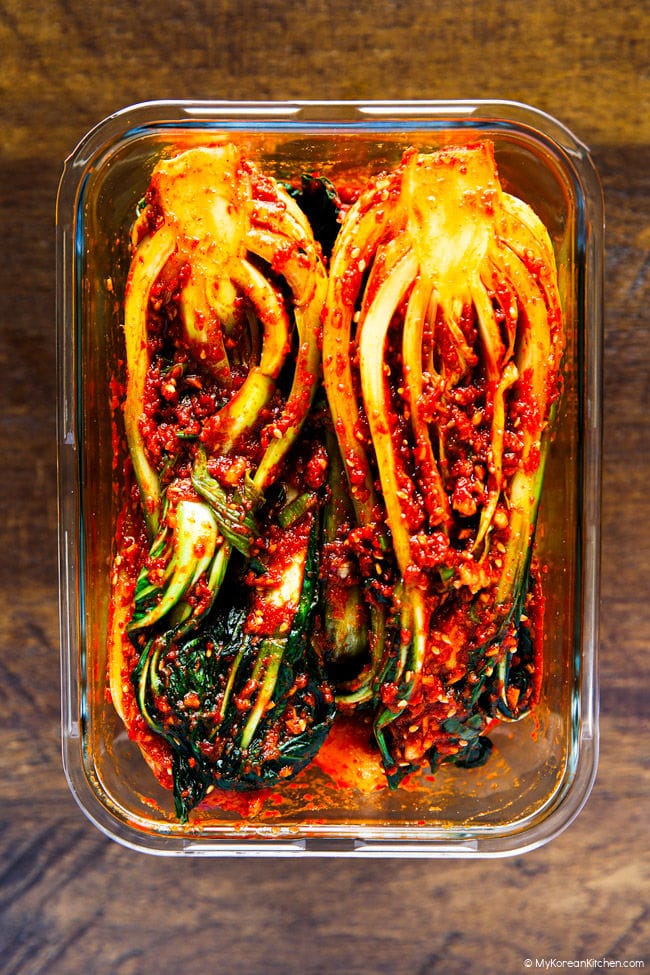
You can serve the kimchi straight after making it if you prefer a fresh, crisp flavor. For a more rounded flavor, transfer it to an airtight container and leave it at room temperature until fermentation begins (about 24 hours in my kitchen), then refrigerate. It will continue to develop a deeper, tangier flavor over the next few days while retaining much of its crisp texture. When ready to serve, cut the bok choy into bite-sized pieces with kitchen scissors or a knife, as the leaves remain attached at the base.
Recipe Notes
Gochugaru and paprika
I originally developed this recipe using paprika powder to create a mild, non-spicy kimchi. While the flavor was good, I found the finished kimchi didn’t develop the vibrant red color that Korean chili flakes (gochugaru) provide. As my mom and I continued testing, we found that using 5 to 6 Tbsp gochugaru produced a richer red color and a more traditional kimchi flavor.
If you prefer a milder kimchi, use 2 Tbsp gochugaru plus 3 to 4 Tbsp paprika powder instead. This combination reduces the heat while still giving the kimchi a beautiful red color.
Red sweet pointed pepper (optional)
My mom likes adding red sweet pointed pepper when making the paprika version of this kimchi. Because paprika powder is much finer than gochugaru, we found that the pepper gives the seasoning a little more texture, helping it coat the bok choy more evenly without adding extra heat.
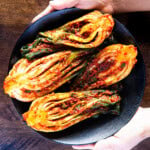
Some of the seasoning may collect in the natural grooves at the base of the bok choy. This is perfectly normal. As the kimchi rests, the flavors become more evenly distributed.
Storage and serving
Bok choy kimchi is best enjoyed within 3 to 5 days of making, when its crisp texture and fresh flavor are at their best. Compared with napa cabbage kimchi, it is typically enjoyed while still relatively young, as the leaves soften more quickly during fermentation. Over time, the leaves lose their bright green color and the seasoning becomes less vibrant.
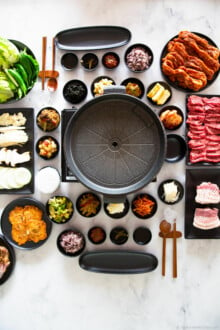
This kimchi pairs especially well with grilled pork belly (samgyeopsal) and bossam. It’s also a delicious alternative to regular kimchi when you’re in the mood for something different.
Other Kimchi Recipes You Might like
Kimchi comes in many varieties, each with its own flavor and texture. If you’re keen to try more, these are some of my favorite recipes.
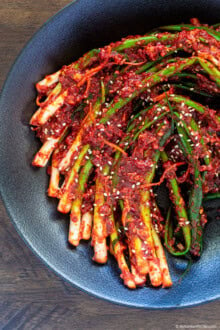
- Pa Kimchi (Green Onion Kimchi)
Pa kimchi is made with tender green onions coated in a bold, savory, spicy seasoning. It’s especially delicious alongside Korean BBQ, where its rich umami flavor helps balance the richness of grilled meats. - Cucumber Kimchi (Oi Kimchi)
This quick cucumber kimchi is crunchy, light, and full of fresh flavor. Easier to make than stuffed cucumber kimchi (oi sobagi), it’s a refreshing summer side dish that’s perfect alongside Korean BBQ or a simple bowl of steamed rice. - Radish Kimchi (Kkakdugi)
Made with crunchy Korean radish, kkakdugi has a satisfying bite and a subtle natural sweetness. It’s especially delicious served alongside hearty Korean soups, such as seolleongtang, galbitang, and kalguksu. - White Kimchi (Baek Kimchi)
White kimchi is a mild, non-spicy variety made without Korean chili flakes (gochugaru). Naturally refreshing and lightly fruity, it’s a great choice if you prefer a gentler introduction to kimchi.
Bok Choy Kimchi
Ingredients
Bok choy
- 1 kg bok choy (2.2.lb)
Brine
- 1/2 cup Korean coarse salt (or rock salt)
- 5 cups lukewarm water
Seasoning
- 120 g red apple (4.2 oz), roughly chopped
- 6 medium garlic cloves (or 2 Tbsp jarred minced garlic)
- 5 g fresh ginger (0.2 oz), peeled (or 1 tsp jarred minced ginger)
- 1 Tbsp salted shrimp
- 3 Tbsp Korean fish sauce
- 1 Tbsp Korean plum syrup
- 110 g red sweet pointed pepper (3.9 oz), thinly sliced, divided (optional)
- 5 - 6 Tbsp Korean chili flakes (gochugaru)
- 2 Tbsp granulated sugar
- 2 Tbsp roasted sesame seeds
- 100 g onion (3.5 oz), julienned
- 75 g carrot (2.6 oz), julienned
- 40 g green onion (1.4 oz), chopped
Flour paste
- 1 Tbsp plain flour
- 2 Tbsp water
Instructions
- Prepare the bok choy. Trim a thin slice off the root end of each bok choy, leaving enough to keep the leaves attached. Halve each bok choy lengthwise. Rinse thoroughly under cold running water, paying particular attention to the base, where dirt tends to collect between the leaves. Drain well in a colander.
- Brine the bok choy. In a large bowl, dissolve the coarse salt in the water. Add the bok choy and soak in the brine.The brining time will vary depending on the size of the bok choy and the thickness of the stems. If the stems are thick and firm, brine for about 90 minutes so the salt penetrates evenly. If the stems are thinner, 60 minutes is usually sufficient. Turn the bok choy 2 to 3 times during brining for even brining.Once brined, rinse the bok choy lightly under running water once, then drain well.
- Make the seasoning paste. Add the apple, garlic, ginger, salted shrimp, fish sauce, plum syrup, and half of the red sweet pointed pepper (if using) to a blender. Pulse until combined.Add the remaining red sweet pointed pepper (if using) and pulse once or twice more, leaving small pieces of pepper throughout the seasoning.
- Make the flour paste. In a small microwave-safe bowl, combine the flour and water until smooth. Microwave for about 15 seconds, then stir. If it has thickened to the consistency of a thin porridge, it’s ready to use. If it is still runny, microwave in 5 to 10 second intervals, stirring after each, until thickened.
- Mix the kimchi. Transfer the blended seasoning to a large bowl. Add the Korean chili flakes, sugar, and sesame seeds. If making the milder version, use 2 Tbsp Korean chili flakes and 3–4 Tbsp paprika powder instead. Add the flour paste and stir until well combined. Add the onion, carrot, green onion, and the remaining red sweet pointed pepper (if using), then mix until evenly combined.Add the bok choy and gently toss until each piece is evenly coated with the seasoning. The leaves are delicate, so avoid squeezing or handling them roughly.
- Enjoy fresh or ferment. You can serve the kimchi straight after making it if you prefer a fresh, crisp flavor. For a more rounded flavor, transfer it to an airtight container and leave it at room temperature until fermentation begins (about 24 hours in my kitchen), then refrigerate. It will continue to develop a deeper, tangier flavor over the next few days while retaining much of its crisp texture. When ready to serve, cut the bok choy into bite-sized pieces with kitchen scissors or a knife, as the leaves remain attached at the base.
Notes
- For a milder kimchi, use 2 Tbsp Korean chili flakes (gochugaru) plus 3–4 Tbsp paprika powder instead.
- 1 Tbsp = 15 ml, 1 Cup = 250 ml
For the best color and flavor, I recommend using 5 to 6 Tbsp gochugaru. If you prefer a milder kimchi, use 2 Tbsp gochugaru plus 3 to 4 Tbsp paprika powder (not smoked) instead. This creates a much milder kimchi while still giving it a beautiful red color, although the flavor won't be quite as rich as one made with gochugaru. Red sweet pointed pepper (optional)
If you're making the paprika version, adding thinly sliced red sweet pointed pepper gives the seasoning a little more texture and helps it cling to the bok choy without adding extra heat. Seasoning at the base
Some of the seasoning may collect in the natural grooves at the base of the bok choy. This is completely normal and will become more evenly distributed as the kimchi rests. Storage and serving
Store the kimchi in a 1.8 L (about 2-quart) airtight container in the refrigerator. This size leaves just enough headspace for fermentation. For the best flavor and texture, enjoy it within 3 to 5 days. As it continues to ferment, the leaves soften and the color becomes more muted, but it can still be enjoyed like regular kimchi. Serve it with samgyeopsal (grilled pork belly), bossam, or alongside your favorite Korean meals.
Nutrition Info (per serving)
The nutrition information shown is an estimate provided by an online nutrition calculator. It should not be considered a substitute for a professional nutritionist’s advice.
Save This Recipe For Later
You can unsubscribe at any time